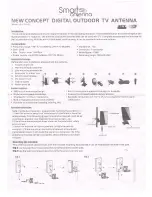
background image


 INSTALLATION 


1.  Before installing the system, make sure that the place is dry and clean, on which the 

antenna will be mounted. 

 
2.  It  is  important  that  the  closing  direction  of  the  antenna  should  be  towards  back  of 

the vehicle. In this position, the wind effect is at the minimum level during the driving 
of the vehicle when the antenna is closed. 


3.  Depending on the requirements; two different motor unit installation method can be 

used.  

a.  Fixing with bold; align the dish holes with rivets on the mounting bracket 

and place the dish onto the mounting bracket. Screw forepart of the dish to 
mounting bracket with M6x10 screws. Use silicon to isolate the tighten 
screws. 

b.  Fixing with bonding: Lead up the mounting surface and motor unit base 

plate according the adhesive. Fix the motor unit by bonding it to the 
mounting surface.  


4.  Stick the foam band 40cm far away from the rear-middle axis of the antenna, after 

thoroughly cleaning the mounting area of the base plate. 

 
5.  Get the antenna and motor cables


into the vehicle properly. This process should be 

done suitably for interior structure of the vehicle. 

 
6.  Position  the  Controlbox  close  to  TV  at  the  inside  of  the  vehicle.  Antenna  cable  is 

connected between the antenna input of the Controlbox and the junction box. 

 
7.  Connect the TV to the satellite receiver with RCA cable. The ground connection of 

the  RCA  cable  should  be  good;  otherwise  some  noise  may  occur  on  audio  and 
video signal. If required, connecting the satellite receiver to the vehicle ground with 
a short cable. 

8.  Connect 12-24 V DC supply voltage to the input of the Controlbox by a thermal fuse 

and connect the “CONTACT” input to the supply that comes from the contact of the 
vehicle. 


Summary of Contents for MTA 65 Series

Page 1: ...MTA 50 MTA 65 Serie MTA 80 Serie INSTALLATION MANUEL ...

Page 2: ...1 ...

Page 3: ...LE OF CONTENTS Page GENERAL 3 IMPORTANT SAFETY INSTRUCTIONS 3 PACKING LIST 4 USAGE 4 EXEMPTIONS 5 CABLE ENTRY PLATE CONNECTIONS 5 INSTALLATION MANUAL 6 THE CASES THAT SHOULD BE CONSIDERED 6 INSTALLATION 7 ...

Page 4: ...y cause damage to the vehicle as well as it will be dangerous for life safety The system shuts down itself and closes the antenna automatically when the vehicle is operated but checking on whether the antenna is closed or not before moving is important for a safe journey The Controlbox is designed for installing into the dashboard of the vehicle If dashboard installation is not possible while dete...

Page 5: ... the satellite is found the signal will be available on the receiver which is connected to the loop out port of Controlbox and the channels on the receiver can be watched Turn off the system To turn off the system press button on the front panel of the Controlbox if the antenna is open it starts to close automatically The system goes on operating until the antenna is closed The system turns off af...

Page 6: ...uct and other connected equipment CABLE ENTRY PLATE CONNECTIONS 1 Connect the antenna cable No 1 from LNB and the antenna cable No 2 from Controlbox antenna input to each other by using F connectors 2 Connect motor cable female connector with 8 taps on the rear panel of the Controlbox and the junction box to the each other with the power cable YSLY J 8x0 5mm 3 Connect motor control cable No 3 from...

Page 7: ...stallation place of the antenna Installation place should be smooth and plain surface and on the centerline according to the vehicle width While doing installation at rough surfaces the bottoms of the installation holes should be supported Otherwise the bottom plate may bend Such a case may cause some technical problems Make sure that the installation base is a rigid surface and it never stretches...

Page 8: ...cording the adhesive Fix the motor unit by bonding it to the mounting surface 4 Stick the foam band 40cm far away from the rear middle axis of the antenna after thoroughly cleaning the mounting area of the base plate 5 Get the antenna and motor cables into the vehicle properly This process should be done suitably for interior structure of the vehicle 6 Position the Controlbox close to TV at the in...

Page 9: ......

Page 10: ...9 ...

Page 11: ......

Page 12: ......

Page 13: ...90 Elevation moving speed 10 second Operating voltage 12 24V DC Operating power consumption 30W Dimensions in closed position 82cm x 104cm x 21cm width x length x height Packed dimensions 83cm x 105cm x 23cm width x length x height Weight 15 kg Packed weight 18 kg Storage temperature 30 C 70 C Operating temperature 15 C 50 C Operating relative humidity range 0 98 The manufacturer reserves the righ...

Reviews: