8
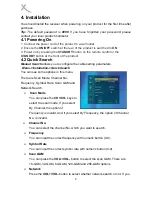
4. Installation
You should install the receiver when powering on your product for the first time after
purchase.
Tip: The default password is 0000. If you have forgotten your password, please
contact your local product distributor.
4.1 Powering On
1. Connect the power cord of the product to a wall outlet.
2. Ensure the
ON/OFF
switch at the rear of the product is switched to
ON
.
3. Power on by pressing the
STANDBY
button on the remote control or the
STANDBY
button at the front of the product.
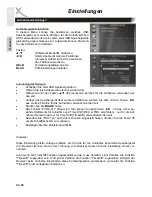
4.2 Quick Search
Manual Search
allows you to configure the cable setting parameters.
Menu->Installation->Quick Search
You can see some options in this menu.
There are Scan Mode, Channel No.,
Frequency, Symbol Rate, Scan QAM and
Network Search.
¾
Scan Mode
You can press the
CH+/CH-
keys to
select the scan mode. If you select
By Channel
, the option of
Frequency is invalid. And if you select
By Frequency
, the option of Channel
No. is invalid.
¾
Channel No.
You can select the channel No. which you want to search.
¾
Frequency
You can input the correct frequency with numeric button (0-9).
¾
Symbol Rate
You can input the correct symbol rate with numeric button (0-9).
¾
Scan QAM
You can press the
VOL+/VOL-
button to select the scan QAM. There are
16-QAM, 32-QAM, 64-QAM, 128-QAM and 256-QAM options.
¾
Network
Press the
VOL+/VOL-
button to select whether network search or not. If you
Summary of Contents for HRK 9200 CI+
Page 1: ...Bedienungsanleitung DE User s Manual ENG HRK 9200 CI...
Page 2: ......
Page 44: ...User s Manual ENG HRK 9200 CI...

