background image

02

19

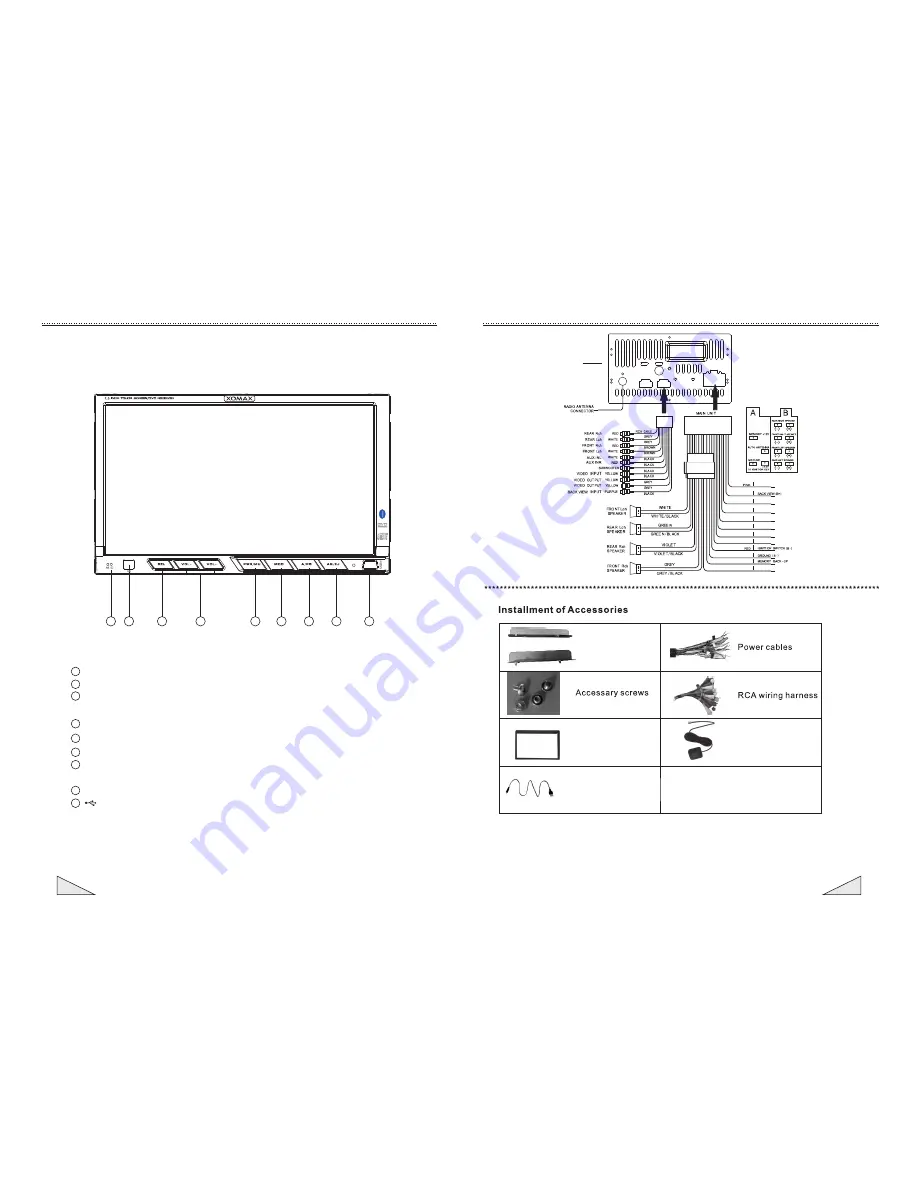
Instruction for the operation of front control panel 

1. Description of the functional buttons 

MIC: Microphone 

Remote control window 

PWR/MU (POWER/MUTE): power on-off (press it for short time to power on and 

press it for long time to power off)/ mute on-off  (short press)  

MODE:mode


switch


button short press Quick access to navigation mode long press

SEL:selection


button

(

short


press

)/

Screen


protection


switch

(

long


press

)

VOL+/-: volume increasing/decreasing button 

A/ PS: for viewing the saved broadcasting station/searching and saving broadcasting 

automatically

AG/ EJ (ANGLE/ EJECT): screen angle adjustment/ disc eject button

      : USB interface

(


)/


(


)

Note: 
Actual symbols on control panel may subject to change without prior notice, above figure is 
only for reference.

1

2

3

4

5

6

7

8

9

1

2

3

4

7

8

9

5

6

XM-2DTSBN706

Outer trim ring

Metal stents

Instruction for wiring and accessories

USB Conversion cable

GPS Antenna

GPS ANTENNA

BLUE/BLACK

AMP  CONTROL

ILLAMNINATION  CONTROL

BROWN

BROWN/BLACK

STEERING WHEEL CONTROL1

STEERING WHEEL CONTROL2

YELLOW

BLACK

ORANGE/BLACK

BRAKE

BLUE/WHITE

MUTE

ORANGE

A

A

B

C

D

F

F


(

(

(

(

(

(

(

(

(

(

(

(

(

(

(

(

(

(

(

(

B

STEERING WHEEL CONTROL(-)

BLACK

BLUE

POWER  ANTENNA

Summary of Contents for XM-2DTSBN706

Page 1: ...INSTRUCTION MANUAL XM 2DTSBN706 ...

Page 2: ......

Page 3: ... operation of DVD VCD CD Instruction for the operation of SD USB AUX 13 Instruction for the operation of Bluetooth Product specification 20 14 Introduction for the function of controller 16 Instruction for the GPS operation Instruction for wiring and accessories 19 Unit Installation 18 Product specification 55 15A 20 60 20 70 Radio Embedded 55dB 4 channel 1 channel 2 channel 1 channel 178 d X175 w...

Page 4: ...iewing the saved broadcasting station searching and saving broadcasting automatically AG EJ ANGLE EJECT screen angle adjustment disc eject button USB interface Note Actual symbols on control panel may subject to change without prior notice above figure is only for reference 1 2 3 4 5 6 7 8 9 1 2 3 4 7 8 9 5 6 XM 2DTSBN706 Outer trim ring Metal stents Instruction for wiring and accessories USB Conv...

Page 5: ... SD card slot is for the insertion of GPS map card The left SD card slot is for the insertion of multimedia playing card The left SD card slot for multimedia the right SD card slot for GPS Unit Installation Installation Instructions 1 First remove the original unit 2 Disassemble remove the bracket and screw save 3 The cable connected 4 Finally Into the location of the unit and then use the origina...

Page 6: ...on selection song selection button press this button to conduct the control of manual search adjustment FF FR and song selection Multiple function selection button press this button repeatedly to set the adjustment and the control of VOL volume TRE high pitch BAS low pitch BAL left and right balance FAD front and rear balance 15 16 17 Numeral button press this button to select the needed repertoir...

Page 7: ...is menu can set the color of backlight for the front panel through this menu can setting such as orange blue red green cyclic or customization etc MUTE Mute switching BAND Cyclic switch of AM FM band PTY Program type selection APS SEL Audio and video setting TA Traffic announcement switching AF Automatic scanning long press browse radio short press Frequency replacement table switching Introductio...

Page 8: ...menu upper right set as Destination set end point Set the end point to completed there will be a mosaic flag in the case of satellite navigation can be had If you want to simulate navigation on another point in the lower right corner of the interface More Options in the Set as Start set the starting point starting point there will be blue flags then gps automatic planning the paths between the sta...

Page 9: ...etc 4 6 Radio setting Radio setting mainly sets the radio region and selects different regional standards in different regions Instruction for the operation of touch screen 10 3 GPS map interface 10 2 3 If the original path has been set not canceled but much be set a new starting point first DeleteRoute see above section 2 by deleting the newly planned path and then the above steps to re set a new...

Page 10: ...ace Select the option of Under this option appears in the following interface 4 7 3 The steering wheel controller input to the will be setting s button Click the button to be set The steering wheel interface will be display the key settings As shown below 4 7 Setting for steering wheel Instruction for the operation of touch screen Music play interface Dial and communication interface Talk record i...

Page 11: ... s function then repeat the above steps re set the desired function value 4 7 6 The steering wheel controller wiring diagram Instruction for the operation of touch screen Description of the button function Audio setting Volume adjustment TRE adjustment Left and right balance Video setting Brightness adjustment Saturation adjustment Tone adjustment BASS adjustment Front and rear balance Contrast ad...

Page 12: ...tion of touch screen 5 Operation for the DVD VCD CD Put the disc in to the system and enter the main menu Click the DVD button to enter DVD playing interface for playing If the playing ends or the disc needs to be taken out please press the slot out button to take out the disc Description of the button function Fast forward 10 11 Instruction for the operation of touch screen 4 8 Adjust the touch s...

Reviews: