background image

MAINTENTANCE


&


CLEAN

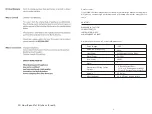
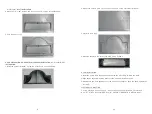
1.Disengage


the


grease


pan


from


the


hood


body

.

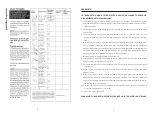
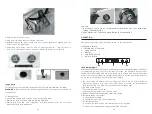
2.Disengage


the


small


grease


guard


cups


from


the


grease


guard


by


turning


counterclockwise


and


remove

.

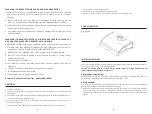
3.Remove


the


screw


retaining


the


grease


guard


to


the


hood

.

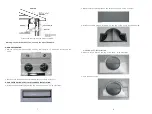
4.Remove


the


grease


guard


from


the


hood

Then


remove


the


bottom


plate

.

5.Unscrew


the


clips


and


remove


the


wheel


grease


collector

.

6.Remove


the


wheel


center


cap

.

7.Loosen


the


wheel


set


screw


in


order


to


disengage


the


wheel


from


its


motor


shaft.

Let


soak


for


30


minutes


all


removed


parts


in


warm


water


with


soft


soap

Then


wash


with


nylon


brush

rinse


and


dry


completely


before


reinstalling

.

4

7

HOOD CLEANING

Stainless  steel  is  one  of  the  easiest  materials  to  keep  clean.  Occasional  care  will  help 

preser ve its fine appearance.

Cleaning tips:

* Hot water with soap or detergent is all that is usually needed.

* Follow all cleaning by rinsing with clear water. Wipe dr y with a clean, soft cloth to avoid 

water marks.

* For discolorations or deposits that persist, use a non-scratching household cleanser or 

stainless steel polishing powder with a little water and a soft cloth.

*  For  stubborn  cases  use  a  plastic  scouring  pad  or  soft  bristle  brush  together  with 

cleanser  and  water.  Rub  lightly  in  direction  of  polishing  lines  or  “grain”  of  the  stainless 

finish. Avoid using too much pressure that may mar the surface.

* Do not allow deposits to remain for long periods of time.

* Do not use ordinar y steel  wool  or steel  brushes. Small  bits  of steel  may adhere to the 

surface causing rust.

* Do not allow salt solutions, disinfectants, bleaches, or cleaning compounds to remain 

in  contact  with  stainless  steel  for  extended  periods.  Many  of  these  compounds  contain 

chemicals that may be harmful. Rinse with water after exposure and wipe dr y with a clean 

cloth.

* Painted surfaces should be cleaned with warm water and mild detergent only.

REPLACEMENT PARTS

Light Bulb: Model: XOPXOAB (Type JCD, 12V, 20W Max, G-4 Base)

Replacement Grease Guard: Model: XOPXOAG

13

14

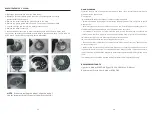
NOTE

 : When reinstalling the wheel, align the end of 

the set screw with the flat part of the motor shaft (A).

Summary of Contents for XOA30

Page 1: ...READ AND SAVE THE INSTRUCTIONS FOR RESIDENTIAL COOKING ONLY Register your product online at www xoventilation com NEED HELP Call our ventilation experts at 800 966 8300 XOA30 XOA36 ...

Page 2: ...ION USE MAINTENANCE CLEAN Product S pecification T echnical P arameters Rated Voltage Rated Power Frequency Light Power Motor Power Total Power Motor 120V 60Hz 2x20W High Efficiency Bulbs 2x130W 300W 2 6 Round Vertical Duct 3 1 4 x 10 Rectangle Vertical Duct 3 1 4 x 10 Rectangle Horizontal Duct Parameters of Ducting Outlets Options Ampere Mounting height 2 5 Amps 26 to 32 from cooking surface XO H...

Page 3: ... the American Society for Heating Refrigeration and Air Conditioning Engineer ASHRAE and the local code authorities 5 Ducted fans must always be vented to the outdoors 6 This appliance is design to be operated by adults Children should not be allowed to temper with the controls or play with this appliance 7 To reduce the risk of fire or electric shock do not use this fan with any solid state speed...

Page 4: ...up pan CAUTION 1 For indoor use only 2 For general ventilating use only Do not use to exhaust hazardous or explosive materials and vapors 3 To avoid motor bearing damage and noisy and or unbalanced impeller keep drywall spray construction dust etc off power unit 4 Your hood motor has a thermal fuse which will automatically shut off the motor if it becomes overheated 5 The hood MUST NOT BE LESS tha...

Page 5: ...located on the top or back of the Unit HOOD PREPARATION VERTICAL DISCHAREG INSTALLATION 1 Install the small shutoff plate inside the back of the hood Using 10 screws 2 Install the large shutoff plate on the back of the hood Using 5 screws 3 Install the rubber gasket Included on the top of the hood As shown below 6 ROUND DUCT INSTALLATION 4 Mount 6 round duct on the top of the hood using 10 screws ...

Page 6: ...uded 3 Seal with duct tape 4 Install the adapter in the back of the hood using 6 screws HOOD INSTALLATION 1 Insert the power cable in the hood and tighten the wire clamp to screw the cable 2 Align hood s keyhole mounting slots over the 4 partially installed screws 3 Making sure the duct positions over the hood s duct adapter push the hood against the rear wall ELECTRICAL CONNECTION 1 Using provide...

Page 7: ...tch on the front panel ELECTRONIC SWITCH 1 TIMER DELAY OFF SWITCH 2 LAMP SWITCH 3 DISPLAY 4 FAN SPEED SWITCH 5 ON OFF SWITCH LOCK ADJUSTMENT When using this hood for the first time or after a power failure the display flashes regularly To stop flashing press on off key for more than 5 seconds the hood will be set to time setting mode By pressing lamp key or fan speed key to change time setting eac...

Page 8: ...arks For discolorations or deposits that persist use a non scratching household cleanser or stainless steel polishing powder with a little water and a soft cloth For stubborn cases use a plastic scouring pad or soft bristle brush together with cleanser and water Rub lightly in direction of polishing lines or grain of the stainless finish Avoid using too much pressure that may mar the surface Do no...

Reviews: