background image


Inserting (see figure A) 

Clean and lightly grease the shank end   
of the tool. 
Insert the tool in a twisting manner into 
the tool holder until it latches itself. 
Check the latching by pilling the tool. 
 

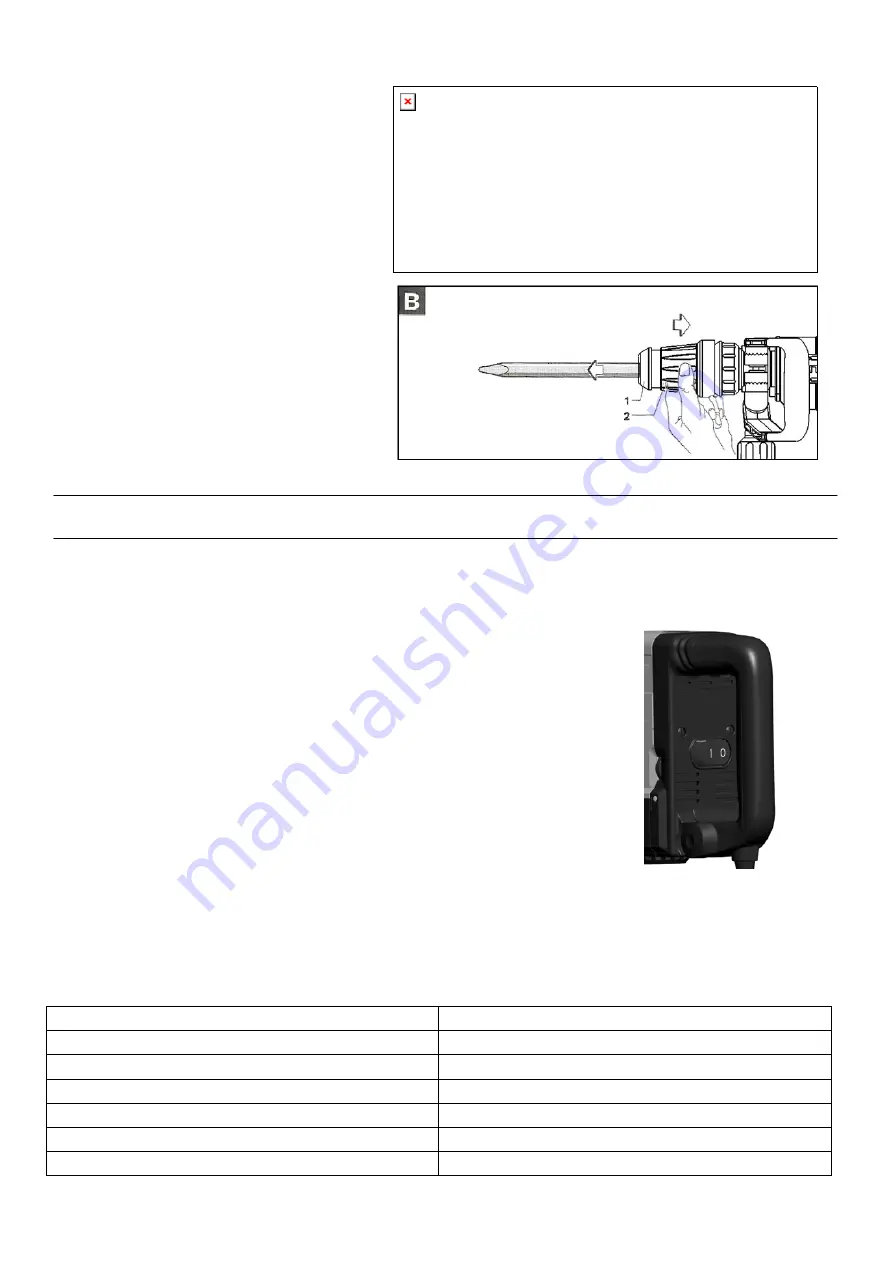
Removing (see figure B) 

Push back the Protective lining 

2

 and remove 

the tool. 


Operation 

Starting Operation 

Observe correct mains voltage! 

The voltage of the power source must agree with the voltage specified 

on the type plate of the power tool. 
 

To start the power tool, Press the switch towards arrow “

I

” direction . 

To switch off the power tool, Press the switch towards arrow “0” direction. 
 

For low temperatures, the power tool reaches the full impact rate only after   
a certain time. 
This start-up time can be shortened by striking the chisel in the power tool   
against the floor one time. 
 

Setting the Impact Rate 

The electronic control enables stepless speed preselection in accordance with the material to be worked. 
The constant electronic control keeps the preselected impact rate nearly constant between no-load and 
load conditions. 
Select the impact rate with the Speed Adjuster Function Knob 10 according to the material. 
The data in the following table are recommended values. 
 
Speed Adjuster Function Knob 6 

Impact frequency(

min

-1

1 1000 
2 1200 
3 1350 
4 1550 
5 1750 
6 1900 

Summary of Contents for XP-G55VC

Page 1: ...e machine works and how it should be operated Maintain the machine in accordance with the instructions and make certain that the machine work correctly please store this instriation and other enclosed documents with the machine together Bj 2012 Zhejiang Xinpu Industrial Commercial Co Ltd 106 No 330 National Road Huajie Industrial Zone Yongkang City Zhejiang 321300 P R China ...

Page 2: ...rk areas invite accidents b Do not operate power tools in explosive atmospheres such as in the presence of flammable liquids gases or dust Power tools create sparks which may ignite the dust or fumes c Keep children and bystanders away while operating a power tool Distractions can cause you to lose control 2 Electrical safety a Power tool plugs must match the outlet Never modify the plug in any wa...

Page 3: ... power tools with your finger on the switch or plugging in power tools that have the switch on invites accidents d Remove any adjusting key or wrench before turning the power tool on A wrench or a key left attached to a rotating part of the power tool may result in personal injury e Do not overreach Keep proper footing and balance at all times This enables better control of the power tool in unexp...

Page 4: ...protection Exposure to noise can cause hearing loss Use auxiliary handle with the tool Loss of control can cause personal injury Hold Power tool by insulated gripping surfaces when performing an operation where the cutting accessory may contact hidden wiring or its own cord Cutting accessory contacting a live wire may make exposed metal parts of the power tool live and could give the operator an e...

Page 5: ...l risks Even when the power tool is used as prescribed it is not possible to eliminate all residual risk factors The following hazards may arise in connection with the power tool s construction and design a Injuries and damage to property to due to broken accessories that are suddenly dashed b Health defects resulting from vibration emission if the power tool is being used over longer period of ti...

Page 6: ... chiseling work in concrete brick masonry and asphalt as well as for driving in and compacting when using the respective accessories Technical Data Demolition Hammer XP G55VC Rated Voltage 220 240V Frequency 50Hz Rated input 1500W Impact frequency 1000 1900 min Impact energy per stroke 6 25J Chisel positions 12 Chiselling capacity in concrete of medium hardness 490kg h Tool holder SDS max Weight 1...

Page 7: ...400mm 1 piece Carbon brush 6 5 17 26 mm 1 couple OPTIONALACCESSORIES sold separately 1 Tine Chisel 18 400mm SDS max 2 Flat Chisel 18 400mm SDS max 3 Big Flat Chisel 18 400mm SDS max 4 Goose Chisel 18 400mm SDS max 5 Surface Roughing Hammering 1 Bushing Tool 2 Shank 6 Tamping Hammering 1 Rammer 2 Shank 150 x 150 mm Optional accessories are subject to change without notice ...

Page 8: ...tool only with the Side Handle 9 The Side Handle 9 can be set to any position for a secure and low fatigue working posture Loosen the Function Knob 10 rotate the Side Handle 9 around the axis of the power tool to the required position and tighten the Function Knob 10 again The Side Handle 9 can be mounted to a different position For this completely unscrew the Function Knob 10 and then pull out th...

Page 9: ...tool Press the switch towards arrow 0 direction For low temperatures the power tool reaches the full impact rate only after a certain time This start up time can be shortened by striking the chisel in the power tool against the floor one time Setting the Impact Rate The electronic control enables stepless speed preselection in accordance with the material to be worked The constant electronic contr...

Page 10: ...er etc will cause motor malfunction and efficiency degraded Replace with a new one when your accessory is abased 2 Check all external parts of the tool for damage at regular intervals Do not operate the tool if parts are damaged If necessary your power tool should be repaired at a xinpu authorized service center 3 Inspecting the mounting screws Regularly inspect all mounting screws and ensure that...

Page 11: ......

Page 12: ......

Reviews: