


17
5.
Next, enter the radio’s new IP address in the address bar of your web browser
and load the page.
Note: Depending on your computer’s configuration, it may
be necessary to change or add an IP address on your computer to be on the
radio’s new subnet.
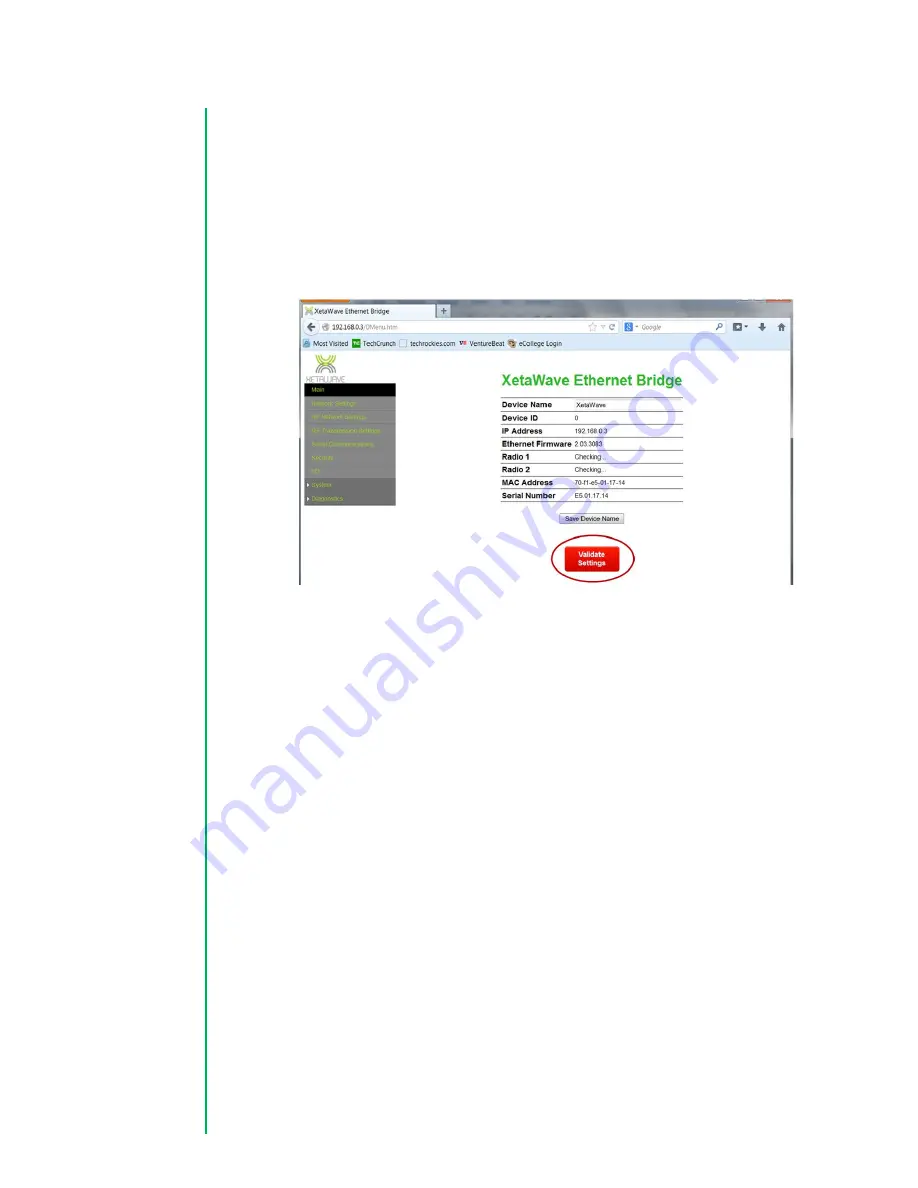
6.
Once on the radio’s “Main” page loads, it will necessary to confirm your settings
are functional by pressing the red “Validate Settings” button on the page.
2.1.2 RF Configuration
The RF settings will differ depending on whether the radio is operating within the
unlicensed ISM or licensed MAS spectrum. The RF settings will also differ slightly if the
radio is operating within an Ethernet or Serial wireless network. The following sections
will cover each case.
2.1.2.1
ISM Settings
1.
Navigate to the “RF Transmission Settings” page.
2.
Select the ISM band and configure the “Start” and “Stop” frequencies within the
ISM band that are will be used by the radio network. Typically these values will
be set to 902.000 and 928.0000 respectively for an initial setup.
Quick Start
Multi-Point


