background image

WorkCentre 7655/7665/7675

WorkCentre 7655/7665/7675

Quick Use Guide

Tray Settings

Undo

Cancel

Save

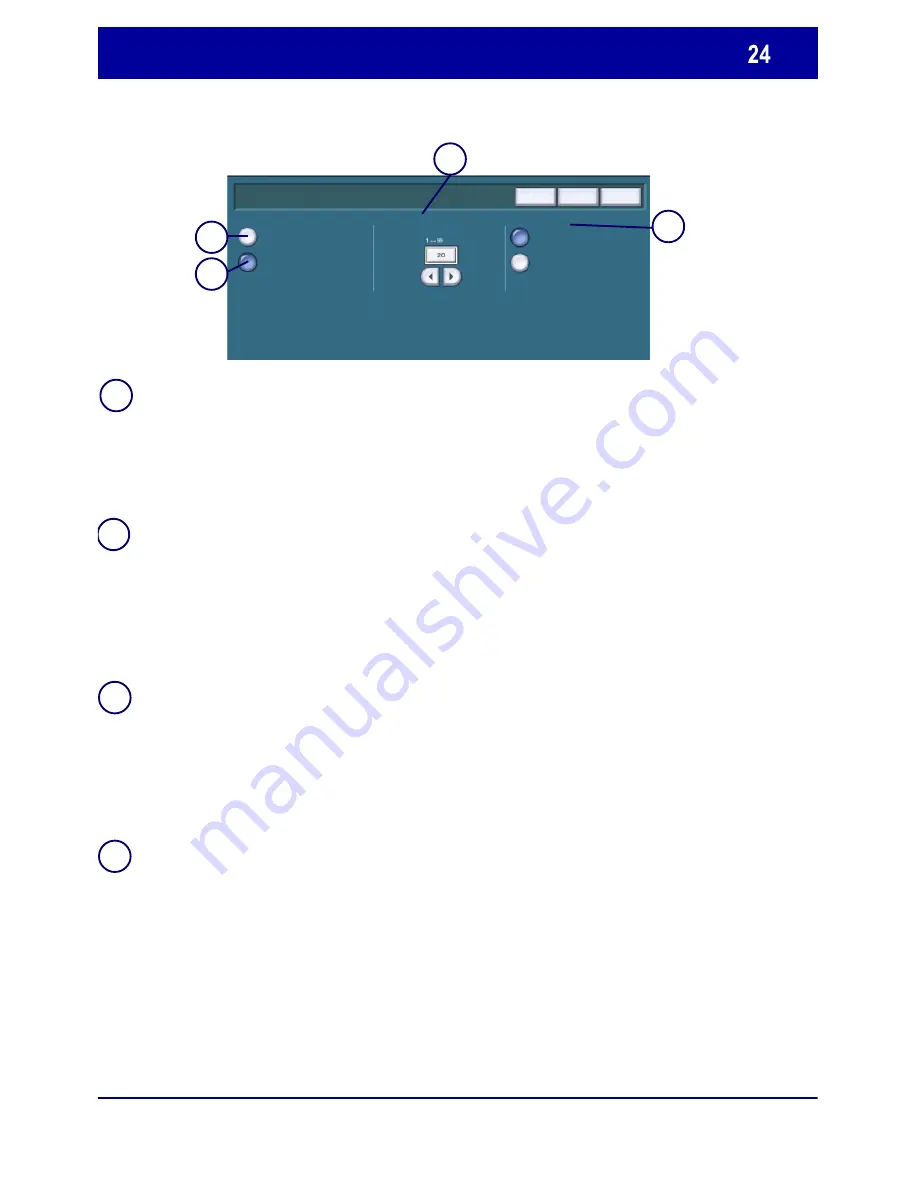
Change Settings - Tray 1

Tray Priority

Auto Selection

On

Off

Tray Type

Dedicated

Fully Adjustable

The Priority setting:
-   Determines which tray is used when two trays are loaded with the 
same paper and Auto Paper Select is chosen.
-   Determines which paper trays are displayed on the Basic Copy tab. 
The trays with the highest priority are displayed.
1 is the highest priority and 99 is the lowest.

Dedicated tray is set to contain one size and type of media.  When the 
tray requires more media a pop-up message will appear telling the user 
what size and type of media to load.

Fully Adjustable allows the user to load any size and type of media, 
within the specified range, into the tray. The machine will detect 
standard sizes of paper but a pop-up screen will appear after the tray 
has been closed asking the user to confirm the size, type and color of 
the media loaded.

With Auto Selection On the machine chooses which tray to feed from to 
best meet the users requirements.

If Auto Paper Select is chosen for a copy job the machine will feed paper 
from a tray that contains the best fit paper for the size of the image and the 
reduction/enlargement selected. However, auto selection only works with 
trays that contain the default color and type to prevent special media being 
used on ordinary copy jobs.

1.

1.

2.

4.

3.

2.

3.

4.

Summary of Contents for WorkCentre 7655

Page 1: ...Quick Use Guide WorkCentre 7655 7665 7675 701P46067 2007...

Page 2: ...The data saved in the hard disk of the machine may be lost if there is any problem in the hard disk Xerox is not responsible for any direct and indirect damages arising from or caused by such data lo...

Page 3: ...Control Panel Usage Counters Printing a configuration report Simple Network Scanning Simple Scan to E mail Simple Internet Faxing Simple Faxing Embedded Simple Copying 3 5 7 9 11 13 15 17 Tools Overv...

Page 4: ...een The touch screen allows you to select all the available programing features It also displays fault clearance procedures and general machine information Services button Displays the job features on...

Page 5: ...the first screen for the current pathway If pressed twice resets all the features to their machine default settings Start Starts the job Log In Out Provides password protected access to the Setup Too...

Page 6: ...ess the Copy icon 3 Select the Features Basic Copying Copy All Services Image Quality Layout Adjustment Output Format Job Assembly Output Color Output Color 2 Sided Copy Copy Output Auto Detect Color...

Page 7: ...re 7655 7665 7675 Quick Use Guide Simple Copying 4 Enter the Quantity 5 Press Start 6 Identify your job in Job Status mode Active Jobs Pending Processing Scanning Completed Jobs Printing Pending Proce...

Page 8: ...KCENTRE PRO Fax E Mail Copy Internet Fax Network Scanning Fax 2 Sided Scanning Image Quality Fax Options Layout Adjustment Fax All Services Fax Number Dialing Chars Keypad Address Book Add 1 Sided Ori...

Page 9: ...cessing Scanning Completed Jobs Printing Pending Processing Printing Printing Job Status Fax 2 Sided Scanning Image Quality Fax Options Layout Adjustment Fax All Services Fax Number Dialing Chars Keyp...

Page 10: ...ent Details Internet Fax Output Color Advanced Settings Internet Fax Options Layout Adjustment Internet Fax All Services New Recipient Color Address Books Black Gray Scale Name Recipient From Subject...

Page 11: ...ing Processing Scanning Completed Jobs Printing Pending Processing Printing Printing Job Status Internet Fax Output Color Advanced Settings Internet Fax Options Layout Adjustment Internet Fax All Serv...

Page 12: ...etect Layout Adjustment E mail All Services E mail 2 Sided Scanning E mail Options Color Black Gray Scale 1 Sided 2 Sided 2 Sided Rotate Side 2 Original Type Photo Text Photo Text Scan Presets for Sha...

Page 13: ...eted Jobs Printing Pending Processing Printing Printing Job Status Output Color Auto Detect Layout Adjustment E mail All Services E mail 2 Sided Scanning E mail Options Color Black Gray Scale 1 Sided...

Page 14: ...Color Auto Detect Layout Adjustment Network Scanning All Services Network Scanning 2 Sided Scanning Filing Options Job Assembly Color Black Gray Scale 1 Sided 2 Sided 2 Sided Rotate Side 2 Original T...

Page 15: ...Printing Pending Processing Printing Printing Job Status Selected Template Show Output Color Auto Detect Layout Adjustment Network Scanning All Services Network Scanning 2 Sided Scanning Filing Option...

Page 16: ...ing Options Job Assembly Advanced Settings Resolution Image Enhancement Image Options From the Machine Information tab select the Print Reports button to access the type of reports you can print Print...

Page 17: ...onfiguration Report Print Selected Report Close Report Name Touch the Configuration Report option then select the Print Selected Report button A message will confirm that the report is being printed a...

Page 18: ...ent Image Options Usage Counters Billing information can be accessed by touching the Machine Status button then touching the Billing Information tab Billing Information 1 2 Usage Counters Faults Suppl...

Page 19: ...Impressions Color Copied Impressions Color Printed Impressions Large Impressions Impression Counters Usage Counters Faults Supplies Machine Information Machine Status Billing Information Tools Color I...

Page 20: ...djustment Network Scanning All Services Network Scanning Filing Options Job Assembly Advanced Settings Resolution Image Enhancement Image Options The Log In Window opens Use the keypad to enter a 4 di...

Page 21: ...ace Settings section includes utilities for General Settings Common Service Settings Copy Service Settings Fax Service Settings Service Enablements Settings and Job Sheet Settings The Paper Tray Manag...

Page 22: ...Select Accounting Mode The Auditron needs to be configured before users can access the Auditron features Accounting Mode None Xerox Standard Accounting Auditron Network Accounting Auxiliary Access Ca...

Page 23: ...Group Account boxes display information for the currently selected User Account If the User Account selected is unused the User Account field is blank and the Group Account is 1 The User Account and...

Page 24: ...ab Tools tab Select Paper Tray Management Groups Column Select Tray Settings Features Column Select Tray Settings The Tray Settings screen shows the properties of each tray in the machine To change th...

Page 25: ...ill appear telling the user what size and type of media to load Fully Adjustable allows the user to load any size and type of media within the specified range into the tray The machine will detect sta...

Page 26: ...own Failure to do so may result in burns if certain parts of the machine are touched 2 Lay paper on the floor before removing the cartridge This will allow any excess toner to fall on the paper Hold t...

Page 27: ...e cartridge evenly with the printer until you hear a click 8 Close the Front Door If the door will not close completely make sure the cartridge is in the lock position and the toner cartridge is insta...

Page 28: ......

Reviews: