background image

Trays

Phaser® 6200 Color Laser Printer

4

4. 

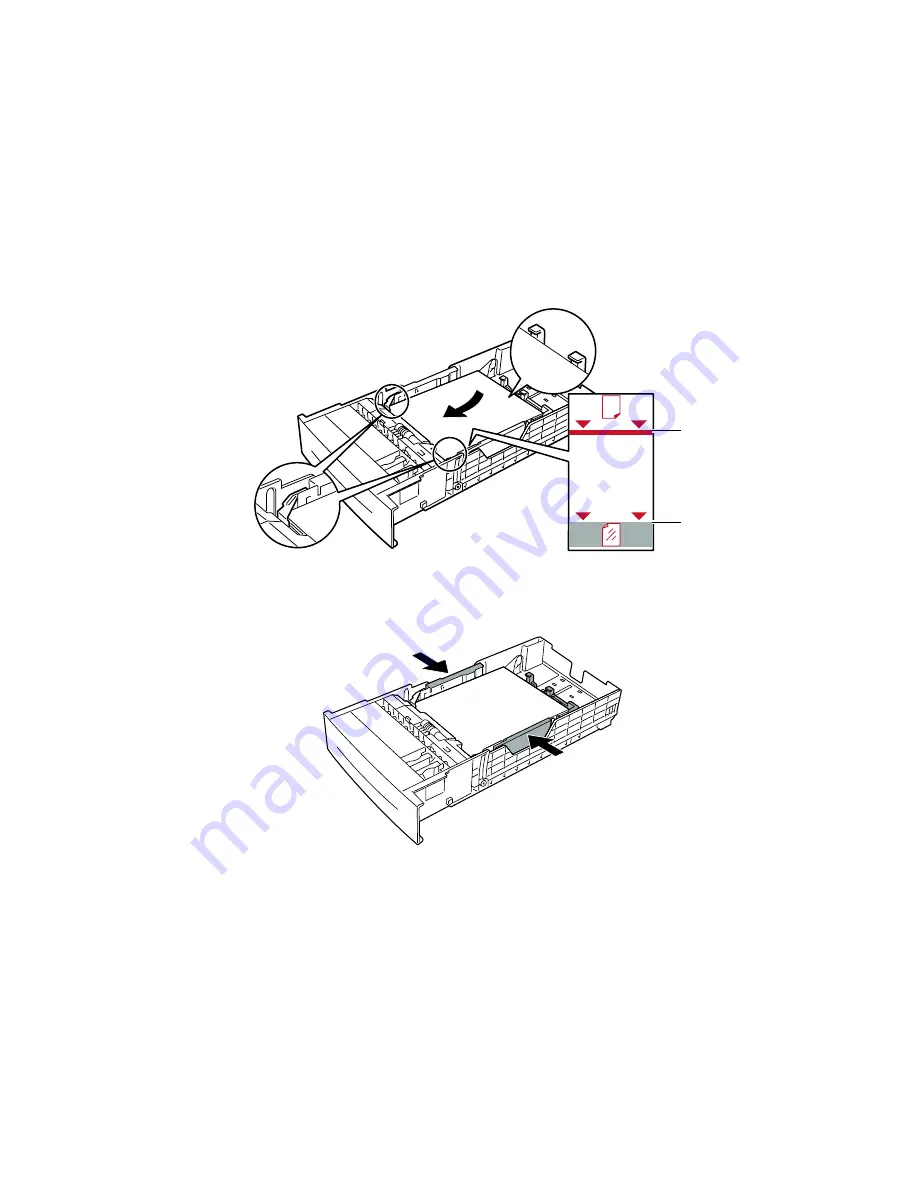
Insert a stack of paper into the tray. Place the paper under the front corner tabs and under the tabs 
on the back guide. For one-sided prints, place the side to be printed 

faceup

 with the top of the page 

at the 

front

 of the tray. For two-sided prints, place the side to be printed with the odd-numbered 

pages 

facedown

 with the top of the page at the 

back

 of the tray. If using paper with pre-punched 

holes, place the holes toward the right side of the tray.

Note

Observe the fill lines on the side of the tray. Do not load paper above the paper fill line (

1

), 

because it may cause a jam. Do not load transparencies above the transparency fill line (

2

).

5. 

If necessary, push the width guides inward to match the size of the paper.  

MAX

6200-03

1

2

MAX

6200-04

Summary of Contents for Phaser 6200

Page 1: ...specifically to work with this printer s oil less fuser Using non Phaser 6200 Transparencies might result in poor image quality and might damage the fuser Damage caused by using non Phaser 6200 Trans...

Page 2: ...the width guides outward If loading paper having a different length tilt the back guide forward slide the guide and insert the pins on the bottom of the guide into the holes in the tray corresponding...

Page 3: ...ace the side to be printed with the odd numbered pages facedown with the top of the page at the back of the tray If using paper with pre punched holes place the holes toward the right side of the tray...

Page 4: ...ed the type of paper press the OK key to accept the current setting for paper type If you have changed the type of paper scroll to the correct paper type and press the OK key to save your selection No...

Page 5: ...e fuser Damage caused by using non Phaser 6200 Transparencies is not covered under the warranty service agreement or Total Satisfaction Guarantee To order Phaser 6200 Transparencies visit the Phaser 6...

Page 6: ...entering the printer first Do not load paper above the fill line Place envelopes with the flap side up and top of the envelope towards the right of the printer For A7 envelopes place the flap side up...

Page 7: ...the tray s paper type and size settings match the loaded paper type Using custom size paper In addition to the wide variety of standard paper sizes available for this printer you can use custom size...

Page 8: ...your selection c For the paper size scroll to Custom and press the OK key d Select Set Custom X by pressing the OK key e Press the Down Arrow or Up Arrow key to scroll to the desired value for X label...

Reviews: