background image

Phaser® 6200 Color Laser Printer

Copyright © 2002 Xerox Corporation. All Rights Reserved.

1

Setting up the Printer

This section covers the basic steps to set up the printer:

Unpacking the printer — see page 1.

Removing the packing tape — see page 4.

Loading paper in the tray — see page 6.

Preparing the toner cartridges — see page 9.

Installing the imaging unit — see page 10.

Connecting the printer — see page 13.

Installing the printer driver — see page 14.

Unpacking the printer

1. 

If you plan to use a High-Capacity Feeder, set it up first. Refer to the 

High-Capacity Feeder


section of this 

Setup Guide

 or the instruction sheet that comes with the High-Capacity Feeder.

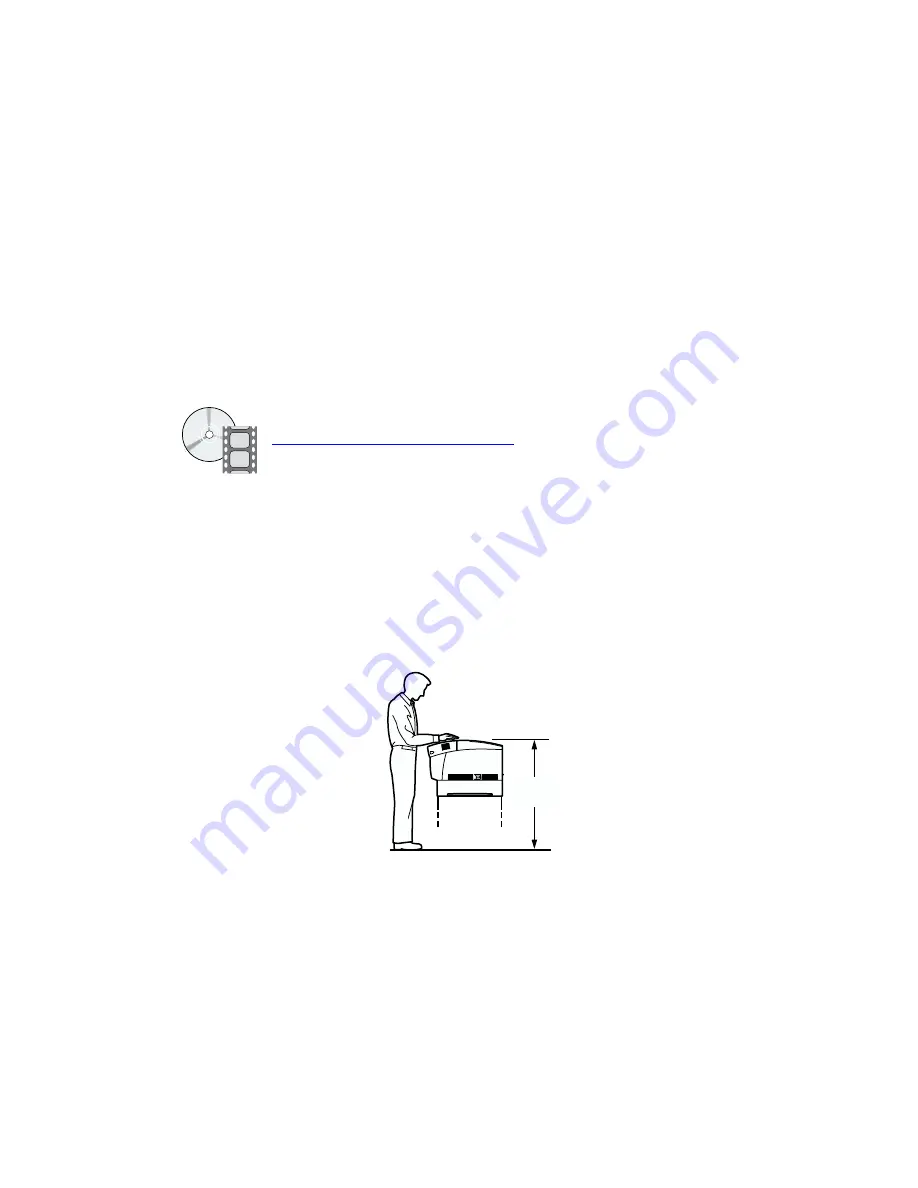
If you won’t be using a High-Capacity Feeder, plan to locate the printer on a sturdy table or 
counter. The ideal height for the top of the printer is shown in the following illustration. 

Instructional videos for setting up the printer and installing upgrades are available on the 

Interactive Documentation CD-ROM

 or the Xerox web site at: 

www.xerox.com/officeprinting/6200support/

You can also refer to the printed 

Setup and Quick Reference Guide

 that comes with the printer.

<

100 cm

(39 in.)

Summary of Contents for Phaser 6200

Page 1: ...P h a s e r C o l o r L a s e r P r i n t e r 6200 Setup Guide...

Page 2: ...marks of International Typeface Corporation Bernhard Modern Clarendon Coronet Helvetica New Century Schoolbook Optima Palatino Stempel Garamond Times and Univers are trademarks of Linotype Hell AG and...

Page 3: ...Upgrade Kit 18 Phaser 6200N to Phaser 6200DP Upgrade Kit 20 Memory 21 Connection Setup 22 Moving 23 Supplies For a complete list of supplies and accessories for your Phaser 6200 Color Laser Printer p...

Page 4: ...u plan to use a High Capacity Feeder set it up first Refer to the High Capacity Feeder section of this Setup Guide or the instruction sheet that comes with the High Capacity Feeder If you won t be usi...

Page 5: ...ions refer to the User Safety Summary section of the Support Guide on the Interactive Documentation CD ROM Caution Do not block or cover the slots and openings on the printer without adequate ventilat...

Page 6: ...two people lift the printer using the hand holds on the side of the printer as shown in the following illustration Place the printer on the High Capacity Feeder or on a stable surface Note The printe...

Page 7: ...inter 4 Removing the packing tape 1 Remove the packing tape from the front left side and right side of the printer 2 Remove the styrofoam blocks from the bottom corners of the printer 3 Use the latch...

Page 8: ...Setting up the Printer Phaser 6200 Color Laser Printer 5 4 Remove the packing tape from the inside of the printer 5 Close the front door...

Page 9: ...Papers section of the Trays and Paper Guide on the Interactive Documentation CD ROM 1 Pull the tray completely out of the printer then remove the cardboard spacers from the sides of the tray 2 Adjust...

Page 10: ...the stack of paper into the tray Place the paper under the front corner tabs and under the tabs on the back guide For one sided prints place the side to be printed faceup with the top of the page at...

Page 11: ...ecessary push the width guides inward to match the size of the paper 6 Insert the tray and push it completely into the printer 7 Install the tray cover on the back of the printer Be sure to slip the h...

Page 12: ...Phaser 6200 Color Laser Printer 9 Preparing the toner cartridges 1 Remove the top cover and the packing sheet 2 Pull upward to remove the ribbons from the left side of the four toner cartridges 3 Rein...

Page 13: ...er Printer 10 Installing the imaging unit 1 Use the latch on the front of the printer to open Front Door A 2 Press up on the tab and lift Top Door C 3 Open the top of the bag containing the imaging un...

Page 14: ...f each ribbon 5 Remove the shipping block from the imaging unit Discard the shipping block 6 Use one hand to hold the imaging unit by the handle Use your other hand to support and guide the imaging un...

Page 15: ...g up the Printer Phaser 6200 Color Laser Printer 12 7 Pull up and remove the protective sheet from the front of the imaging unit 8 Slowly and firmly close Top Door C until it latches 9 Close the front...

Page 16: ...s Parallel USB Ethernet not available on the Phaser 6200B model 1 Connect the printer to your computer using the appropriate cable not supplied with the printer Connect the cable to the proper slot on...

Page 17: ...for the first time it takes approximately 5 minutes to warm up Installing the printer driver 1 Install the printer driver on your computer by inserting the Printer Installer and Utilities CD ROM in y...

Page 18: ...Phaser 6200 Color Laser Printer Copyright 2002 Xerox Corporation All Rights Reserved 15 High Capacity Feeder 1 3 1 1 1 2 35 kg 77 lbs 1 2 3 5 4 6 4 1 4 2...

Page 19: ...Phaser 6200 Color Laser Printer Copyright 2002 Xerox Corporation All Rights Reserved 16 Hard Drive 1 2 3 4 5 6 4 1 4 2...

Page 20: ...Hard Drive Phaser 6200 Color Laser Printer 17 6 9 8 7...

Page 21: ...Phaser 6200B to Phaser 6200N Upgrade Kit Phaser 6200 Color Laser Printer 18 Phaser 6200B to Phaser 6200N Upgrade Kit 1 2 3 6 8 5 4...

Page 22: ...Phaser 6200B to Phaser 6200N Upgrade Kit Phaser 6200 Color Laser Printer 19 9 8 10 11...

Page 23: ...Phaser 6200N to Phaser 6200DP Upgrade Kit Phaser 6200 Color Laser Printer 20 Phaser 6200N to Phaser 6200DP Upgrade Kit 1 7 8 4 5 6 2 3...

Page 24: ...Phaser 6200 Color Laser Printer Copyright 2002 Xerox Corporation All Rights Reserved 21 Memory 1 2 3 4 7 8 6...

Page 25: ...op and at the bottom of the page Print these pages at the printer s front panel For detailed information about connecting to a network refer to the Networking Guide on the Interactive Documentation CD...

Page 26: ...from your printer s software CD ROM Select the appropriate LPT parallel port Ethernet Connection recommended Network Use an Ethernet connection with two twisted pair Category 5 RJ 45 cables and an Et...

Page 27: ...ct Properties 3 On the IP Address tab select Specify an IP address Enter an IP address and Subnet Mask and click OK If you use the IP address noted above set a Subnet Mask of 255 255 255 0 4 Click OK...

Page 28: ...the printer Click Create to create the desktop printer For more details refer to the infoSMART Knowledge Base at www xerox com officeprinting infoSMART Document 2562 Macintosh OS X Macintosh OS X sup...

Page 29: ...he bottom of the page Print these pages at the printer s front panel Accessing printable pages Access these pages from the Printable Pages Menu 1 At the front panel scroll to the Printable Pages Menu...

Page 30: ...nter over a raised door threshold or across a parking lot can damage the printer Preparing the printer for shipment To transport the printer by vehicle the printer must be prepared according to a spec...

Reviews: