background image

Photo 22

Photo 23

Photo 24

4

Xerox  N24/32/40  Technical Instructions

Step 21

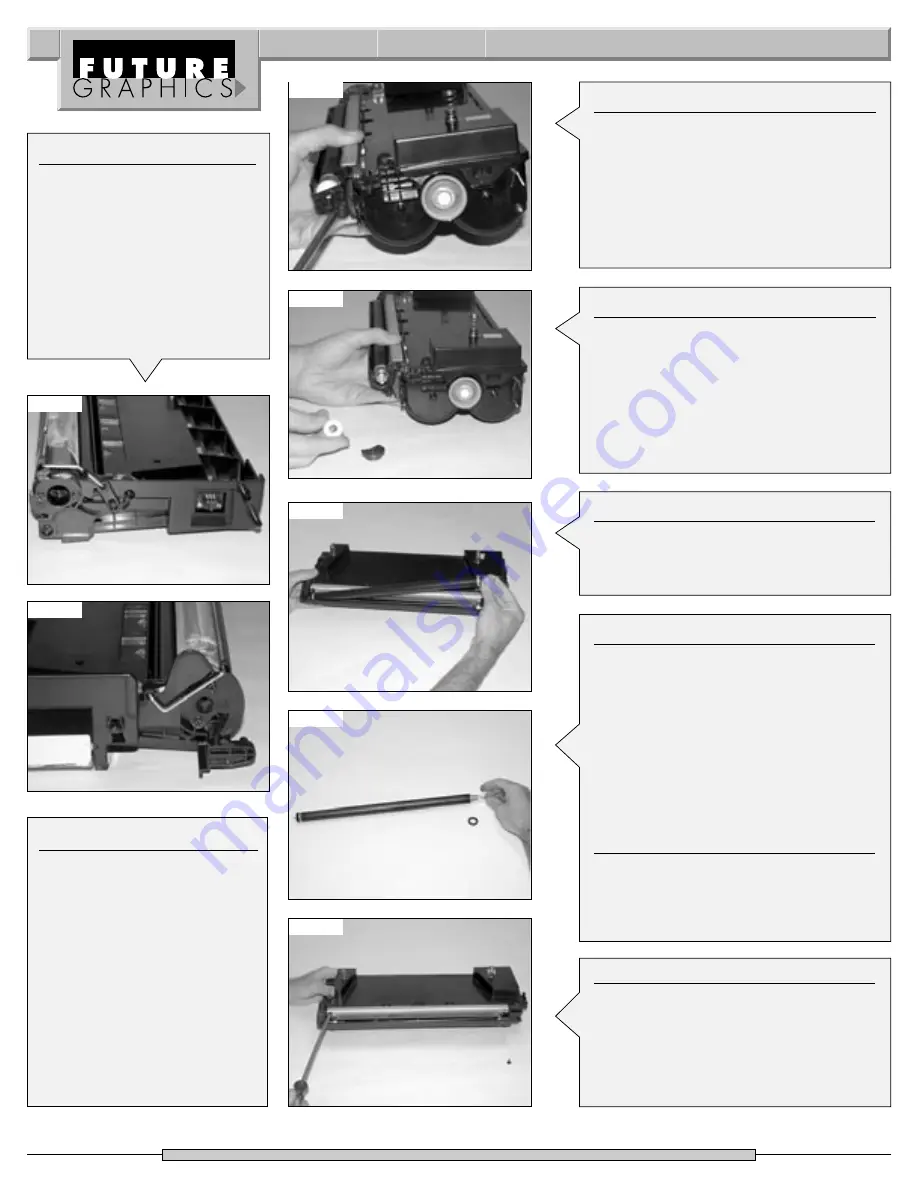
Lift the gear end of the mag roller up
and remove the roller from the contact
end of the hopper.

(See Photo 26)

Step 22

Remove the mag roller bearing and the
bushing from the gear end of the mag
roller.

(See Photo 27) 

NOTE: A locking washer keeps the 
mag roller bearing and bushing on the
contact end of the mag roller in place,
it is not necessary to remove them.
Clean the bearings with a lint free cloth
and alcohol.

Step 23

Using dry compressed air or a vacuum,
clean the toner off the mag roller.
NOTE: Clean the mag roller using a mag
roller cleaner and a lint free cloth.

Step 24

Remove the two screws holding the 
doctor blade.

(See Photo 28)

If you plan 

to reuse the doctor blade clean the toner
off the blade using dry compressed air 
or a vacuum. Using a lint free cloth and
alcohol wipe off the doctor blade.

Step 17

Install the drum axle hubs on
each side of the waste hopper
and install the screws that hold
the axle hubs.

(See Photos 22 & 23)

Photo 25

Photo 26

Photo 27

Photo 28

Step 18

Rotate the drum 4-5 revolutions
to ensure that the wiper blade
is cleaning the drum correctly.
Using a lint free cloth wipe the
padding powder off the PCR.
Set the waste hopper aside and
cover.

Step 19

Remove the screw that holds the mag
roller end cap on the gear end of the
mag roller.

(See Photo 24) 

Remove the

end cap.

Step 20

Remove the mag roller drive gear and
the stabilizing bushing from the end of
the mag roller.

(See Photo 25)

Summary of Contents for DocuPrint N24

Page 1: ...ocuCentre 220 230 332 340 IBM InfoPrint 32 40 QMS 3260 4032 Dataproducts Genicom Microlaser 320 320N 108473 B2 113R173 113R120 13R273 113R274 90H3566 1710307 001 113R00173 5A6530P01 Diagonal Cutters Needle Nose Pliers Philips Screwdriver Small Flat Blade Screwdriver Technical Instructions Printers Supplies Tools 1 CORPORATE LOS ANGELES T 800 394 9900 818 837 8100 F 800 394 9910 818 838 7047 DALLAS...

Page 2: ...ructions Photo 9 Step 8 Carefully lift the waste hopper so it is up on its end and the handle of the cartridge is facing you See Photo 11 NOTE Do not flip the waste hopper so the wiper blade is down toner will spill out of the hopper Remove the screw located just below the handle See Photo 12 Step 6 Lift out the drum See Photos 9 Step 7 Remove the PCR from the cradles See Photos 10 NOTE Clean the ...

Page 3: ...Step 12 Remove the wiper blade from the waste hopper See Photo 17 Step 14 Reinstall the waste hopper cover to the top of the waste hopper Install the screw that holds the cover on the waste hopper See Photo 18 Photo 16 Photo 17 Step 13 Apply padding powder to the new blade Install the new wiper blade in the waste hopper making sure the spacers are on the wiper blade screws See Photo 18 Photo 18 Ph...

Page 4: ...h Step 24 Remove the two screws holding the doctor blade See Photo 28 If you plan to reuse the doctor blade clean the toner off the blade using dry compressed air or a vacuum Using a lint free cloth and alcohol wipe off the doctor blade Step 17 Install the drum axle hubs on each side of the waste hopper and install the screws that hold the axle hubs See Photos 22 23 Photo 25 Photo 26 Photo 27 Phot...

Page 5: ...ng the back of the toner hopper press down on the toner hopper cover just above the clip While applying pressure to the cover use a small flat blade screwdriver to pry the clip that locks the cover in place away from the hopper See Photo 31 Step 28 Release the clip located next to the fill plug in the same way See Photo 32 Step 29 With all the clips released lift the cover off the hopper See Photo...

Page 6: ...ps into position in the agitator drive gear Step 34 Using needle nose pliers grab the metal toner agitator bar and pull it from the agitator gear See Photo 38 Step 35 Remove the agitator drive gear from the side of the hopper See Photo 39 Step 32 Release the four clips two on the top and two on the bottom that hold the contact end cap to the hopper See Photos 35 36 Step 33 Using a small flat blade...

Page 7: ...h the fill plug out of the toner hopper See Photo 45 Step 42 Place the cover of the toner hopper onto the hopper Push down on the cover making sure all five clips a securely fastened Install the four screws to the top of the cover See Photo 46 Step 43 Reinstall the doctor blade and the two screws that hold the blade in place See Photo 47 Photo 44 Photo 45 Photo 46 Photo 47 Step 44 Place the mag ro...

Page 8: ...2 40 Technical Instructions Step 46 Grab the waste hopper by the handle and lower the waste hopper onto the toner hopper Once the two sections are aligned correctly install the two cartridge pins that hold the two sections of the cartridge together See Photo 50 Step 47 Using a Philips screwdriver remove the two screws hold the cartridge chip See Photo 51 Need help with a particular remanu facturin...

Page 9: ...rs companies like IBM QMS Dataproducts Epson and others started releasing machines under their names using the same Fuji Xerox engine The now popular Fuji Xerox engine is capable of printing anywhere from 24 to 40 pagers per minute and up to 1200x1200 dots per inch depending on which machine is purchased The toner cartridges yield 20 000 pages for the digital copier models and 23 000 pages for the...

Page 10: ...ible Replacement XE13R273CHIPX 1 Compatible with OEM Part 113R273 16 Chip MultEPROM Xerox N24 32 40 Compatible Replacement XEN32CHIPC 1 Compatible with OEM Part 113R173 17 Chip MultEPROM Reset Xerox N24 32 40 Reprogrammed Exchange XEN32CHIPX 1 Compatible with OEM Part 113R173 18 Chip MultEPROM Xerox N24 3240 EUR Compatible Replacement XEN32CHIPC 1 Compatible with OEM Part 113R184 19 Chip MultEPROM...

Reviews: