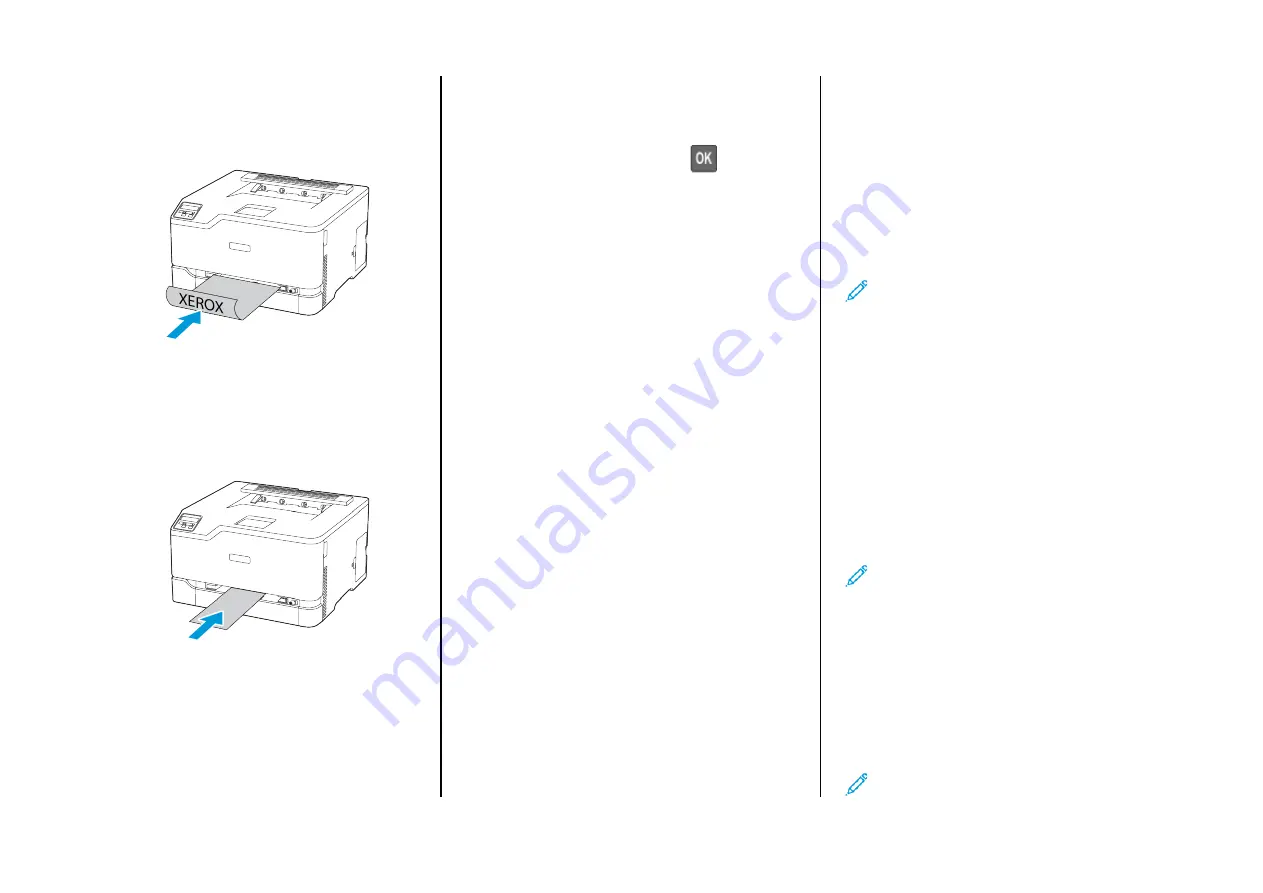
• Load letterhead with the printable side face-down and the top
edge entering the printer last for two-sided printing.
• Load envelope with the flap side down and against the right
side of the paper guide.
3.
Feed the paper until its leading edge gets pulled in.
• To avoid paper jams, do not force paper into the manual
feeder.
• Before loading another sheet, wait for a message to appear
on the display.
SSeettttiinngg tthhee PPaappeerr SSiizzee aanndd TTyyppee
1.
From the control panel, navigate to
Settings > PaperTray >
Configuration > Paper Size/Type
, then select a paper source.
For non-touch-screen printer models, press
to navigate
through the settings.
2.
Set the paper size and type.
U
Uppddaattiinngg FFiirrm
mw
waarree
Some applications require a minimum device firmware level to
operate correctly.
For more information on updating the device firmware, contact your
representative.
1.
Open a web browser, and then type the printer IP address in the
address field.
• View the printer IP address on the printer home screen. The IP
address appears as four sets of numbers separated by periods,
such as 123.123.123.123.
• If you are using a proxy server, then temporarily disable it to
load the web page correctly.
2.
Click
Settings > Device > Update Firmware
.
3.
Do either of the following:
• Click
Check for updates > I agree, start update
.
• Upload the flash file.
1. Browse to the flash file.
2. Click
Upload > Start
.
C
Coonnffiigguurriinngg W
Wii--FFii D
Diirreecctt
Wi-Fi Direct is a Wi-Fi-based peer-to-peer technology that allows
wireless devices to connect directly to a Wi-Fi Direct-enabled printer
without using an access point (wireless router).
1.
From the control panel, navigate to
Settings > Network/Ports >
Wi-Fi Direct
.
For non-touch-screen printer models, to navigate through the
settings, press
OK
.
2.
Configure the settings.
• Enable Wi-Fi Direct: Enables the printer to broadcast its own
Wi-Fi Direct network.
• Wi-Fi Direct Name: Assigns a name for the Wi-Fi Direct
network.
• Wi-Fi Direct Password: Assigns the password for negotiating
the wireless security when using the peer-to-peer connection.
• Show Password on Setup Page: Shows the password on the
Network Setup Page.
• Auto-Accept Push Button Requests: Lets the printer accept
connection requests automatically.
Note:
Accepting push-button requests automatically is not
secured.
• By default, the Wi-Fi Direct network password is not visible on
the printer display. To show the password, enable the
password peek icon. From the control panel, navigate to
Settings > Security > Miscellaneous > Enable Password/PIN
Reveal
.
• To know the password of the Wi-Fi Direct network without
showing it on the printer display, from the control panel
navigate to
Settings > Reports > Network > Network Setup
Page
.
C
Coonnnneeccttiinngg aa M
Moobbiillee D
Deevviiccee ttoo tthhee PPrriinntteerr
Before connecting your mobile device, make sure that Wi-Fi Direct has
been configured. For more information, see
C
Coonnnneeccttiinngg U
Ussiinngg W
Wii--FFii D
Diirreecctt
Note:
These instructions apply only to Android mobile
devices.
1.
From the mobile device, go to the settings menu.
2.
Enable
Wi-Fi
, and then tap
Wi-Fi Direct
.
3.
Select the printer Wi-Fi Direct name.
4.
Confirm the connection on the printer control panel.
C
Coonnnneeccttiinngg U
Ussiinngg W
Wii--FFii
1.
From the mobile device, go to the settings menu.
2.
Tap
Wi-Fi
, and then select the printer Wi-Fi Direct name.
Note:
The string DIRECT-xy, where x and y are two random
characters, is added before the Wi-Fi Direct name.
4


