dc05cc0371
8
Driver Program
: Enter
*IBMSNMPDRV
(default setting) for Xerox products. See Appendix 2 for using the
optional Xerox supplied *XSNMPDRV.
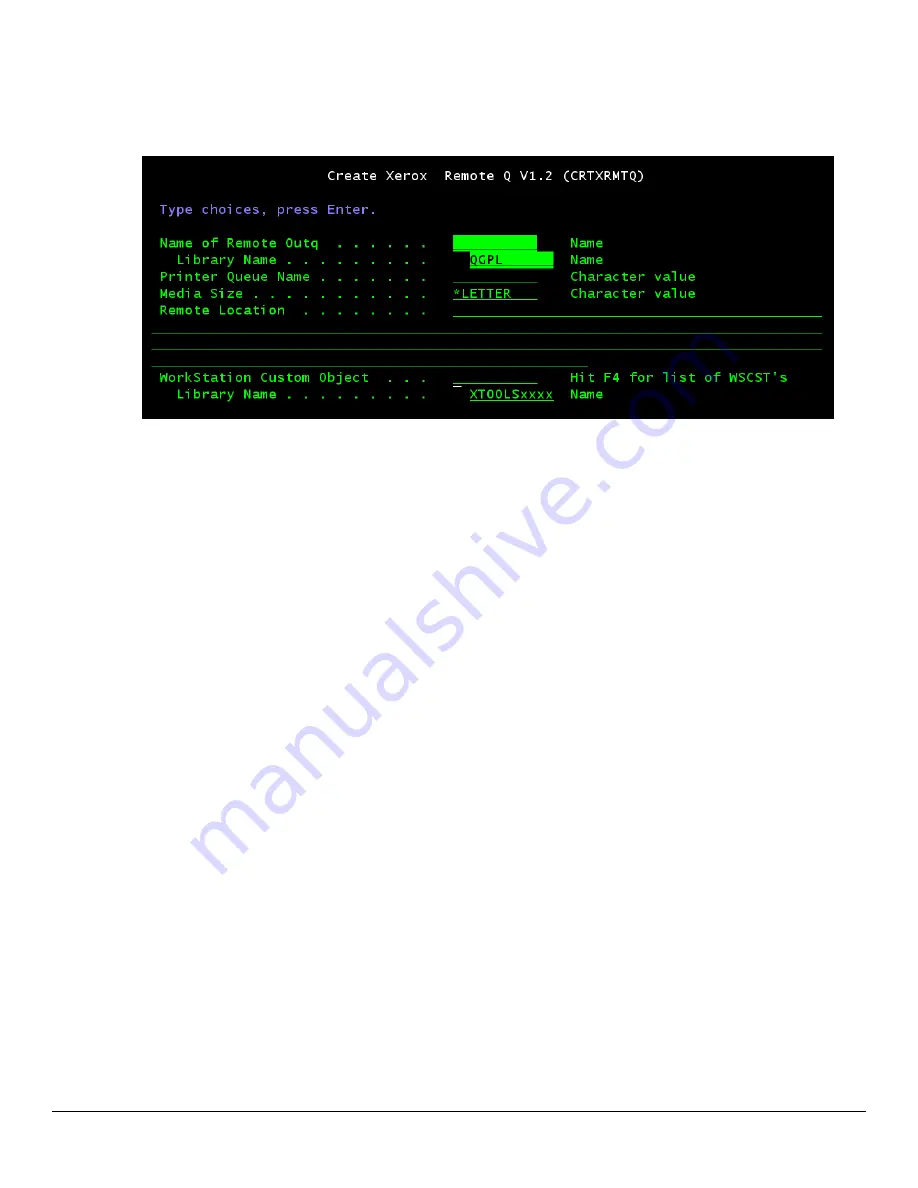
b. If you use CRTXRMTQ, a screen like the following one appears:
h
Enter the information below:
Name of Remote OUTQ
: User defined name of the remote queue.
Library Name
: Name of the library where this queue is stored. QGPL is recommended, as shown in the
sample screen above.
Printer Queue Name
: If the Xerox device associated with this queue is a Document Centre or
WorkCentre, enter
‘lp’ (include quote marks). If the Xerox device associated with this queue is a Phaser,
enter AUTO.
Media Size
:
Specifies the media size associated with this remote queue. The default is *LETTER,
which means an 8.
5” x 11” paper size command will be sent to the printer when an SCS spool is
released from the queue. Other supported values are *A4, *LEGAL, *LEDGER, *EXECUTIVE, *A3, *A5,
*B4, and *B5. For this to work with AFPDS spools, the page size of the spool must match the
queue’s
Media Size
– otherwise, the spool’s page size will override the Media Size.
Remote Location
: The IP address or host name of the remote location. If you use an IP address,
surround it with single quotes, for example,
‘111.111.1.100’
.
WorkStation Custom Object
: The WSCST that was created when the user-defined WSCO was compiled.
Press F4 to see the list.
Library Name:
The name of the library where the WSCST resides. Use the name that matches the
version of the library that was downloaded. E.g. XTOOLS0924
3. Press ENTER when complete.
4. The queue is now ready to receive print jobs. Start the writer if it did not start automatically.
To start the writer for a device description:
•
STRPRTWTR [Name of Printer Device]
To start the writer for a remote print queue:
•
STRRMTWTR [Name of Remote OUTQ]
5. Repeat steps 1 through 4 for each Xerox device to be tested.
Testing the Setup
Use an existing spool file or create a screen capture
– move it to the print queue created in the previous
section, and release it.


