background image

Introduction             Printer Options             Menu Tree              Technical Info          Error  Messages       Troublesho

 Introduction 1-4

Introduction

   1

Introduction            Printer Options            Menu Tree             Technical Info          Error Messages        Troubleshooting


Reference Guide  8142/8160

Caring for your media

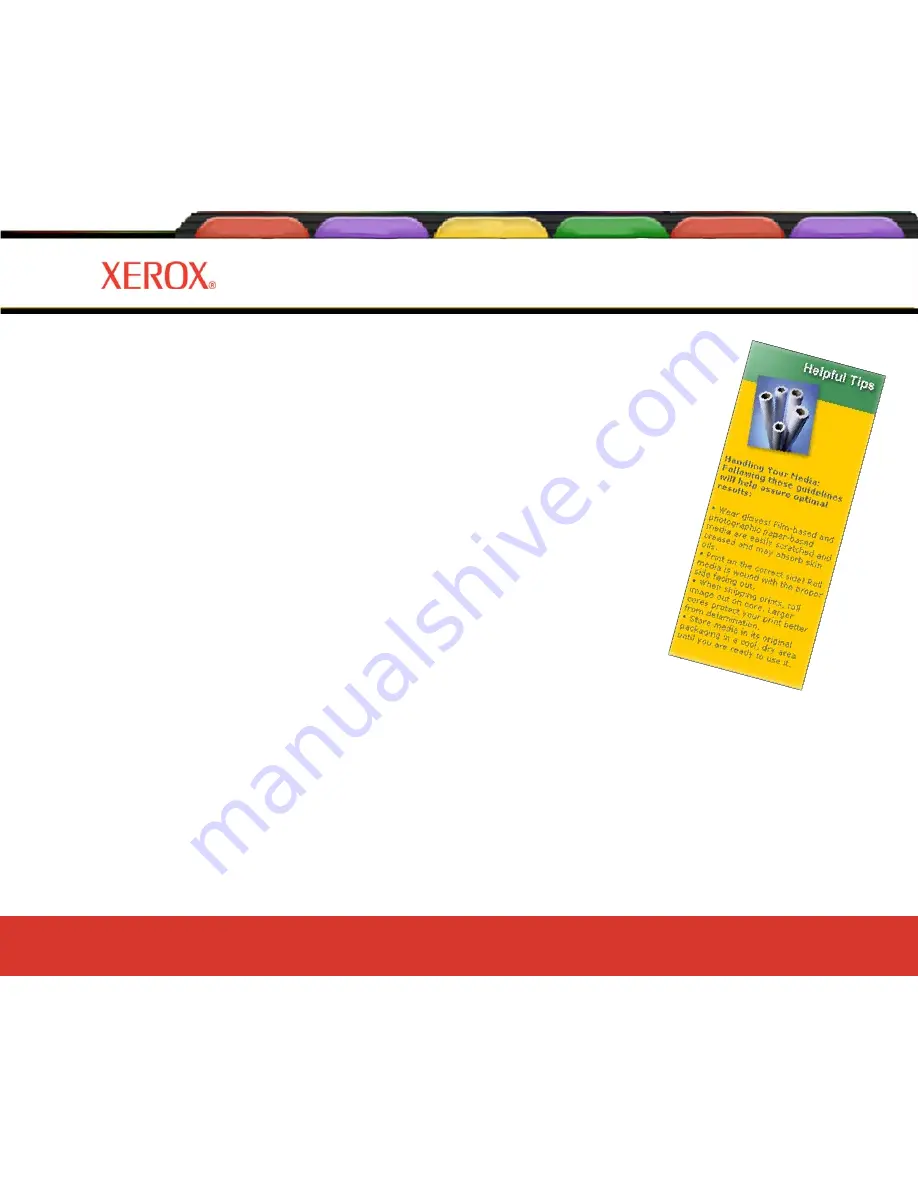
Store media in its original packaging in a cool, dry area until you are ready to use it. The
environment should be stable; i.e., no extremes of heat and cold, and non-condensing
humidity. If conditions are outside the operating ranges recommended for the printer, allow
the media to acclimate in the operating environment for at least 48 hours before using it.

If you remove a roll of media from the printer, be sure to store it in a manner which
keeps it clean and dust-free. Ideally, you should return it to its original packaging for
storage.

Print on the correct side!

 Roll media is wound with the printable side out.

Handle with care!

 Handle your media carefully to avoid creases, scrapes, and

tears. Avoid crushing or damaging roll media edges.

Caution!

  Some medias use an adhesive to adhere the end of the media to the

core.  This adhesive can transfer onto rollers in the media feed path.  A buildup of
this adhesive can cause banding and other imperfections in your printed output.
To avoid this, it is recommended that you always cut the media before the end
of the roll.

Summary of Contents for 8142

Page 1: ...d below no part of this manual may be copied or distributed transmitted transcribed stored in a retrieval system or translated in any human or computing language in any form or by any means electronic...

Page 2: ...instructions may cause harmful interference to radio communications User Instructions If the equipment does cause harmful interference to radio or television reception which can be determined by turni...

Page 3: ...gewissen Einschr nkungen unterliegen Beachten Sie deshalb die Hinweise in der Bedienungsanleitung Dem Zentralamt f r Zulassungen im Fernmeldewesen w rde den Inverkehrbringen dieses Ger tes angezeigt...

Page 4: ...ed 10A 250VAC with the proper plug configuration for the country where the device will be used is required for continued safety compliance Ein harmonisiertes HAR Netzkabel min 10A 250V mit dem vorgesc...

Page 5: ...oring the warning can damage the printer or result in an unsatisfactorily printed image Other reference materials In addition to this guide the following additional documentation is included with your...

Page 6: ...e for setup instructions and the Maintenance Guide for maintenance information The printer is a wide format color inkjet printer that gives you professional quality output on a wide variety of media u...

Page 7: ...you are aware of the superb color graphics which can be obtained Note how ever that to obtain high quality results you must consider several factors Follow the simple guidelines in the sections that...

Page 8: ...because the jets may clog Replace the original tape on the jet plate Place the cartridge in a cartridge garage or sealed plastic bag and store it in a closed area at room temperature Keep it out of d...

Page 9: ...vironment for at least 48 hours before using it If you remove a roll of media from the printer be sure to store it in a manner which keeps it clean and dust free Ideally you should return it to its or...

Page 10: ...al Info Error Messages Troubleshooting Reference Guide 8142 8160 Loading media The procedure for loading media is shown in the Quick Reference Guide If you are using paper rolls with a core diameter o...

Page 11: ...If you use the takeup roll as a feed roll you cannot use the takeup system If you want to use the takeup roll as a feed roll set the printer to ROLL2 by pressing Setup Menu Paper Options Menu Supply T...

Page 12: ...not blocked Depending on the ambient humidity temperature and amount of ink coverage you may want to turn on the heater and or set a dry time as described in Chapter 2 Replacing the cutter A cutter lo...

Page 13: ...move the carriage back into the service station This ensures that the cutter blade is in the home position Choose the correct printing mode By choosing from a variety of color quality and resolution m...

Page 14: ...Verify that the bands print a solid pattern If there are gaps in the lines there may be clogged jets Manually bypass any clogged jets Changing Paper Rolls Run the paper calibration Utility Menu Calib...

Page 15: ...s with firmware level 1 5 0 and later Confirm that you have at least that firmware level before you begin Checking firmware level 1 At the Control Panel select Utility Service Menu About 2 Check for v...

Page 16: ...Test All Color Test Type Basic done No Yes Micro banding Done Done No Yes Basic calibration Activate dryer warm platen Activate dryer warm platen Micro banding Basic Calibration document ref Set Print...

Page 17: ...l 2 A test pattern prints The prime pattern consists of bands of color for each cartridge and a sloping line Each jet is represented by a short horizontal line Together these short horizontal lines fo...

Page 18: ...Printer Options Menu Tree Technical Info Error Messages Troublesho Introduction 1 13 Introduction 1 Introduction Printer Options Menu Tree Technical Info Error Messages Troubleshooting Reference Guid...

Page 19: ...o clean them using the procedures on the previous page 1 Press Utility Menu Calibration Menu Open Jet Menu Edit List Menu and press the Edit List button that designates the color of the cartridge of i...

Page 20: ...ter completing steps 1 and 2 below before proceeding with the Line Length Test in the next section 1 Set dryer to 4 Low Heat Fans At the control panel select Setup Menu Dryer Menu Dryer Setting Select...

Page 21: ...Tree Technical Info Error Messages Troublesho Introduction 1 16 Introduction 1 Introduction Printer Options Menu Tree Technical Info Error Messages Troubleshooting Reference Guide 8142 8160 Media gui...

Page 22: ...gth Calibration sets the printer paper speed to print accurate length lines 1 At the Control Panel select Utility Menu Calibration Menu Paper Calib Menu Line Length Menu Line Length Test The printer p...

Page 23: ...st for best printing results Note To correctly see the yellow color on the test pattern it is necessary to use a blue light source 1 At the Control Panel select Utility Menu Calibration Menu Color Db...

Page 24: ...1 At the Control Panel select Utility Menu Calibration Menu Color Calib Menu Horiz Calib Test A test pattern prints Note To correctly see the yellow color on the test pattern it is necessary to use a...

Page 25: ...ee Technical Info Error Messages Troubleshooting Reference Guide 8142 8160 0 1 2 3 1 2 3 Horizontal head to head test pattern 4 Record the number for each and enter the value s if required by pressing...

Page 26: ...ibration Menu Color Calib Menu Vert Calib Test A test pattern prints Note To correctly see the yellow color on the test pattern it is necessary to use a blue light source 2 Examine the registration ta...

Page 27: ...1 22 Introduction 1 Introduction Printer Options Menu Tree Technical Info Error Messages Troubleshooting Reference Guide 8142 8160 0 1 2 3 1 2 3 Vertical head to head test pattern Note Perform the Col...

Page 28: ...rvice Menu Calibration Menu Deadband Test A test pattern prints 2 Use an eye loupe and examine the test pattern all 6 colors should line up across the entire print Note Verify alignment at 3 primary p...

Page 29: ...st 1 Press Utility Menu Service Menu Diagnostics Menu Color Test Menu All Color Test A color bar will print for each cartridge 2 Analyze the calibration test target print especially the cyan sector fo...

Page 30: ...ice Menu Diagnostics Menu Color Test Menu Stall Select Select the stall e g K C M Y C1 M1 then press Utility Menu Service Menu Diagnostics Menu Color Test Menu Color Test Print just that color will pr...

Page 31: ...th system status Some tests are performed between prints and require no user input while others require user input Cartridge related error messages are listed in Appendix B Cartridge related troublesh...

Page 32: ...ction Printer Options Menu Tree Technical Info Error Messages Troubleshooting Reference Guide 8142 8160 Lowering the air plenum Sometimes during printing or servicing you may want to lower the air ple...

Page 33: ...media Feed media options let you move the media forward or backward To feed media 1 Press Feed Media Forward or Backward Media feeds in the selected direction while the button is pressed Media counte...

Page 34: ...nter is maintained across power cycles but is not stored as a user parameter To enter a media length value 1 Press Feed Media Media Counter 2 Set the media length by entering a value between 0 and 500...

Page 35: ...which toggles to the resume state or you press Reset Pressing Pause allows you to continue the current print at your discretion A few rules regarding the End of Plot feature will not work when Sheet i...

Page 36: ...olor Mode 2 Choose Color or Mono 3 Press OK Quality mode Your printer offers four predefined print quality modes which let you make tradeoffs between speed and quality The quality mode you use depends...

Page 37: ...a user defined print mode Mode Color DPI Passes Direction Speed High Speed Color 600 x 600 Two Bi 10 Productivity Color 600 x 600 Three Bi 10 Fine Color 600 x 600 Four Bi 10 Enhanced Color 600 x 600 S...

Page 38: ...rinted image as shown in the following table Image file resolution Printer dpi setting Affect on printed output 300 dpi 600 dpi 1 input pixel prints as 4 output pixels The printed image is the same si...

Page 39: ...check whether open jet compensation will be able to fully compensate for the currently set number of passes before beginning a new print job When Pass Correction is set to Auto the printer checks to s...

Page 40: ...ge speed 1 Press Setup Menu Print Mode Menu Carriage Speed 2 Choose 1 2 3 4 5 6 7 8 9 or 10 10 is the fastest 3 Press OK Print direction Print direction specifies whether the inkjets fire on both pass...

Page 41: ...you are going to use roll paper with the lower roll feeder No takeup available with either roll option Select Takeup if you intend to use roll paper with the takeup system To choose supply type 1 Pres...

Page 42: ...8 x 24 8 21 6 x 25 6 23 0 x 35 0 21 8 x 33 8 22 6 x 34 6 24 0 x 29 0 22 8 x 27 8 23 6 x 28 6 25 0 x 38 0 23 8 x 36 8 24 6 x 37 6 32 0 x 44 0 30 8 x 42 8 31 6 x 43 6 35 0 x 45 0 33 8 x 43 8 34 6 x 44 6...

Page 43: ...16 6 x 21 6 D 22 0 x 34 0 20 8 x 32 8 21 6 x 33 6 E 34 0 x 44 0 32 8 x 42 8 33 6 x 43 6 ISO A MET_NORM_A A3 297 x 420 mm 267 x 390 mm 287 x 410 mm A2 420 x 594 mm 390 x 564 mm 410 x 584 mm A1 594 x 8...

Page 44: ...x 62 8 48 0 x 65 0 46 8 x 62 4 47 6 x 62 8 50 0 x 65 0 48 8 x 62 4 49 6 x 62 8 53 0 x 65 0 51 8 x 62 4 52 6 x 62 8 54 0 x 65 0 52 8 x 62 4 53 6 x 62 8 58 0 x 65 0 56 8 x 62 4 57 6 x 62 8 60 0 x 65 0 5...

Page 45: ...he Expanded setting expands the print area and decreases the margins Any part of the image that extends into the margin will be clipped When the Margins option is set to Expanded make sure that you al...

Page 46: ...l Info Error Messages Troubleshooting 2 Expanded 0 197 5 mm margin on each of three sides 1 57 40 mm margin on the fourth side for mono prints and 1 96 50 mm margin on the fourth side for color prints...

Page 47: ...he default is 6 seconds selectable from a range of 1 12 seconds To set auto load delay 1 Press Setup Menu Paper Option Menu Auto Load Delay 2 Choose the delay time 3 Press OK Save media When Save Medi...

Page 48: ...ess Setup Menu Paper Option Menu Auto Cut Menu Auto Cut 2 Choose On or Off 3 Press OK Auto Cut Delay Auto Cut Delay allows you to set a delay time before the printer automatically performs the auto cu...

Page 49: ...ut the media immediately To reset counter to zero and initiate auto cut 1 Press Setup Menu Paper Option Menu Auto Cut Menu Delay Status 2 Choose Reset Counter 3 Press Exit Dryer setting The printer dr...

Page 50: ...aper Satin 215g Medium Heat Fan On Production Xerox Universal Photo Paper Gloss 285g Medium Heat Fan On Fine Xerox Universal Photo Paper Satin 285g Medium Heat Fan On Fine Specialist Application Paper...

Page 51: ...Fire Retardant 250g Heat Off Fan On Production Xerox Banner Polyester 290mic Heat Off Fan On Production Xerox Matt Polypropylene Banner 185mic Heat Off Fan Off Production Xerox Matt Polypropylene Bann...

Page 52: ...e core Before printing be sure there is sufficient media left on the roll to do the print and advance the entire print past the dryer You can deter mine whether there is sufficient media by choosing F...

Page 53: ...ess Setup Menu User Setup Menu Select User 2 Scroll to the number for the user setting i e user 1 user 2 etc to use 3 Press OK Units Select Measurement units can be displayed in English or Metric To c...

Page 54: ...gs Pressing the Setup Menu User Setup Menu Init Settings buttons returns all printer options to the factory defaults All saved user settings are lost The table at the end of this chapter shows the pri...

Page 55: ...by setting the wiper to Off the default To turn on the wiper 1 Press Setup Menu Ink Option Menu Auto Wipe 2 Choose On 3 Press OK Cartridge spit interval Cartridge spitting helps to clear and prevent c...

Page 56: ...e DHCP protocol can be used to obtain a lease on an IP address The print server will request a permanent lease If you are using DHCP to manage IP addresses we recommend that permanent leases be assign...

Page 57: ...eat Hi Fans 9 Heat Hi 10 Heat Max Fans 11 Heat Max Margins Normal Expanded Edge Band Media Standard All US Eng US Arch ISO A Met Over A ISO B Special Graphic US All Met ALL Pass Correction Auto Pause...

Page 58: ...the option gives access to a menu with further options Items in bold are the default option Main Menu at a Glance MainMenu Load Media Cut Pause Reset Feed Media Menu Forward Media Counter Display Coun...

Page 59: ...or examine the print job Pressing Pause again will restart printing Reset clears the print buffer When cancelling a print first remove it from the computer s print queue then press the Reset button on...

Page 60: ...ia Counter provides access to additional options where the length of a roll of media 0 to 500 can be entered and the media counter reset Display Counter displays a screen where the current value of th...

Page 61: ...Auto Pause Off Carriage Speed 1 10 Print Direction Uni Bi Exit Paper Option Menu Supply Type Sheet Roll Roll2 Takeup Media Standard All US Engr USArch ISOA ISO B Special METOVERA Graphics USAll MetAll...

Page 62: ...3 User Setup Menu Select User 1 8 1 Save User 1 8 1 Units Select English Metric Language English German French Italian Spanish Portuguese Init Settings Print Settings LCD Contrast 1 8 5 8 is less cont...

Page 63: ...Tree Introduction Printer Options Menu Tree Technical Info Error Messages Troubleshooting 3 Service Menu at a Glance Bold indicates the default Service menu Calibration menu Diagnostics menu Color Tes...

Page 64: ...access to options for loading paper Dryer Menu provides access to a further menu in which you can select the dryer setting and preferences for drying the end of a plot User Setup Menu provides access...

Page 65: ...ity Mode provides access to a further menu to select the print mode Dots per Inch provides access to a selection screen for print resolution Print Passes provides access to a selection screen for prin...

Page 66: ...r media standard Margins provides access to a selection screen for margins Auto Load Delay provides access to a selection screen for auto load delay Auto Cut Menu provides access to a menu to activate...

Page 67: ...of a print job End of Plot EOP Dry ON with Rewind enables the printer to automatically advance the media at the printing speed 12 inches to allow the image to fully pass the heater The media is then f...

Page 68: ...number Default User 1 Units Select provides access to a further menu to choose the calibration units English default or Metric Language provides access to a further menu to select the language used f...

Page 69: ...l Info Error Messages Troubleshooting 3 Ink Option Menu Auto Wipe provides access to a further menu to turn the Auto wipe function Off or On default When On the cartridges are wiped during printing Sp...

Page 70: ...or Messages Troubleshooting 3 Network Menu IP Config Lets you set the IP address for the printer Restore Defaults Restores the printer s default IP address Network Info Displays the IP address IP subn...

Page 71: ...out of the service station for installing and replacing cartridges and the media cutter Calibration Menu provides access to a further menu for calibration options and diagnostics Display Settings disp...

Page 72: ...rther menu for choosing an individual cartridge to prime Serv Station Menu provides access to further menus for filling tubes and cleaning cartridges Clean provides access to further selections for cl...

Page 73: ...ting 3 Service Station Menu Vacuum Prime use this option to help clear cartridge clogs or air from the ink lines Pump On use this function to draw ink from the reservoir through the line fill cartridg...

Page 74: ...h tests are used for paper calibration Color Db Menu provides access to a further set of menus in which you can print the color deadband test pattern and set deadband velocity compensation for each ca...

Page 75: ...lib Menu Choose One Line Length Menu Feed Adjust Menu Exit Line Length Menu provides access to a screen for printing the line length test pattern and choosing line length value or image quality value...

Page 76: ...onds to the best vertical alignment in the test pattern for the C1 M1 C M and Y cartridges Horizontal provides access to a menu in which you can enter the number which corresponds to the best horizont...

Page 77: ...vides access to a further set of menus for performing diagnostics tech support only About provides information about the printer s firmware version BROM RAM and printer size Ink Status Menu provides a...

Page 78: ...r is greater INTERFACES 100BaseT Compatible RJ45 connector POWER 100 120 200 240 VAC 50 60 Hz Consumption 25 W Idle 1120 W Typical 1225 W Maximum OPERATINGENVIRONMENT 59 85 F 15 30 C 20 70 RH Non cond...

Page 79: ...ter Options Menu Tree Technical Info Error Messages Troubleshooting A Media for Dye based Ink Photographic Coated Film Indoor Indoor Outdoor Vinyl Specialty Fine Art Indoor Outdoor Media for Pigment b...

Page 80: ...ion If more than one alarm condition exists press the Next button on the Alarms menu to view other alarms If you cannot clear the error record the message and the sequence of events leading to the mes...

Page 81: ...EM value Your printer will not work with cartridges designated otherwise OEM type information is available in the About menu display and also in Disp Cart Info menu which is available in the Service m...

Page 82: ...OEM ID Be sure the ink bottle OEM value matches your printer OEM value Your printer will not work with ink bottles designated otherwise OEM type information is available in the About menu display and...

Page 83: ...board Main board errors will be displayed as MBID Error Code X X will be a specific error code number For all main board errors note the error code number and contact technical support for further as...

Page 84: ...roblems can be solved by checking for just three items Is the printer connected to a good power source Is the voltage switch on the back of the printer set correctly i e 115 230 Is the network functio...

Page 85: ...ue with the steps that follow 7 Print directly to the printer from several software applications 8 If you are networked login and try printing from several software applications 9 If steps 7 or 8 fail...

Page 86: ...dows applications naturally print slower than DOS applications Be sure the Windows Print Manager is turned OFF Takeup roll doesn t turn Be sure the media feed option is set to Takeup Takeup roll doesn...

Page 87: ...edia An obstruction in the path of the carriage assembly is hindering carriage movement The obstruction may or may not be visible Other common causes include dirty encoder strip media interference wor...

Page 88: ...let it dry completely before trying to operate the printer Check the belt for visible damage such as fraying and pieces coming off it Check the trailing cable cable that moves during printer operatio...

Page 89: ...contact on the cartridge and carrier Be sure it is clean and dry Be sure the cartridge is seated properly See the Quick Start Guide Check that ink is being fed through the delivery lines If necessary...

Page 90: ...x cable Dryer Disabled Condition under Sensor Status Check voltage switch position either 115V or 230V depending on region For a dryer set to 115V and operated at 230V line input the circuitry in the...

Page 91: ...hould be heard indicating the download was successful After a one second delay the printer will automatically reboot The printer should come up normally Verify the new firmware revision by sequencing...

Page 92: ...artridges Make sure the printer is positioned on level ground Use a higher quality print mode such as Ultrafine Be sure you are using genuine Xerox inks and media Cartridge spits small amounts of ink...

Page 93: ...rectly To change a specific drawing from monochrome to color or vice versa you must switch the Color Mono setting and re transmit the file Ink smears after removing the print Be sure the ink is dry be...

Page 94: ...rinted area This light area is ghosting By using the cartridge heaters to warm the cartridge in these non printed areas the change in temperature helps minimize ghosting STEPS TO MINIMIZE GHOSTING PAR...

Page 95: ...your application to save paper set the paper size to the next larger size for example if you are printing a C size image choose D size paper Be sure to set Save Media to ON This stops the printer from...

Page 96: ...oor vertical or horizontal line quality Perform color calibration See the Quick Reference Guide Data Transfer Printer doesn t generate a print Be sure your printer is connected to the port to which yo...

Page 97: ...server type ping system name and press Return This command checks that the network link between the print server and print client is set up correctly If the message says the system is alive the networ...

Page 98: ...t make sure the printer is configured properly On the print server make sure the printer is not waiting because of a fault Make sure the printer is not set up as a login terminal Application Software...

Page 99: ...is manual and still need assistance call the reseller where you purchased your printer Before you call technical support for help be sure that you have all of the following information available Print...

Reviews: