


12
│ Hardware Installation
OSD ( On-Screen Display ) Menu
The Settings and options in the OSD menu are categorized into 6
Categories : Color, Adjust, OSD, Setup, Function, Sound
1.
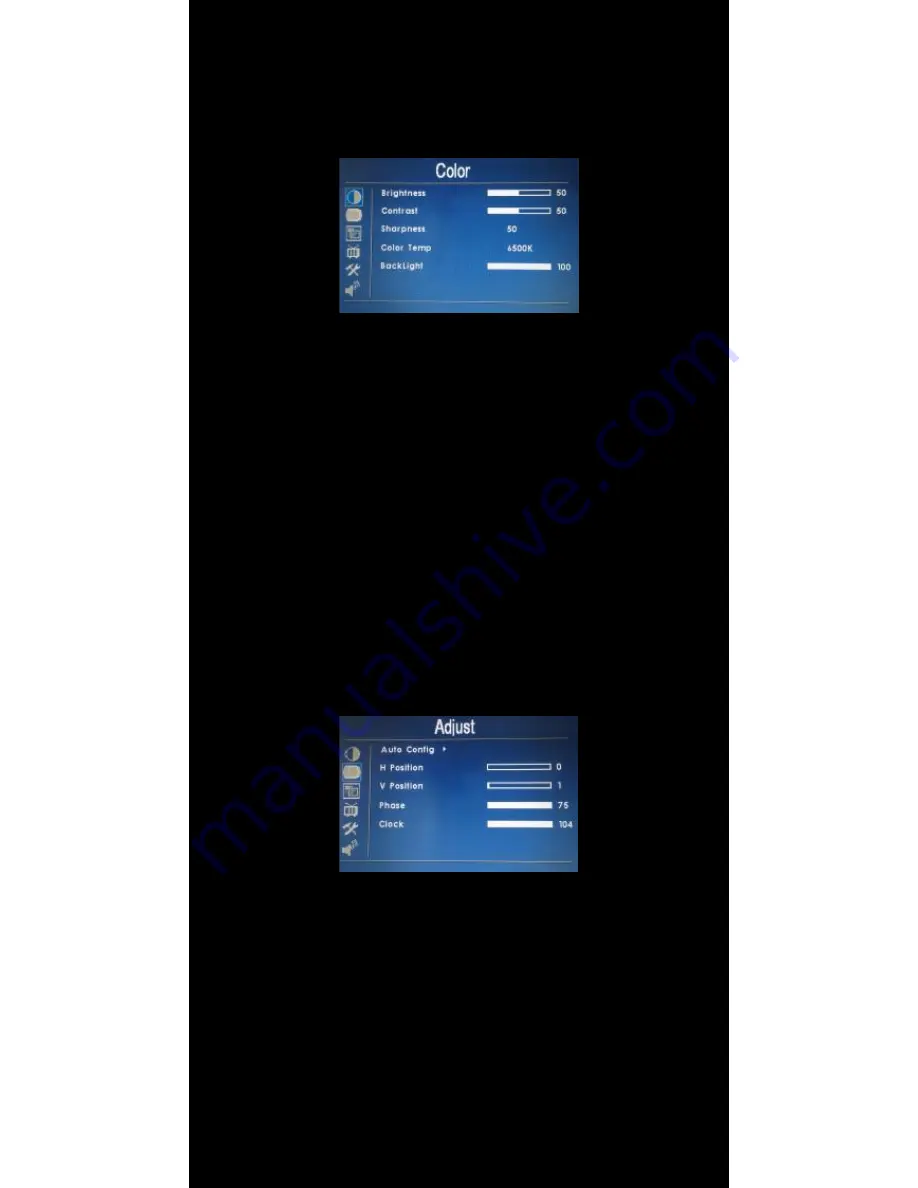
Colors
• Brightness : Adjust brightness by pressing Left ( ◄ ) or Right ( ► ) buttons.
Increase the number for a higher level of brightness. Decrease the number
for a lower level of brightness.
• Contrast : Adjust contrast by pressing Left ( ◄ ) or Right ( ► ) buttons.
Increase the number for a higher level of contrast. Decrease the number
for a lower level of contrast.
• Sharpness : Adjust sharpness by pressing left or right buttons. Press left
to decrease sharpness and right to increase the level of sharpness.
• Color Temp : Set the color temp to the desired setting : 6500K, 9300K
and User.
• Backlight : Adjust backlight intensity by pressing Left ( ◄ ) or Right ( ► )
buttons. Increase the number for a higher level of backlight output.
Decrease the number for a lower level of backlight output. Only works
when Auto sensor is turned off.
2.
Adjust
• Auto Config : Adjust display automatically.
• H Position : Adjust the Horizontal position by pressing the left or right
buttons.
• V Position : Adjust the Vertical position by pressing the left or right
buttons.
• Phase : Phase ( fine ) adjustment. Image flickering can be removed
through changing this setting (only valid for VGA setting )
• Clock : Adjust the horizontal sync width of the screen image.
Summary of Contents for 700CSH
Page 1: ...700CSH INSTALLATION MANUAL...


