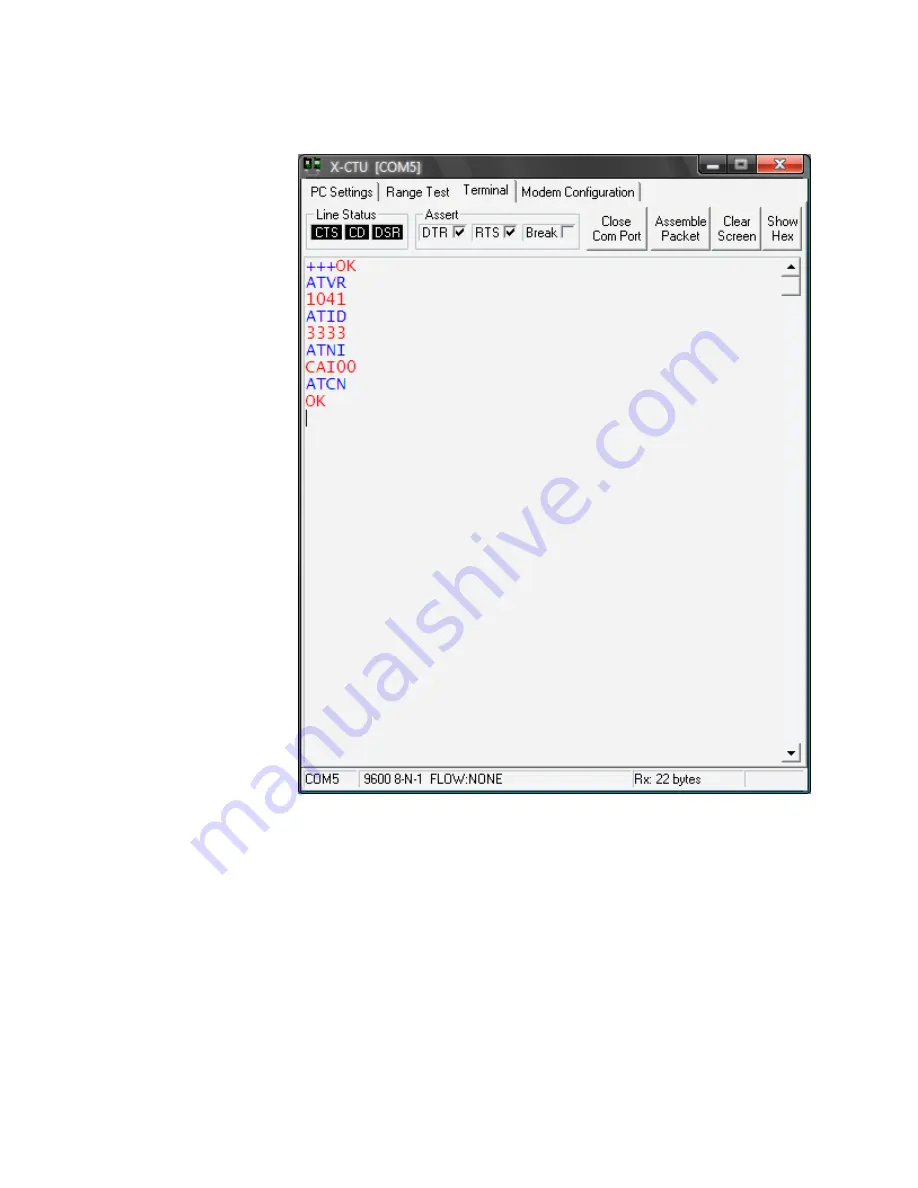
Step 5: Test the XBee
Read through this step
before you do it since
once you enter
command mode, you’ll
need to enter a new
command within 5
seconds or the XBee
will exit command
mode and you’ll need to
start this step again.
Click on the terminal
tab and type “+++” in
the window to enter
command mode. The
XBee should respond in
a second or two with
“OK”.
Type “ATVR” to check
the firmware version on
the XBee. This should
match the firmware
version that you
upgraded to (1241 for
Router/End Device or
1041 for Coordinator).
Type “ATID” to check
the PAN Network ID
that the XBee is using.
It should respond with
“123” or whatever unique PAN ID you set in step 4.
Type “ATNI” to check the Node Identifier. The XBee should respond with “router1” or
whatever unique Node Identifier you set in step 4.
Type “ATCN” to exit command mode. The XBee will respond with “OK”. If those commands
returned the correct information, then congratulations, you’ve successfully updated this XBee!
Quit the X-CTU program and disconnect the USB-miniB cable from the computer.
If any of those commands did not return the correct information, click back to the “Modem
Configuration” tab, change the desired settings, and click the “Write” button again.


