
CHART B: 4
Ohm Minimum Amplifier
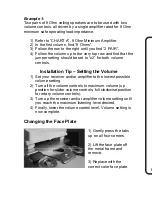
Example 1:
Two pairs of 8 Ohm ceiling speakers are to be used with two
volume controls, all driven by a single amplifier rated for 8 Ohm
minimum safe operating load impedance.
1) Refer to “CHART A”, 8 Ohm Minimum Amplifier.
2) In the first column, find “8 Ohms”.
3) Follow the row to the right until you find “2 PAIR”.
4) Follow the column up to the
jumper setting should be set to “x2” for both volume
controls.
Installation Tip – Setting the Volume
1) Set your receiver and/or amplifier to the lowest possible
volume setting.
2) Turn all the volume controls to maximum volume (up
position for slider volume controls, full clockwise position
for rotary volume controls).
3) Turn up the receiver and/or amplifier volume setting until
you reach the maximum listening level desired.
4) Finally, lower the volume control level. Volume setting is
now complete.
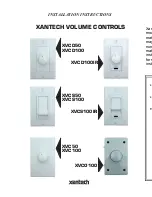
Changing the Face Plate
1) Gently press the tabs
up on all four corners.
2) Lift the face plate off
the metal frame and
remove.
3) Replace with the
correct color face plate.
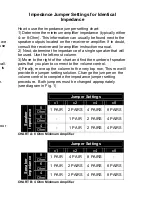
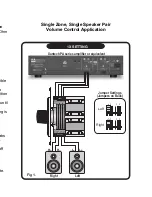
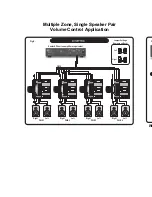
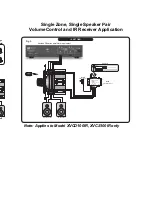
Single Zone, Single Speaker Pair
Volume Control Application
Left
Right
Xantech PA series amplifier or equivalent
1X SETTING
R+ R L L+
IN
PU
T
R+ R L L+
O U T P U T
R+ R
L L+
x1
x2
x4
x8
x1
x2
x4
x8
Jumper Settings
(Jumpers on Back)
Fig 1.
Left
Right


