INSTALLATION INSTRUCTIONS
EN85K
Ensemble
Surface Mount / TV Mount / Flush Mount/ Shelf Mount
Plasma LCD / LED / CFL Friendly
Convertible IR Receiver Kit
PRELIMINAR
Y
COPY
Page 1: ...INSTALLATION INSTRUCTIONS EN85K Ensemble Surface Mount TV Mount Flush Mount Shelf Mount Plasma LCD LED CFL Friendly Convertible IR Receiver Kit PRELIMINARY COPY PRELIMINARY COPY...
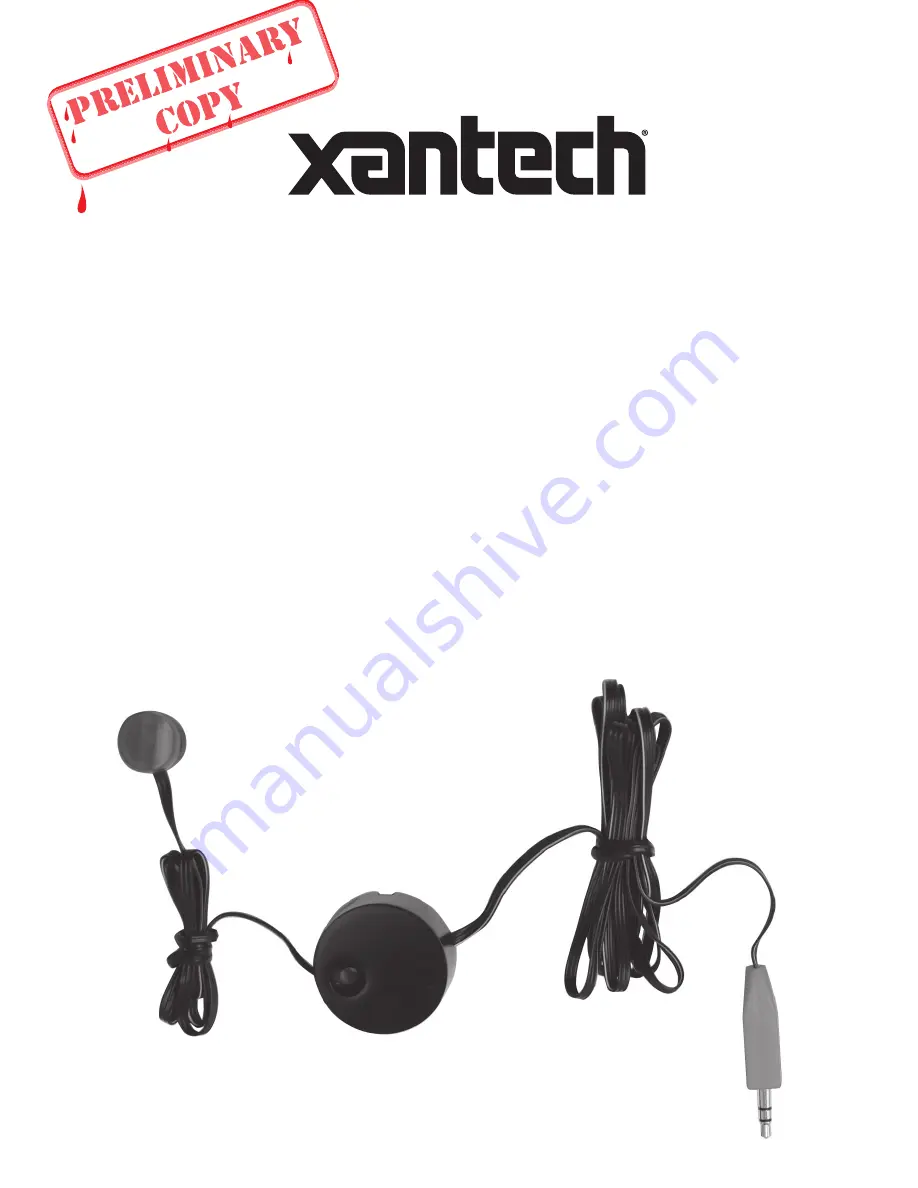
Page 2: ...eiver adapts and connects in minutes Please read the instruc tions in this manual carefully to enjoy arm chair control of your favorite audio video components FEATURES IR Receiver shelf mount flush mo...
Page 3: ...RGPS Power Supply The unique design of the EN85K allows the EN85 IR Receiver to be adapted to almost any surface mount flush mount or shelf mount application using the in cluded adapters The EN85 can...
Page 4: ...eiver Emitters and Power Supply all connect to the 789 44 Connecting Block The Connecting Block should be in the same location as the audio video components If the A V components are in a wall unit or...
Page 5: ...round to the back of the TV The Ribbon Cable can be secured to the TV with tape or a wire holder if necessary Do not block any TV vents 4 Using one of the included adhesive strips carefully attach the...
Page 6: ...pter Figures 2 3 4 Carefully flatten and wrap the 8 Ribbon Cable around to the back of the TV The Ribbon Cable can be secured to the TV with tape or a wire holder if necessary Do not block any TV vent...
Page 7: ...gure 8 Tabletop Adapter Remove Tighten Base To Connecting Block RCVR Jack Lens Rotate Clockwise to Tighten Rotate Counter clockwise to Remove 3 With the 8 Ribbon Cable on the IR Receiver facing up car...
Page 8: ...rol and the IR Receiver in normal use 2 Drill an 11 16 17 4mm diameter hole in the cabinet door Figure 9 3 Pinch the Adapter Locks together and carefully slide the adapter through the hole until the a...
Page 9: ...e Electronics Module to the inside of the cabinet 6 Carefully run the plug end of the Ribbon Cable to where the Connecting Block will be located Be careful not to pinch or strain the cable If this is...
Page 10: ...Block Connect the red IR Receiver plug to the red Connecting Block jack 3 Carefully position the 283D IR Emitters over the IR Eye on each audio video component to be controlled If the eye is not obvio...
Page 11: ...LE THIS WILL REDUCE THE SENSITIVITY OF THE IR RECEIVER AND VOID THE WARRANTY IF IT IS NECESSARY TO EXTEND THE WIRE LENGTH TO THE CONNECTING BLOCK EXTEND THE WIRE THAT RUNS BETWEEN THE ELECTRONICS MODU...
Page 12: ...bon Cable OK to Add Length Electronics Module Hand Held IR Remote When adding wire length confirm that the IR Signal 12VDC and GND wires are properly connected to both the IR Receiver and Connecting B...
Page 13: ...the Wire sections The Main Room IR Receiver gets connected using the red 3 5mm mini IR RCVR jack on the 789 44 Connecting Block and the multi room receiver s get connected to the screw terminals on t...
Page 14: ...into Connecting Block Test Emitter and verify wiring 3 Signal wire between IR Re ceiver and the Connecting Block is open Recheck wiring 4 Power Supply not putting out proper voltage Verify supply is a...
Page 15: ...tromag netic interference This can be due to light dimmer controls or other radiating electronic devices PC s or any poorly shielded electronic device Reposition the IR Receiver and or cabling away fr...
Page 16: ...e 4 EMI induced noise electromag netic interference This can be due to light dimmer controls or other radiating electronic devices PC s or any poorly shielded electronic device Reposition the IR Recei...
Page 17: ...er causes a filter effect due to accumulated capaci tance of the wire Intermittent or no IR control could actually be because of the longer wire runs Putting a 470 ohm resistor in paral lel at the Con...
Page 18: ...is correct but the signal is overpowering the unit or there is bleed through from other Emitters close by Reposition the Emitter so it is not directly over the IR eye to reduce the amount of IR signal...
Page 19: ...tep 2 NOTE In most cases this will indicate the Power Supply is good but in some cases the Power Supply can still be bad i e reads good when not plugged in but may not be able to handle the current lo...
Page 20: ...es Some states do not allow the exclusion or limitation of incidental or consequential damages so the above limitation may not apply to you This warranty gives you specific legal rights You may have a...