background image

6-6  Maintenance and Specifications

The fuser becomes very hot during operation. 

Always

 allow the fuser to cool

completely before opening the fuser cover. If a paper jam occurs in the fuser area, turn
off the printer and wait at least 30 minutes before attempting to clear the jam.

2.

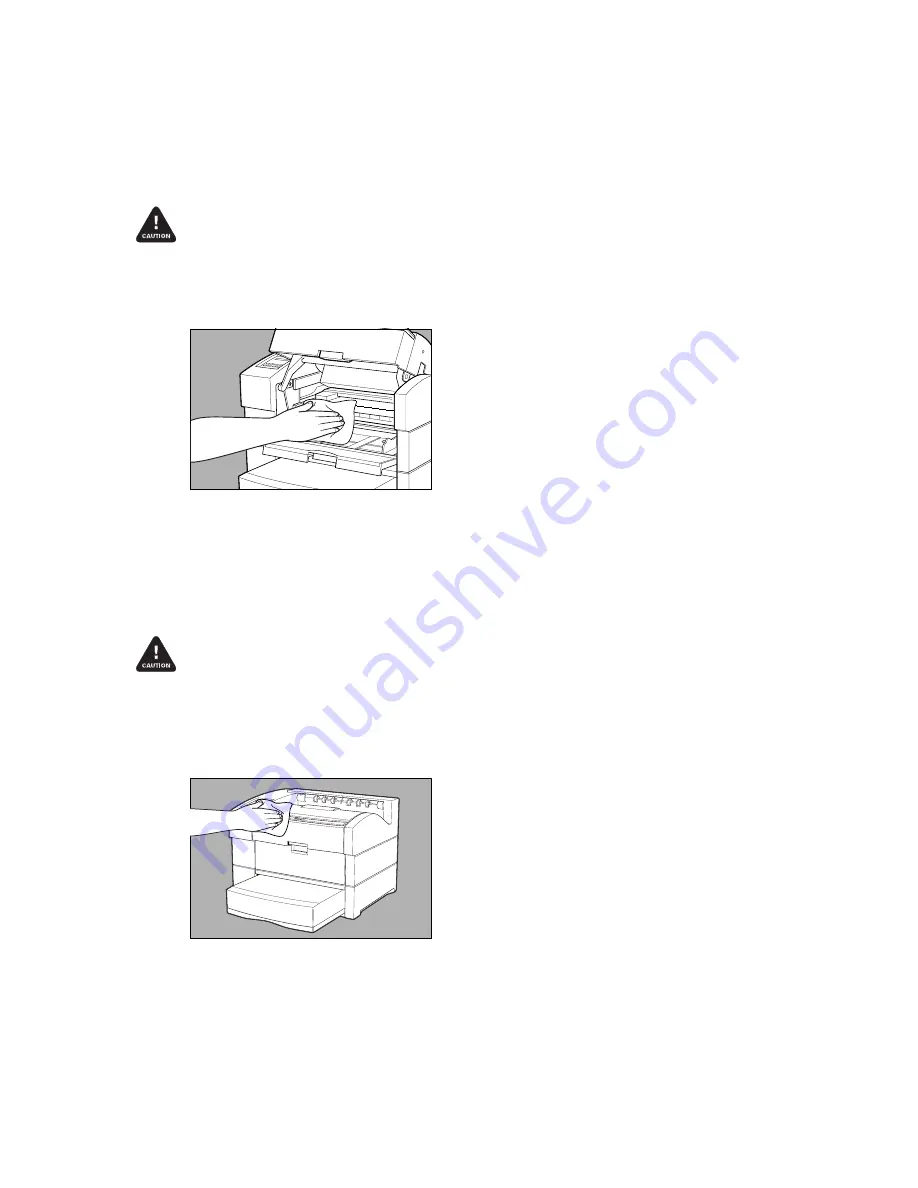
Remove any paper scraps and wipe off paper and toner dust with a dry clean
cloth (fig. 6.3).

Fig. 6.3  Toner and Manual Feed Area Cleaning

3.

Reassemble the printer and reconnect it to the power source.

Exterior Cleaning 

1.

Turn off your printer and disconnect it from the power source.

Use only water or mild detergent for cleaning. To prevent discoloration, cracking, and
deformation of the case, do not use alcohol, ammonia-based cleaners, or other volatile
cleaners on or around the printer. Never spray or pour solutions directly on the
printer. Always put the solution on the cloth and wipe the printer with the cloth.

2.

Clean the printer’s exterior using a clean, lint-free cloth dampened with water
(fig. 6.4).

Scale 75%

Fig. 6.4  Exterior Cleaning

Summary of Contents for Accel-a-Writer 4

Page 1: ...left sides At the end of the day turn off the printer following the procedure in chapter 1 Never move the printer with the toner cartridge installed Do not place anything on top of the printer Always...

Page 2: ...nter using the recessed grip areas on the right and left sides 1 Turn off the printer then unplug the power cord from the power source 2 Remove all media from the multipurpose feeder and close it and...

Page 3: ...unning smoothly and avoid unnecessary problems perform the following cleaning steps monthly Also clean the printer inside after removing a paper jam or replacing the toner cartridge Fuser Assembly Cle...

Page 4: ...ller To prevent printer damage wipe area lightly do not rub 7 Vacuum the area using a soft brush attachment or blow compressed air into the printer Wear protective safety glasses when using compressed...

Page 5: ...6 Lower the roller back into place with the gear end to the left Make sure the lever protruding below the transfer roller fits inside the small opening on the door 7 Push the roller into its holding c...

Page 6: ...leaning 3 Reassemble the printer and reconnect it to the power source Exterior Cleaning 1 Turn off your printer and disconnect it from the power source Use only water or mild detergent for cleaning To...

Page 7: ...ximum 580 W Running Maximum 5 W Pause Mode 6 5 Amps 220 240 V Version 220 VAC Maximum 580 W Running Maximum 5 W Pause Mode 50 60 Hz 47 63 Hz 3 2 Amps Noise Level Printing less than 49 5 dB without Dup...

Page 8: ...Screening Technology More X ACT Accurate Calibration Technology patented Densitometer support Toner cartridge 7 000 sheets letter 5 coverage Printer Memory Requirements Memory requirements vary depend...

Page 9: ...for users in the United States and Canada XANT provides a one year limited warranty against defects in material and workmanship on your printer See Limited Warranty later in this chapter To obtain war...

Page 10: ...urchase This warranty does not apply if the product has been damaged by accident abuse misuse misapplication or if the product has been modified without the written permission of XANT CORPORATION XANT...

Page 11: ...call your preferred XANT dealer or your XANT Consumables Sales Representative at 800 540 7091 US and Canada Your warranty and maintenance contracts are not affected by using non XANT products However...

Page 12: ...6 12 Maintenance and Specifications...

Reviews: