9
99
99
8
88
88
H
H
H
H
H
OOKING
OOKING
OOKING
OOKING
OOKING
UP
UP
UP
UP
UP
THE
THE
THE
THE
THE
A
A
A
A
A
UDIO
UDIO
UDIO
UDIO
UDIO
R
R
R
R
R
ECEIVER
ECEIVER
ECEIVER
ECEIVER
ECEIVER
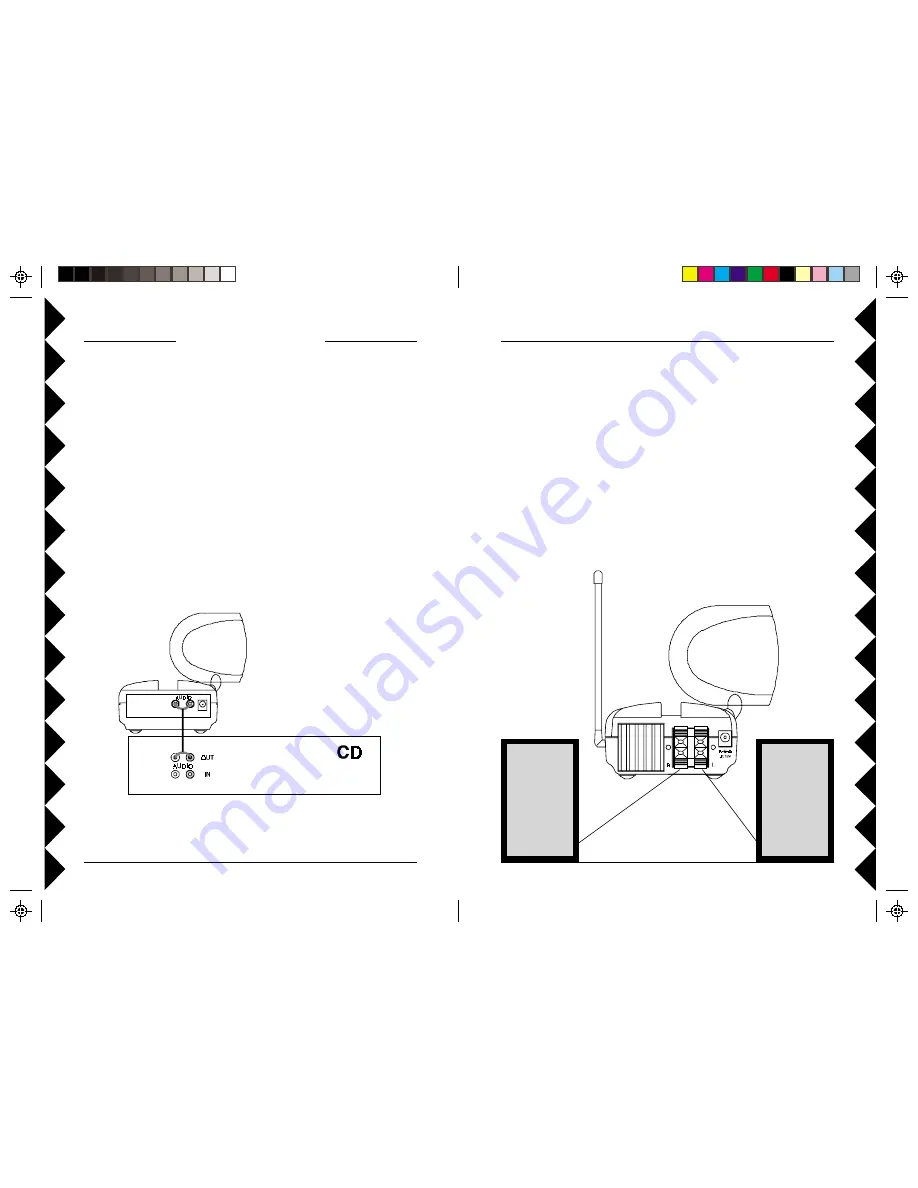
1. Using speaker wire (not included) connect the left channel output
to your left speaker and the right channel output to your right
speaker (speakers not included). You can use any speakers rated
at 4 to 8 Ohms, and a minimum power rating of 10W.
2. Set the channel switch (on the BOTTOM of the unit) to channel A
(to the LEFT).
3. Plug the Audio Receiver's Power Supply (the larger of the two
power supplies) into a 120 volt wall outlet and plug its jack into
the Audio Receiver.
4. Position the Audio Receiver in a convenient location and orient
the antenna so that the flat side points in the direction of the
room where you set up the Audio Sender.
C
C
C
C
C
ONNECTING
ONNECTING
ONNECTING
ONNECTING
ONNECTING
U
U
U
U
U
PPPPP
H
H
H
H
H
OOKING
OOKING
OOKING
OOKING
OOKING
UP
UP
UP
UP
UP
THE
THE
THE
THE
THE
A
A
A
A
A
UDIO
UDIO
UDIO
UDIO
UDIO
S
S
S
S
S
ENDER
ENDER
ENDER
ENDER
ENDER
1. Connect the jack on the audio cable (supplied) to the audio out
jack on your CD player, stereo, PC sound card, etc.
2. Connect the red RCA plug to the socket labelled AUDIO RIGHT
and the white RCA plug to the jack labeled AUDIO LEFT on the
Audio Sender.
3. Set the channel switch (on the TOP of the unit) to channel A (to the
RIGHT).
4. Plug the Audio Sender's Power Supply (the smaller of the two
power supplies) into a convenient 120 volt wall outlet and plug its
jack into the Audio Sender.
5. Position the Audio Sender in a convenient location and orient the
antenna so that the flat side points in the direction of the room
where you will be installing the Audio Receiver/Speaker Driver.
P


