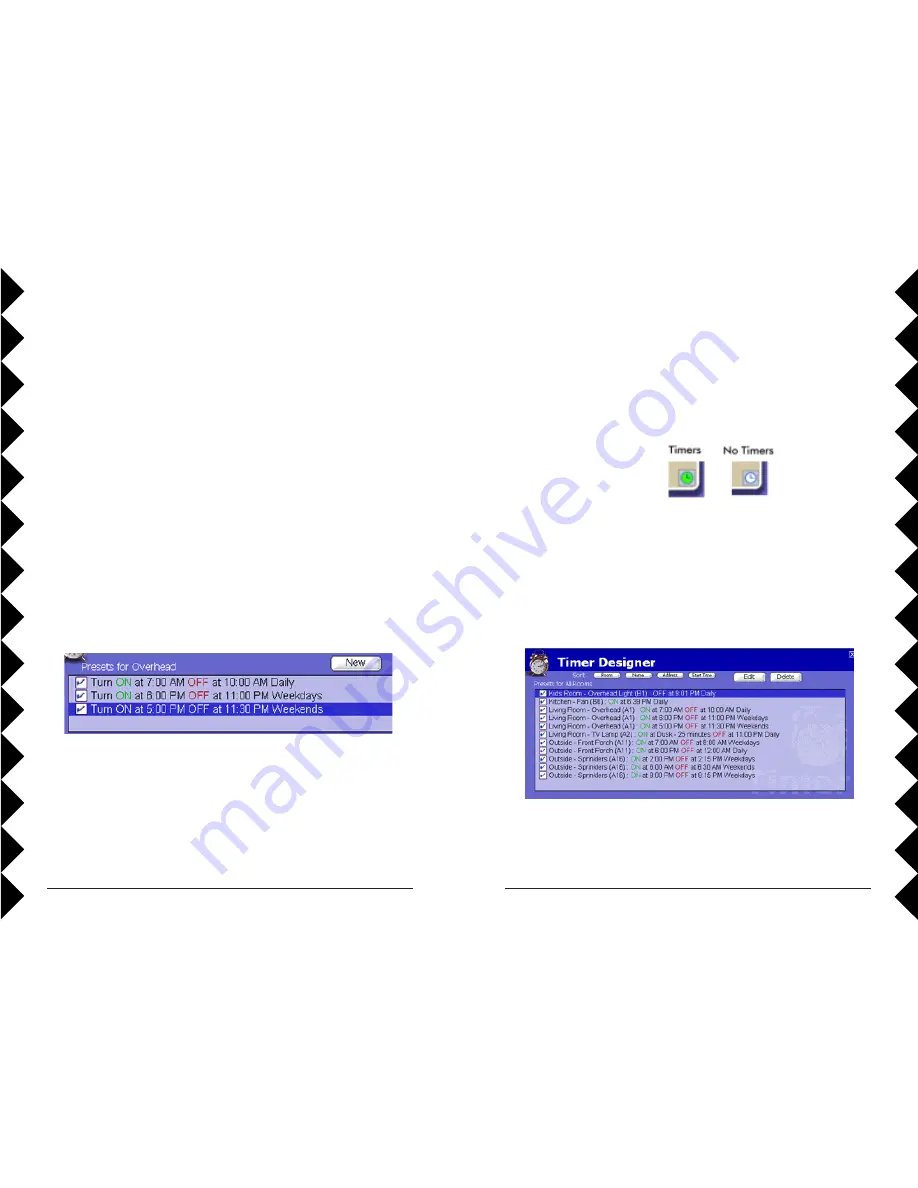
background image

25

24

Timer Summary View

The Timer Summary View is a way to look at all of your scheduled
timers, either room by room, or all rooms at once. To open the Timer
Summary, click on the Timers bar in the Tree Pane, when you have
no module selected. This will open the summary for the current
room. If you have the summary open and click the Rooms bar in the
Tree Pane, you’ll open a summary for all of your rooms, as seen
below.

C

REATING

 T

IMED

 E

VENTS

In the Summary View you can check or uncheck timers to turn them
on or off, and delete timers as well. Use the 

Room

Module

,

Address

, and 

Start Time

 buttons to change the sort order of the

timer listing.

Saving Timers

When you adjust the setting for your timers, the changes are saved
automatically. You can tell which modules have timers saved by
looking at the clock icon on the module: a green clock faces indicates
that module has timer settings; a white clock face means that module
has no timers scheduled.

C

REATING

 T

IMED

 E

VENTS

You can choose to use both Dusk and Dawn settings, or just one, but you
can only have one On command active at a time. When you use a Dusk or
Dawn setting, you don’t have to use the exact time; you can enter a time
into the box, and then choose to have your timer happen before or after
Dusk or Dawn.

The two “Make Active...” buttons are a quick way to have a module only
on during the day or night. A light that’s active during the day will turn on
at Dawn and turn off at Dusk. One that’s active at night will do the
opposite.

When you use Dusk and Dawn times and store your timers in the
ActiveHome Pro interface, you can end up using a lot of space. If you don’t
have too many modules, it won’t be a problem. If you use a lot of timers or
have a lot of modules in your home, it may be helpful to group your Dusk
and Dawn activities in a 

Macro

, and then schedule the Macro at the

appropriate time.

Timer List

When you’re in the Timer Designer, all of the timers for that module are
listed in the text box at the top of the pane.

The list describes each timer, and when it occurs. If you don’t want a
timer to be active, just uncheck the check box in front of it. To delete
a timer, highlight it and click the Delete button.

Summary of Contents for ActiveHome Pro CM15A

Page 1: ...1 OWNER S MANUAL Please keep for future reference MODEL CM15A ActiveHome Pro USB 2 Way Home Automation System...

Page 2: ...nformation after you install updates since it will always be more up to date Controllers and Modules The first thing you need to understand is that there are two different devices you need to control...

Page 3: ...iance Modules 18 Macros 18 Special Modules 19 Two Way Modules 19 Creating Timed Events 20 Opening the Timer Designer 20 Creating a New Timer 20 Setting Up Timers 21 Timer List 24 Saving Timers 25 Time...

Page 4: ...should have the interface and a USB cable HARDWARE SETUP Disable or turn off your anti virus software before you install the software as some anti virus programs interfere with the installation Remem...

Page 5: ...Setup Hardware Setup Plug in the CM15A Interface wait until the installation program asks you to connect it Plug the Interface into an AC outlet near your PC Insert four AAA alkaline batteries in the...

Page 6: ...to the room creation window Type the name of the room in the box then choose a color for the modules in that room Each room can have its own color so it s easier to tell modules apart in the Room Vie...

Page 7: ...o describe a module s location or how you normally use it Choose the category of module to add Lamp Appliance etc and then use the drop down menu to select the exact model number of the module you re...

Page 8: ...ule LM14A 2 Way Lamp Module LM15A Socket Rocket LM465 Lamp Module SL575 Screw in Lamp Module WS12A Decorator style Wall Switch Module WS14A Decorator style Companion Switch WS467 Wall Switch Module Ap...

Page 9: ...you click on the Recycle Bin it opens its contents in the Room View where you can then restore deleted items or remove them permanently from ActiveHome Pro CONFIGURATION Getting Data from Previous Ver...

Page 10: ...are in the Room View you have direct control of the lamps appliances and other modules in your ActiveHome Pro configuration These controls are in the on screen representation of the module Modules of...

Page 11: ...he arrows to scroll through dates or type the month and day in directly CREATING TIMED EVENTS Scheduling events for specific times and dates is one of the most powerful features in ActiveHome Pro Each...

Page 12: ...ust to later sunset times in the summer and shorter days in the winter In order to use Dusk and Dawn settings you should set your city or latitude and longitude information in the Configuration menu C...

Page 13: ...use both Dusk and Dawn settings or just one but you can only have one On command active at a time When you use a Dusk or Dawn setting you don t have to use the exact time you can enter a time into the...

Page 14: ...ar time 3 You can press a button on any X10 Controller or remote control to trigger the Macro 4 You can set an X10 motion detector to send the Macro trigger command to trigger the Macro when someone w...

Page 15: ...es in the selected room Change rooms using the drop down list and the modules will change USING MACRO EVENTS In the room list dimmable modules lamps are shown with a light blue title bar Appliance Mod...

Page 16: ...older pane You can also add a macro from the Edit menu or by right clicking in a room and choosing Add Macro from the pop up menu When you create a new Macro you start in a blank Macro Editor window T...

Page 17: ...which only works if the module is already on Here we ll set the Small Light to turn on to 70 percent Step 1 Macro Information First name your macro Click into the Macro Name box and type a new name In...

Page 18: ...window to see what s happening in your macros Step 5 Extending Over Time One useful thing you can do with macros is use them to turn a set of lights on for you to use them then turn them off automatic...

Page 19: ...without needing any attention from you You can also set up a schedule for another location and move the interface where you need it even if there s no computer there The Timers and Macros will be sto...

Page 20: ...an easy way to automate all of your X10 controlled lights and appliances ActiveHome Pro s Lifestyle Mode learns from you Instead of programming timers and macros Lifestyle mode watches the things you...

Page 21: ...to get rid of all of the items in the Recycle Bin you can right click the Recycle Bin and choose Empty Recycle Bin from the pop up menu You can also use the Tools Menu to perform the same action Click...

Page 22: ...em to allow you to control each module separately An X10 address consists of two parts the House Code and the Unit Code House Codes A House Code is the part of the X10 address the assigns a module to...

Page 23: ...rt your Windows CD When all these steps are done the driver will be updated and the screen will say you re finished For more help with setup please visit http www x10 com support Troubleshooting If yo...

Page 24: ...Heavy Duty Module HD245 to control 220V appliances such as air conditioners and water heaters Expanding Your System EXPANDING YOUR SYSTEM In addition to regular Lamp Modules and Appliance Modules etc...

Page 25: ...ipment try to correct the interference by one or more of the following measures Reorient the antenna of the radio TV experiencing the interference Relocate the equipment with respect to the radio TV M...

Reviews: