21
seat and seat barrel as one piece.
3.
Location of brake safety connection: You should see a box with several wires coming out of
it. You will also see these wires go into quick disconnects and locate a 4 wire plug. There will
only be one and on the controller side of the connector the wire colors are: Yellow, Red,
Black and Green. On the opposite side the colors are Blue, Green with Yellow stripe, Gray
and Green. Unplug the connector and locate the Blue wire, on the opposite side of the wire
goes into the male connector we will need to unlock the gold pin to remove the wire from the
controller.
How To Adjust Drum Brakes
1.
Loosen the brake handle adjustment on handlebars to fully outward. Locate the brake cable
adjustment screw and screw this in all the way.
2.
Follow your brake cable to the brake caliper. There will be a small nut holding the metal
cable to the caliper arm. Loosen this nut, move the brake arm while holding the cable tight
until the brake just starts to drag when the tire is turned off the ground. Tighten the lock nut
back down onto the cable.
3.
Next fine tune the adjustment by screwing the cable tension screw outward to pull on brake
line until proper braking is achieved.
4.
Lock this position down by tightening the nuts.
5.
Avoid adjusting brakes on handlebars because there is a safety switch built into the handles to
kill motor while using the brakes.
How To Install Bearings
1.
Remove the rear wheel.
2.
Remove the old bearing. To do this, you will need to insert something, like a screw driver,
from the opposite side and simply push it out.
3.
Put the new bearings in. You will want to use something like a rubber mallet so you do not
crack the bearings. Set the wheel on a flat, absorbent surface, like a work bench. Tap the
bearing into the wheel evenly.
4.
Re-install the tire and test ride.
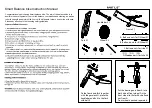
How To Align Front Forks
1.
Remove the dash on the backside. Find the 12mm bolt in the center of the handlebars and
loosen it.
2.
Take a hammer and hit this bolt. Stand with the front tire between your legs. Hold the tire
Summary of Contents for XB-502
Page 7: ...7 Product features ...
Page 31: ...31 Controller Connector Placement Wiring Diagram ...
Page 32: ...32 Voltmeter Connection Diagram ...
Page 33: ...33 Rear Motor Diagrams ...
Page 34: ...34 ...
Page 35: ...35 Battery Wiring Diagrams ...


