background image

EN

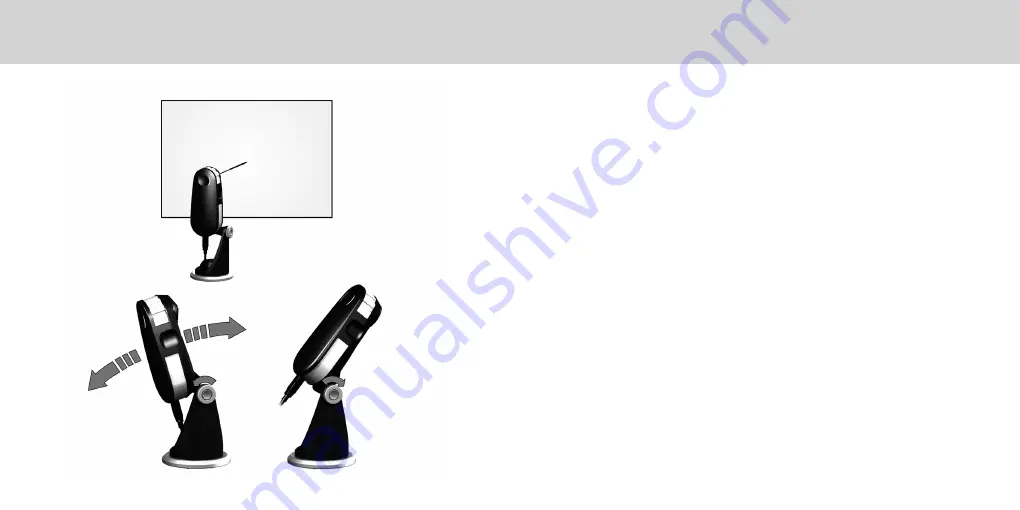
Projector Measurement

Setup the 

i1

Pro device for projector measurements. 

1.   Place the 

i1

Pro device on the tripod holder next to the projector or at a distance in 

front of your screen.

2.   Open the locking screw on the tripod holder and adjust the angle of the 

i1

Pro 

device. The limiting aperture of the 

i1

Pro should point towards the center of your 

screen. Close the locking screw once the device is in the right position.

3.   Adjust the lighting of your room to the same conditions as you will use for the 

projector and presentation.

4.   Configure your software for projector measurement and follow the instructions on 

the screen.

Summary of Contents for i1Pro

Page 1: ...Quick Start Guide Kurzanleitung Manuel de d marrage Guida introduttiva Gu a de inicio r pido Guia de In cio R pido...

Page 2: ...EC LVD 2006 95 EC FEDERAL COMMUNICATIONS COMMISSION NOTICE NOTE This equipment has been tested and found to comply with the limits for a Class B digital device pursuant to Part 15 of the FCC Rules The...

Page 3: ...rating the Device 14 Scan Measurement 16 Single Pass Scan Measurement 20 Dual Pass Scan Measurement 22 Spot Measurement 24 Display Measurement 26 Ambient Light Measurement 28 Projector Measurement 32...

Page 4: ...erformance Quick Start Guide Tripod Holder optional 2 Ambient Light Measuring Head optional 3 Protection Cover optional 4 Display Holder 5 Positioning Target 6 Calibration Plate 7 Measurement Device 8...

Page 5: ...photometer 1 2 3 4 5 6 7 8 Reference Gap for Ruler Mount Positioning Sensor Limiting Aperture Measurement Button Status Indicators Type Label with Serial Number Mounting Interface for Accessories USB...

Page 6: ...ou start using your new device For more detailed information please refer to Contents on the software DVD 3 Remove the Install software and read manual before first use warning sticker and the positio...

Page 7: ...ol the device is not installed on your computer In the third case the device can still be used in compatibility mode with software supporting older revisions of the i1Pro device solid white The device...

Page 8: ...bration plate The device must seat firmly on the calibration plate 3 Set the software for calibration of the device and press the measurement button Status indicator lights switch off during calibrati...

Page 9: ...ut OBC X Rite Optical Brightener Compensation The Status Indicators on the i1Pro device guides you through the measurement process Dual pass scan measurements require the aluminum ruler which includes...

Page 10: ...ake sure that the positioning pins on the carriage slide into the reference gaps on the bottom of the i1Pro device Double check that the i1Pro device seats firmly in the carriage 5 During scanning mea...

Page 11: ...of a different row Check if the row you measured is the row the software is expecting 5 Position the ruler with the device in front of the next row of your test chart and measure the next row 1 Make...

Page 12: ...will measure the row with the UV illumination only If successful you can proceed to the next row 2x green flash the dual pass measurement of a row was successful 1 Make sure that your device is calibr...

Page 13: ...target by inserting the mounting connector on the positioning target in the mounting interface at the rear of the i1Pro device 2 Configure your software to take spot measurements 3 Position the devic...

Page 14: ...er to the correct length 2 Mount the i1Pro measurement device on the display holder by inserting the mounting connector on the display holder in the mounting interface at the rear of the i1Pro device...

Page 15: ...ient light measuring head rotate the measuring head counterclockwise until the arrow on the protection cover points to the unlocked marking on the tripod holder 2 Attach the ambient light measuring he...

Page 16: ...ipod holder base plate into the screw nut on the bottom of the tripod holder Turn the tripod holder base plate clockwise until the tripod holder is fastened to the tripod holder base plate If you are...

Page 17: ...n the tripod holder and adjust the angle of the i1Pro device The limiting aperture of the i1Pro should point towards the center of your screen Close the locking screw once the device is in the right p...

Page 18: ...clean it and the inside of the limiting aperture 1 To remove the limiting aperture turn it clockwise until the arrow points to the unlocked position on the i1Pro device 2 Remove the limiting aperture...

Page 19: ...problem In this case please perform the following steps 1 Launch i1Diagnostics Software 2 Perform a functionality check by following the instructions given from the i1Diagnostics Software 3 If i1Diagn...

Page 20: ...zed X Rite service center Proof of purchase in the form of a bill of sale or receipted invoice which is evidence that the unit is within the Warranty period must be presented to obtain warranty servic...

Page 21: ...M1 UV excluded Filter ISO 13655 2009 measurement condition M2 OBC Optical Brightener Compensation OBC with i1Profiler software Calibration Manual on external ceramic white reference Measurement backgr...

Page 22: ...ort requires either 2 video cards or a dual head video card that supports dual video LUTs being loaded User must have Administrator rights to install and uninstall the application Important note The X...

Reviews: