


10
13
”
Grass Trimmer/Edger
EN
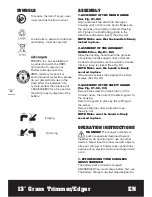
To reduce the risk of injury, user
must read instruction manual
Li-Ion battery. separate collection,
and battery must be recycled
POSITEC Inc. has established
a partnership with the RBRC
Corporation to recycle any
Positec batteries with the
RBRC-call2recycle seal. For
environmental protection, please
do not discard batteries in the
trash. After the batteries’ life
cycle is ended, then please call
1.800-822-8837 for a free service
that will properly dispose of the
battery.
Edging
Trimming
symBoLs
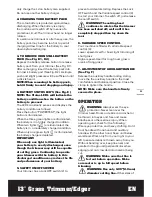
AssEmBLy
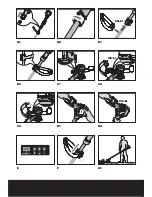
1. ASSEmBly oF THE mAiN HANdlE
(See Fig. A1, A2)
Align and insert the shaft into the upper
housing until a click can be heard. Make sure
the grooves are correctly matched. (See Fig.
A1). Tighten the shaft locking knob in the
direction indicated to lock
(See Fig. A2).
NoTE: make sure that the handle is firmly
locked in place.
2.ASSEmBly oF THE AuxiliARy
HANdlE (See Fig. B1, B2)
Slide the auxiliary handle onto the grooves
of auxiliary handle support until a click can
be heard. And make sure the auxiliary handle
locking clamp is closed. (See Fig. B1)
NoTE: make sure the handle is firmly
secured in place.
If the handle is loose then tighten the 2 side
screws. (See Fig. B2)
3. ASSEmBly oF THE SAFETy GuARd
(See Fig. C1, C2, C3)
Remove the screw from the bottom of the
trimmer head - then attach the safety guard to
the housing.
Secure the guard in place by the refitting of
the screw.
Remove the line cutter protection tape.
(See Fig. C3)
NoTE:
make sure the Guard is firmly
secured in place.
opErATIoN INsTruCTIoNs
wARNiNG!
The charger and battery
pack are specially designed to work
together so do not attempt to use any other
devices. Never insert or allow metallic objects
into your charger or battery pack connections
because of an electrical failure and hazard will
occur.
1. BEFoRE uSiNG youR CoRdlESS
GRASS TRimmER
The battery pack included is shipped
UNCHARGED. You must charge before first use.
The battery charger supplied was designed to
Summary of Contents for WG190
Page 2: ......
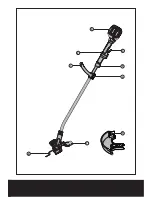
Page 3: ...2 3 1 6 8 7 5 9 4...
Page 4: ...Click Click Click A1 A2 B1 B2 C1 C2 C3 D1 D2 E F G1...
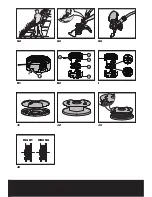
Page 5: ...RIGHT WRONG 15 10 11 12 13 14 G2 G3 G4 H1 H2 I J1 J2 J3 J4...
Page 35: ......