


HANGZHOU WORLDE DIGITAL PIANO CO.,LTD HANGZHOU WORLDE MUSIC ELECTRONIC CO., LTD
WEBSITE: WWW.WORLDE.COM.CN EMAIL:[email protected] TEL:86 571 88730848
(1)Press CTRL ASSIGN button and the LED displays “CH0”.
(2)Rotate R1 dial.
(3) Input and confirm the No. with Value Dial. The numbers are the controllers(The controller value will be displayed when you exit Assign mode).
(4)Press the “Enter” button to confirm and the LED will display “Done”. It will be saved and displayed for the current value after resetting.
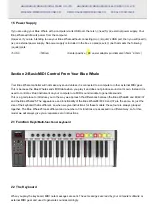
2.5.3 PITCH AND MODULATION TOUCH STRIPS
If you touch the Pitch bend strip at its center and move your finger forward or backward it will alter the pitch of the played
sound. The range of the pitch bend is determined by the preset that has been selected.
Similarly, moving your finger along the Modulation strip alters the modulation amount of the played sound. The level of
modulation introduced by activating the modulation strip depends on which preset is selected.
2.5.4 ASSIGNABLE PEDAL
2 pedal interfaces that can be assigned controller No. independently. First press the ”assign” button. Then operate the
pedal to select it, and the LED shows the controller number and the controller value. Input the No. with Value Dial when
the pedal is selected. You need to use enter to confirm the data. Operation steps are same as 2.5.2.
2.5.5 PAD SETTING
Activate a pad and press the Ctrl Assign button, the LED will display the currently assigned controller
of the pad. The controller number 128 is for pad note. Rotate the Value Dial to edit the Pad note. Enter the new pad
number you want the pad to be assigned with the Value Dial. For example: if you want to assign PAD1 to control 34,
operation steps are shown as below:
(1) Press CTRL ASSIGN button and the LED displays “CH0”.
(2) Trigger Pad1.
(3) Input and confirm the No. with Value Dial. The numbers are the controllers(The controller value will be displayed when you exit Assign mode)..
(4) Press the “Enter” button to confirm and the LED will display “Done”. It will be saved and displayed for the current value after resetting.
Section 3. Advanced Settings
3.1 How to make good use of the keyboard
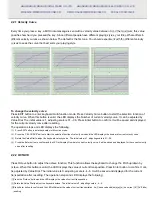
3.1.1 DUAL
Press EDIT button to enter keyboard multi-function mode. Press “Dual” button to start the Dual function. When Dual is
ON, the LED displays the ‘ON', Keyboard sends MIDI info of two channels, with the voice/channel of both channels are
adjustable. The 2nd voice and channel of 2 layer can be adjusted currently (Dual is ON).
Dual and Split cannot be used at the same time. When Dual is ON, Split is OFF. The operation steps and the LED
displays the following:
(1) Press EDIT button to enter keyboard multi-function mode.


