5
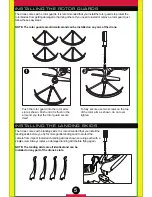
INSTALLING THE ROTOR GUARDS
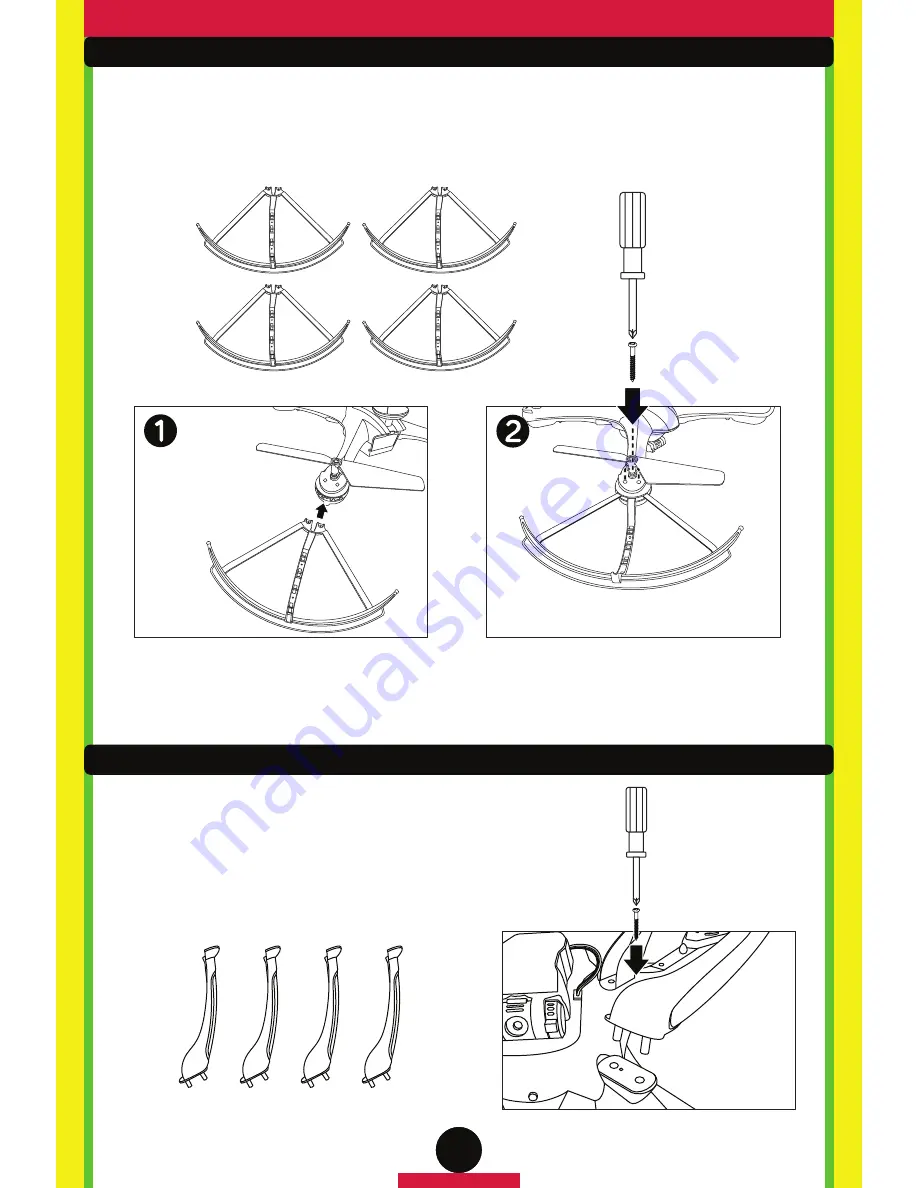
The drone comes with 4 rotor guards. It is recommended that you install the rotor guards to protect the
rotor blades from getting damaged or harming others. If you need to install or remove a rotor guard, just
follow these easy steps.
NOTE: The rotor guards are all identical and can be installed on any arm of the drone.
INSTALLING THE LANDING SKIDS
The drone comes with 4 landing skids. It is recommended that you install the
landing skids before you fly for more gentle landings and to protect the
camera from impact. Install each landing skid as shown securing each with a
single screw. Always replace a damaged landing skid before flying again.
NOTE: The landing skids are all identical and can be
installed on any part of the drone’s slots.
Push the rotor guard into the rotor arms
slot as shown. Push until it is flush in the
arm and you feel the rotor guard secure
itself.
To fully secure use two screws on the top
of the rotor arm as shown, do not over
tighten.


