Drilling in wood
• Fasten the workpiece.
• Use the operating mode “drill” for wood.
• Mark the spot that is to be drilled with a punch mark or a nail.
Drilling in plastic
• Fasten the workpiece.
• Use the operating mode “drill” for plastic.
• Use a steel drill for drilling in plastic.
• Mark the spot that is to be drilled with a punch mark or a nail.
Drilling on concrete or brickwork / stone
• Fasten the workpiece.
• Use the operating mode “percussion drilling” for concrete or brickwork / stone.
• Use a drill for stone / concrete / brickwork that is equipped with hard metal.
Assembly additional handle / depth stop
1. Loosen the lower screw of the additional handle.
2. Slide the additional handle over the quick action drill chuck to the clamping collar
(see image 1).
3. Tighten the lower screw again.
Assembling the depth stop
1) Loosen the upper screw of the additional handle.
2) Insert the depth stop.
3) Set the desired distance.
4) Then re-tighten the upper screw of the additional handle.
Environmental conditions
The power tool is designed for 230 V alternating current at 50 Hz net frequency. Check
that the extension cord is undamaged and that it is correctly connected to the mains
outlet and the mains plug of the power tool. Your specialised dealer can advise you
about the right extension cord to use.
Operation
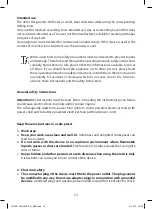
During work always wear safety goggles, hearing protection, safety gloves and sturdy
work clothes!
Selection switch: Drilling / Percussion drilling (image 1, no. 2)
With the selection switch drilling / percussion drilling (Image 1, no. 2) you can set the
power tool to the operating modes drilling and percussion drilling.
18
1221331 WB 500 SB_N_BDA.indd 18
01.12.14 19:03
Summary of Contents for WB 500 SB N
Page 36: ...1 a b c 2 a 35 1221331 WB 500 SB_N_BDA indd 35 01 12 14 19 03...
Page 37: ...b c d e f 3 a b c d e f g 36 1221331 WB 500 SB_N_BDA indd 36 01 12 14 19 03...
Page 38: ...h i j k 4 a b c d e f g h 37 1221331 WB 500 SB_N_BDA indd 37 01 12 14 19 03...
Page 39: ...5 a b 6 a b c d e f g h i 38 1221331 WB 500 SB_N_BDA indd 38 01 12 14 19 03...
Page 40: ...2 01 2 1 02 2 2 03 2 3 04 HSS HSS Bohren 39 1221331 WB 500 SB_N_BDA indd 39 01 12 14 19 03...
Page 43: ...1 2 42 1221331 WB 500 SB_N_BDA indd 42 01 12 14 19 03...
Page 80: ...l 1 a b c 2 a 79 1221331 WB 500 SB_N_BDA indd 79 01 12 14 19 04...
Page 81: ...b c d e f 3 a b c d e f g 80 1221331 WB 500 SB_N_BDA indd 80 01 12 14 19 04...
Page 82: ...h i j k 4 a b c d e f g h 81 1221331 WB 500 SB_N_BDA indd 81 01 12 14 19 04...
Page 83: ...5 a b X 6 a b c d e f g h i 82 1221331 WB 500 SB_N_BDA indd 82 01 12 14 19 04...
Page 84: ...2 01 2 1 02 2 2 03 2 3 04 HSS HSS 83 1221331 WB 500 SB_N_BDA indd 83 01 12 14 19 04...
Page 85: ...1 2 1 3 1 2 3 4 230 V 50 Hz 1 2 1 2 84 1221331 WB 500 SB_N_BDA indd 84 01 12 14 19 04...
Page 87: ...1 2 86 1221331 WB 500 SB_N_BDA indd 86 01 12 14 19 04...

