background image


Riding the bike cont. 
 

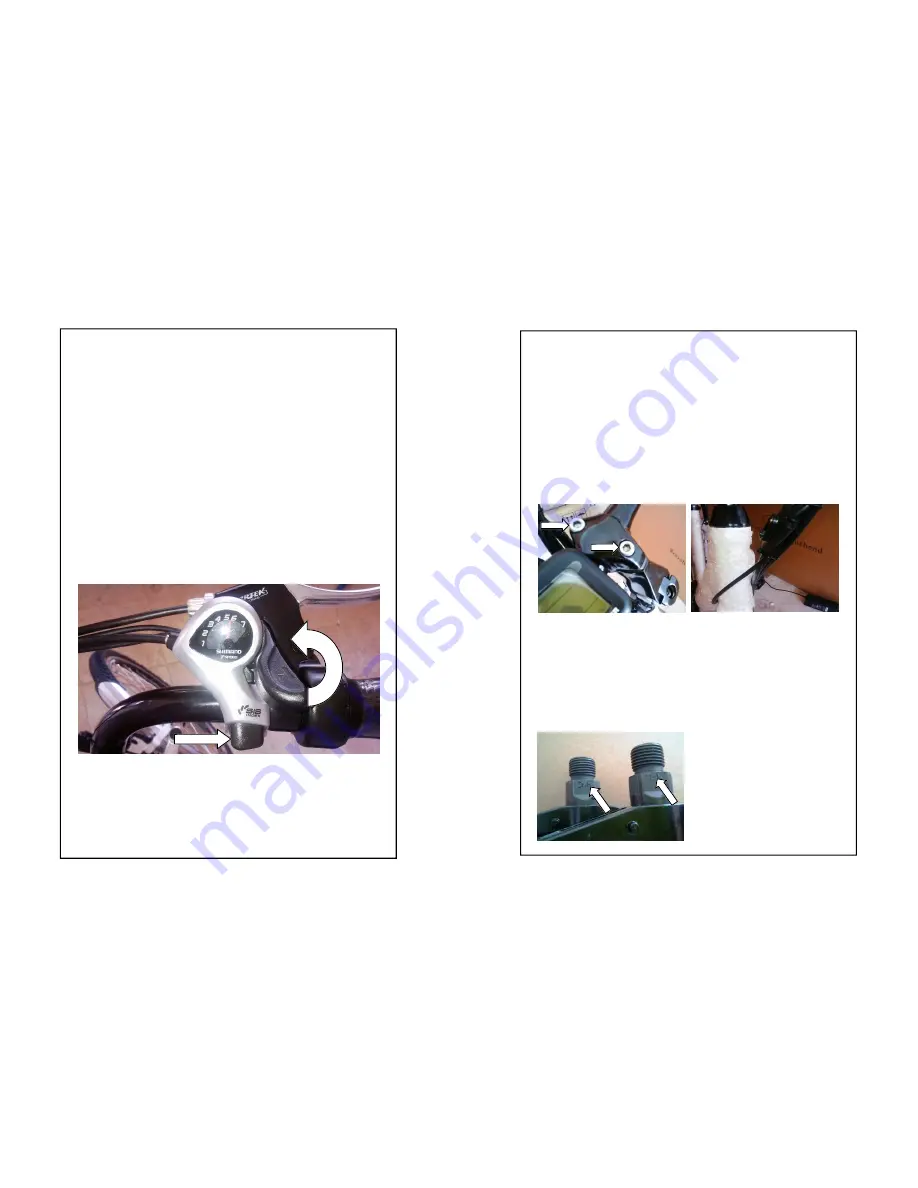
Your bike features 7 speed Shimano index shifting gears 
which are changed using the thumb selector on the right side 
of the handlebars. When the thumb stick is fully extended, 
the bike is in first gear (the easiest to pedal). To move up 
through the gears press the black (+) button as shown. 
To move back down the gears, simply push the thumb selec-
tor again. 
 

With this particular type of electric bike, you should 
change the gears one at a time, waiting until the gear is 
properly engaged before changing to another gear. 

 
Most of the time, you will likely use the bike in it’s highest 
gear, but to get the best performance out of your bike on 
hills, you should change down to the 3rd or 4th gear 

before


you start your ascent. 

You may need to rotate the handlebars within the stem after 
adjusting the height, to do this simply loosen the two bolts as 
shown and then rotate the bar until it is in the desired posi-
tion and then re-tighten the bolts ensuring that the bar sits 
centrally within the bracket. 
 
Ensure that the cables are routed properly around the frame 
when the handlebars are fitted, if the cables are not routed 
properly, the gears and brakes will likely not work properly. 
The cables to the handlebars should go around the frame as 
per the photo below. 

Pedals: 
 

The pedals fit on a specific side of the bike. Do NOT 
 attempt to fit the pedals on the wrong side of the bike. 

The pedals are marked ‘R’ (right) and ‘L’ (left) to indicate 
which side of the bike the pedal should be fitted to. Fit each 
pedal into position and hand tighten, then use the 15mm 
spanner to fully secure the pedals in place. 


Note:  
 
The thread on the left pedal 
is reversed meaning the 
pedal should be tightened 
anti-clock-wise as opposed 
to the usual clock-wise. 

Summary of Contents for Sant-Ana CD

Page 1: ...days Support staff are not available at the weekends though if you send an email it will normally be responded to on the following Monday morning Email support wooshbikes co uk Woosh support telephone...

Page 2: ...nished to German standards with every nut and bolt fully tightened immaculate paintwork and superb quality plastic on things like handlebars and battery cases But this alas would also push the prices...

Page 3: ...a bike for commuting you should consider our chain driven CD versions Care Electric bikes need more regular maintenance than standard bikes Spokes and other mechanical fixings need tightening every 2...

Page 4: ...d for damage in return transit caused by poor or inadequate packaging and missing items such as keys Paint quality An electric bike has around 120 more parts than a standard bike and these are added a...

Page 5: ...failure to maintain the bike or its parts in accordance with the manual the rec ommended rider weight being exceeded or allowing weights heavier than 5Kgs being placed on the rear rack of allowing pe...

Page 6: ...n is unlikely but you should be aware of this Insurance and break down cover Whether from us or any other supplier electric bikes get stolen and break down If you are going to be very highly dependant...

Page 7: ...fore riding it to ensure your own safety DIY repairs We sell to users willing and able to maintain their bike to a good standard or with a colleague or local bike shop able to do so Many repairs are s...

Page 8: ...ipped to you at a cost of 15 Safety warnings Do not allow anyone under the age of 14 to ride the bike Never allow a small child to ride on the rear carrier Their legs or feet could get trapped in the...

Page 9: ...or have a health problem which would prevent you from riding the bike without power we warmly recommend you take out roadside rescue This is available from Cycleguard from 18 per year and they also of...

Page 10: ...instructions on how to adjust your brakes see the support section of our website at www wooshbikes co uk If you are unsure about any of the adjustments that you may need to make to your bike take your...

Page 11: ...can now use the stand to keep the bike upright Mudguard and Front Light With the wheel in position you can now fit the mudguard and front light The mudguard bracket should be on the rear face of the...

Page 12: ...just the angle of your handlebars you need to loosen the allen bolts on the sides of the handlebar clamp and you will also need to undo the bolt on the underside of the han dlebar clamp to release the...

Page 13: ...rs within the stem after adjusting the height to do this simply loosen the two bolts as shown and then rotate the bar until it is in the desired posi tion and then re tighten the bolts ensuring that t...

Page 14: ...he Mode button to switch on the Control Module The bike is now effectively on and if you ride it in this state the motor will provide assis tance when pedalling and you will also be able to use the th...

Page 15: ...should fully charge the battery before initial use The battery can be charged on the bike or it can be re moved and charged separately The socket used to charge the battery is located at the left rea...

Page 16: ...ions i e below 6 degrees The battery can be easily removed from the bike and charged indoors if its more convenient Remember to allow the battery to warm up to room temperature before charging If the...

Reviews: