Page
14
of
31
G. Adding Bypass Valves
Adding a bypass valve system
(3 valves, 2 T’s and unions) at each heat exchanger is a good idea
so that if there is a potential problem such as a stopped up heat exchanger, it can be diagnosed &
serviced easily as well as being used for a summer bypass as explained in the
“operation” section
of this manual.
H. Installing A Water-To-Air Heat Exchanger
The heat exchanger should be installed above an air conditioning condenser coil and must be
placed at least 2” above it so any ice that may from on the condenser due to improper operation
won’t touch the new heat exchanger.
No air can be allowed to flow around it or out of the ductwork. Use adhesive backed foam tape
(used for insulating doors and windows) to seal around the frame and foil tape to seal off the
opening you make in the plenum heat for the heat exchanger.
Make sure the fittings for the supply and return lines are easy to get to once the heat exchanger is
installed.
You should be able to find a heat exchanger to fit most popular sizes of plenums. If you are unable
to the ductwork must be modified to accept the heat exchanger. Wear proper protective gear.
(gloves, safety glasses, etc…)
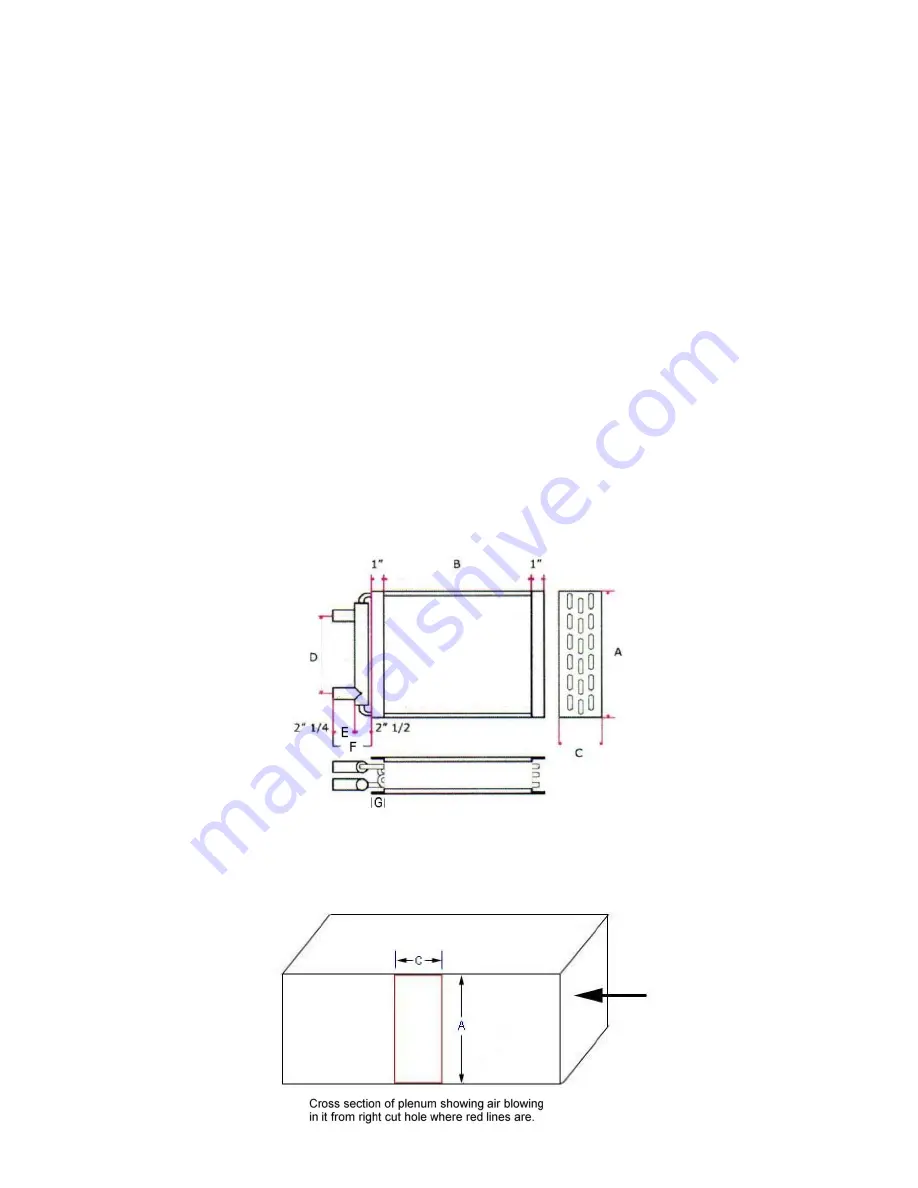
Measure the width of the heat exchanger (Dimension A in next diagram). Measure the thickness of
the heat exchanger (Dimension C).
Start by cutting a hole in the side of the ductwork the thickness of the heat exchanger (Dimension
C) and the full length of the ductwork (usually Dimension A).
WARNING! Metal edges are very sharp! Wear protective gloves and use caution!


