


9
Troubleshooting
What you see
Ensure that the power cord is firmly connected and the LCD
monitor is on.
“ VIDEO MODE NOT
SUPPORTED ” message
“NO SIGNAL” message
Screen is blank and power indictor
is off
�
Check the maximum resolution and the frequency of the
video adaptor.
�
Compare these values with the data in the Display Modes
Timing Chart.
�
Ensure that the signal cable is firmly connected to the PC
or video sources.
�
Ensure that the PC or video sources are turned on.
The image is too light or too dark
�
Adjust the Brightness and Contrast.
�
Refer to the Brightness/Contrast
The image color is not good
�
Adjust the Color
�
Refer to the Color
Image is not centered on the
screen
�
Executes “Auto Adjustment”.
The power lamp flickers.
�
The monitor is using its power management system.
�
Move the computer’s mouse or press a key on the key-
board.
Image is not stable and may
appear to vibrate
�
Check that the display resolution and frequency from your
PC or video board is an available mode for your monitor.
On your computer check : Control Panel, Display, Settings
�
Note : Your monitor supports multiscan display functions
within the following frequency domain:
Suggested Actions
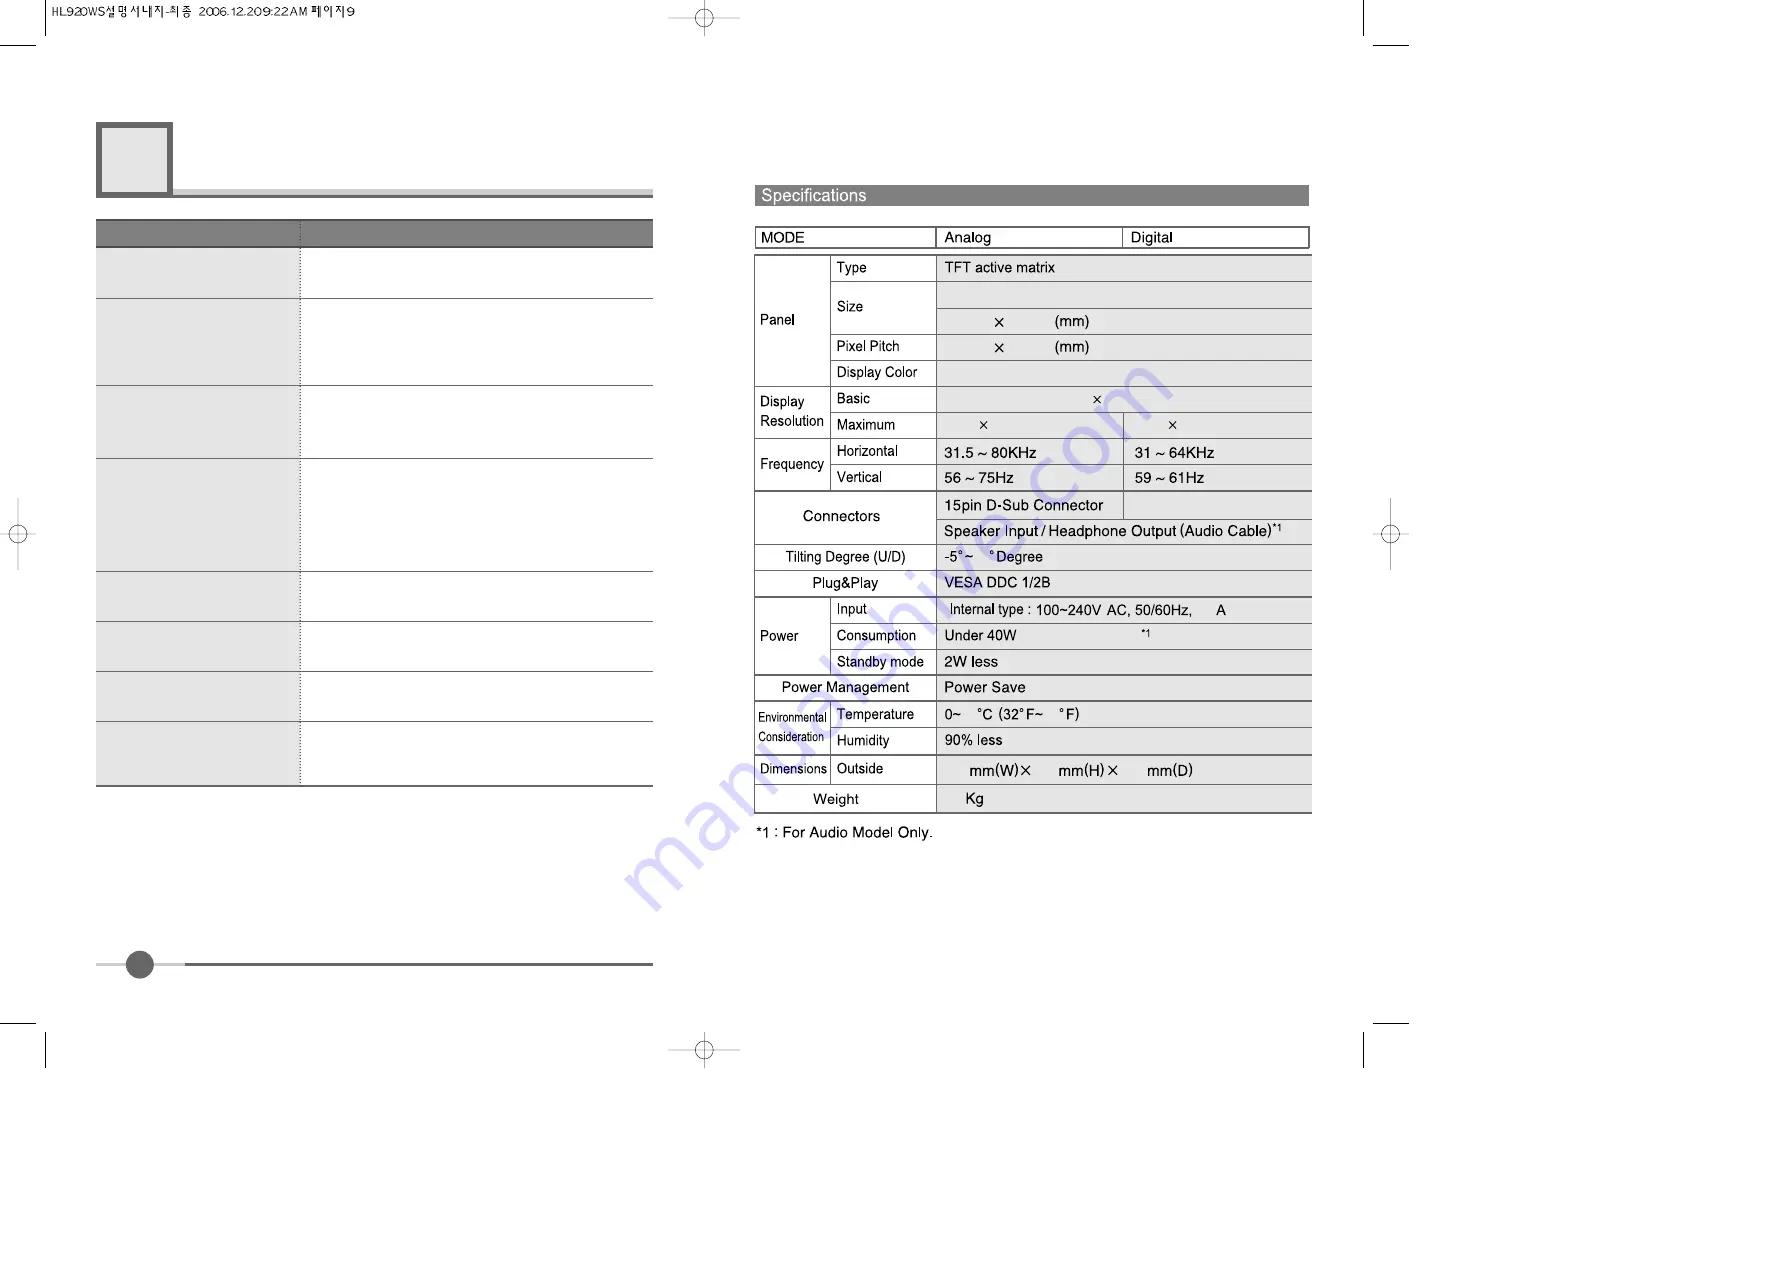
6
19 inch wide
408.24
255.15
0.2835
16.2 M
1440 900@60Hz
1440 900@75Hz
1440
24pin DVI-D Connector
20
0.5
(Speaker Max 4W )
25
445
350
190
4.3
77
900@60Hz
0.2835


