


07-01-2003 WMS Gaming
4 of 7
Performing a RAM Clear
16-009323-03 Installing CPU-NXT (A-006182-
xx)
1.
Turn the game power to On. The monitor
displays POST (Power ON Self Test)
information and then displays the files being
loaded onto the system. Once completed, one
“Bong!” indicates that the sound system is
functioning properly.
2.
Ensure the top (55
x
) or left-most (36
x
) LED
light on the I/O board turns on and then stays
off. Otherwise, if it stays lit, the CPU board is
not properly engaged. If this is the case, power
off the game and remove the CPU board.
Then, reinstall the CPU board ensuring that it
is installed securely.
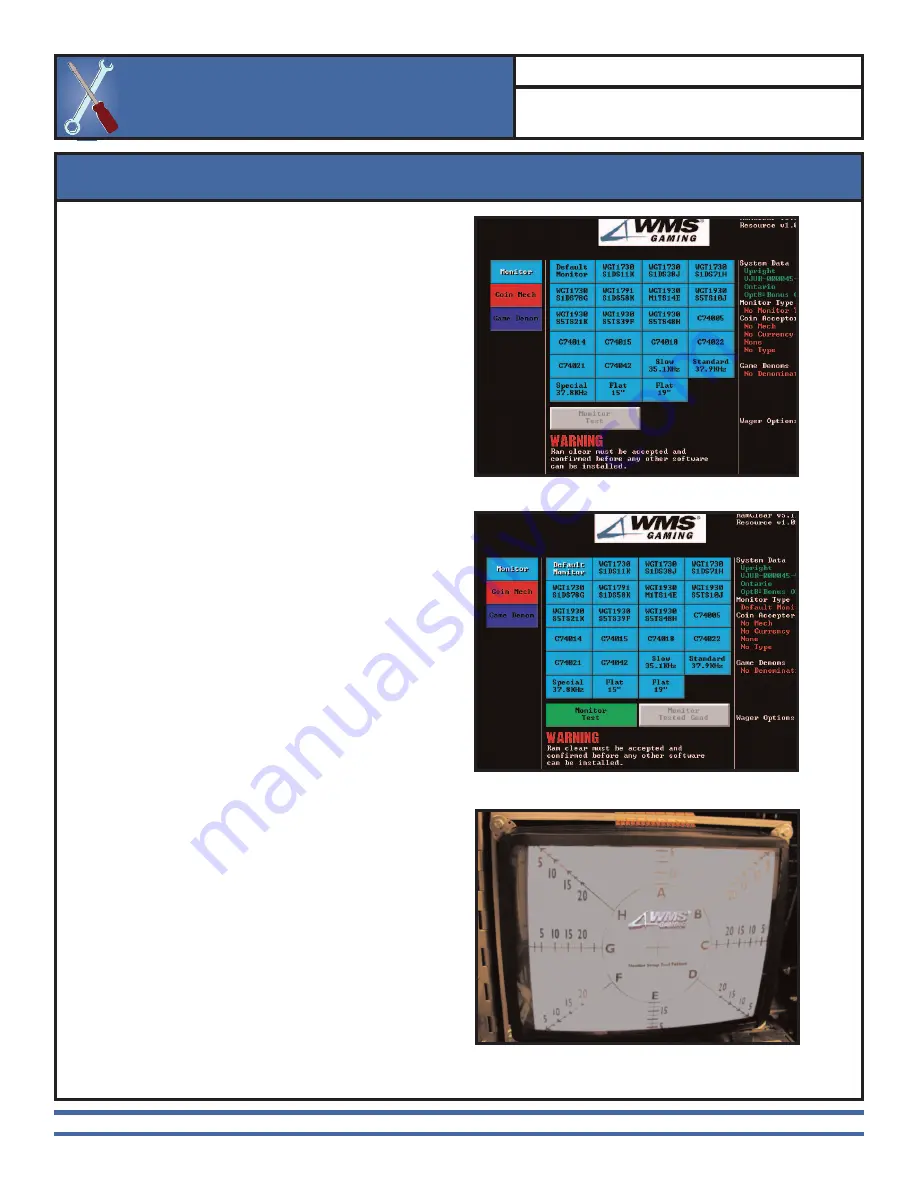
3.
The monitor displays a menu allowing selection
of the monitor,
Image 7
.
4.
Select the correct monitor model option and
press the green Monitor Test button,
Image 8
.
To identify the monitor type, check the
manufacturer’s monitor label.
5.
The monitor displays a test configuration
screen,
Image 9
. If the image displays clearly,
you have selected the correct monitor type.
Touch the screen to return to the monitor
selection screen. If the image does not display
clearly, touch the screen to return to the
previous menu. Then, correct the monitor
selection and retest.
6.
Once the test completes properly, select the
Monitor Tested Good button.
I
NSTALLATION
B
ULLETIN
16-009323-03 Installing CPU-NXT (A-006182-
xx)
Performing a RAM Clear
Image 7
. Selecting a monitor type.
Image 8
. Selecting the Monitor Test button.
Image 9
. Selecting a monitor type.


