3-7
Button Panel Maintenance
16-020834-00
5
Disconnect Belly Light cable from the Belly Light cable connector,
6
Using a 1/4" nut driver, remove the two #6 hex screws securing the Belly Light Bracket,
.
7
Using an 11/32" nut driver, remove the two #8 Keps nuts securing the Belly Light Bracket,
.
CAUTION: Use care when performing the following step, as the Belly Glass is not secured once
the bracket is removed.
8
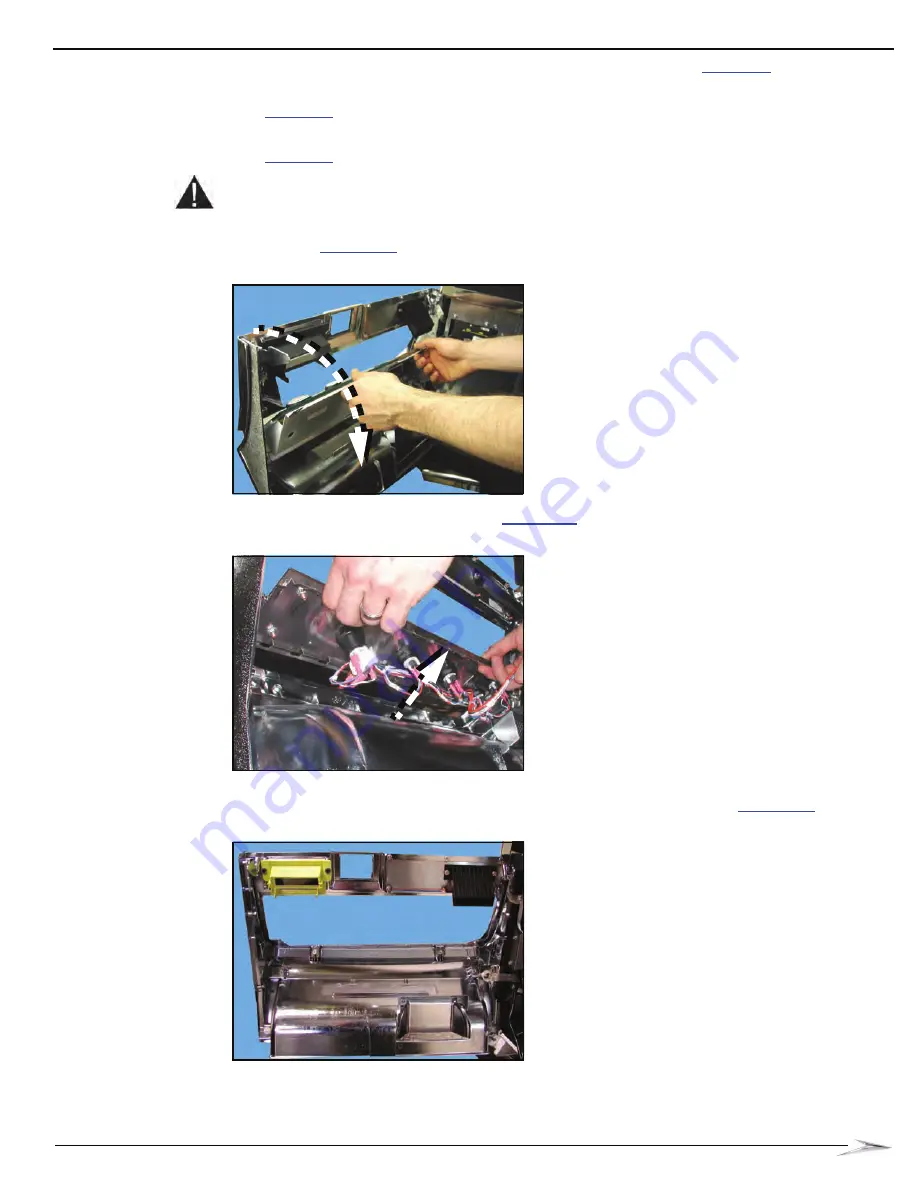
Slowly and carefully rotate down the top of the Belly Light Bracket backward on the two pivoting
screws,
, and remove the bracket.
Figure 3-10 Rotate the Belly Light Bracket backward.
9
Slide out the existing Button Panel,
.
Figure 3-11 Slide out the existing Button Panel.
The game is ready for the installation of the replacement Button Panel,
Figure 3-12 Empty Button Panel area.
Summary of Contents for Bluebird Series
Page 2: ......
Page 12: ...4 List of Figures November 2007 ...
Page 16: ...4 About this Guide General Information October 2007 ...
Page 101: ...5 13 Chapter 5 Exploded Views Block Diagram for BBU AC Power Distribution ...
Page 102: ...5 14 Chapter 5 Exploded Views Block Diagram for BBU Bulkhead with CPU NXT ...
Page 103: ...5 15 Chapter 5 Exploded Views Block Diagram for BBU Bulkhead with CPU NXT ...
Page 104: ......


