~ 60 ~
Installation
Make sure that the packaging is in perfect conditions and that none of the
components inside is damaged: in case of damaged components, please
contact your retailer and do not carry out installation.
Read all of the following instructions before carrying out installation
.
WS20
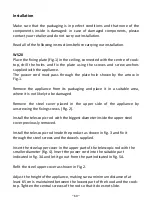
Place the fixing plate (Fig.1) in the ceiling, connected with the centre of cook-
top, drill the holes and fix the plate using the screws and screw anchors
supplied with the appliance.
The power cord must pass through the plate hole shown by the arrow in
Fig.1.
Remove the appliance from its packaging and place it in a suitable area,
where it is not likely to be damaged
Remove the steel cover placed in the upper side of the appliance by
unscrewing the fixing screws. (Fig. 2).
Install the telescopic rod with the biggest diameter inside the upper steel
cover previously removed.
Install the telescopic rod inside the product as shown in fig. 3 and fix it
through the steel screws and the dowels supplied.
Insert the steel upper cover in the upper part of the telescopic rod with the
smaller diameter (fig. 4). Insert the power cord into the suitable part
indicated in fig. 3A and let it go out from the part indicated in fig. 5A.
Refit the steel upper cover as shown in Fig. 2.
Adjust the height of the appliance, making sure a minimum distance of at
least 65 cm is maintained between the lowest part of the hood and the cook-
top. Tighten the central screws of the rod so that it does not slide.
Summary of Contents for 21660079
Page 2: ...2...
Page 9: ...9 M lskitse WS20...
Page 10: ...10 M lskitse WS21...
Page 27: ...27 M ttskiss WS20...
Page 28: ...28 M ttskiss WS21...
Page 38: ...38 Service GarantGruppen AB Bang rdsgatan 6 582 77 Link ping Tlf 013 15 45 10 Fax 013 15 45 07...
Page 46: ...46 Mittapiirustukset WS20...
Page 47: ...47 Mittapiirustukset WS21...
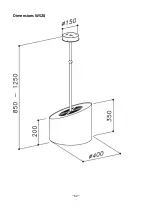
Page 62: ...62 Dimensions WS20...
Page 63: ...63 Dimensions WS21...
Page 69: ...69...
Page 70: ...70...
Page 71: ...71...
Page 72: ...72...


