background image

English_19


C

A

MER

A

 OPER

ATION

White Bal (White Balance)

Use the White Balance function to adjust the screen color.

1.  From the Setup menu, select the 

<White Bal>.

2.  Select the desired mode.


  Select one of the following 5 modes, 

as appropriate for your purpose.


y

ATW : 

 Select this when the color tem-
perature is between 2,400K and 
10,500K.


y


INDOOR : 

 Select this when the color temperature is between 4,500K and 8,500K. 
Automatically adjusts the camera color for optimization to the indoor 

environment.


y


OUTDOOR : 

 Select this when the color temperature is between 1,800K and 10,500K.  
Automatically adjusts the camera color for optimization to the outdoor environ-
ment.


y

MANUAL :  

Select this to fine-tune White 
Balance manually. Set White  
Balance first by using the ATW 
or AWC mode. After that button 
to MANUAL mode, fine-tune 
the White Balance and the 
Function Setup switch.


y

AWC

SET :  

To find the optimal luminance level for the current environment, point the camera 
towards a sheet of white paper and press the Set button. If the environment 
changes, readjust it. 


M


`

White Balance may not work properly under the following conditions. In this case 
select the AWC mode.

1


Select this When the color temperature of environment surrounding the subject 
is out of the control range (e.g. clear sky, or sunset)

2


When the ambient illumination of the subject is dim.


`

  If the camera is directed towards a fluorescent light or is installed in a place where 

illumination changes dramatically, the White Balance operation may become 
unstable.

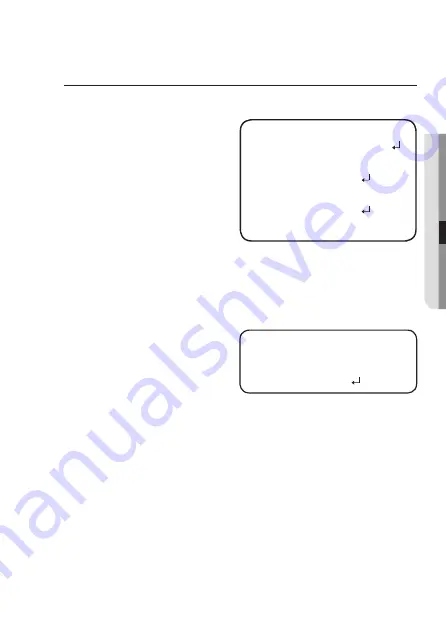
MAIN SETUP

 1. 

VIDEO FORMAT  

FORMAT

 2. WHITE BAL  

ATW

  3. EXPOSURE 
  4. BACKLIGHT  

OFF  

  5. SPECIAL 


  6. EXIT 

SAVE

WB MANUAL

 1. RED GAIN  

IIIIIIIIII

I

IIIIIIIIII

   50

     2. BLUE GAIN  

IIIIIIII

I

IIIIIIIIIIII

   40

3. RETURN 


Summary of Contents for HCF-8010V

Page 1: ...ANALOGCAMERA User Manual HCF 8010V ...

Page 2: ...ernocircumstances thisdocumentshallbereproduced distributedorchanged partiallyorwholly withoutformalauthorization Disclaimer Hanwha Techwin makesthebesttoverifytheintegrityandcorrectnessofthecontentsinthisdocument butno formal guaranteeshallbeprovided Useofthisdocumentandthesubsequentresultsshallbeentirelyontheuser sown responsibility Hanwha Techwin reservestherighttochangethecontentsofthisdocumen...

Page 3: ... hazard do not expose this appliance to rain or moisture To prevent injury this apparatus must be securely attached to the floor wall in accordance with the installation instructions WARNING 1 Be sure to use only the standard adapter that is specified in the specification sheet Using any other adapter could cause fire electrical shock or damage to the product 2 Incorrectly connecting the power sup...

Page 4: ...k CAUTION 1 Do not drop objects on the product or apply strong shock to it Keep away from a location subject to excessive vibrationor magnetic interference 2 Do not install in a location subject to high temperature over 55 C low temperature below 30 C or high humidity Doing so may cause fire or electric shock 3 If you want to relocate the already installed product be sure to turn off the power and...

Page 5: ...sposed of with other household waste at the end of their working life Where marked the chemical symbols Hg Cd or Pb indicate that the battery contains mercury cadmium or lead above the reference levels in EC Directive 2006 66 If batteries are not properly disposed of these substances can cause harm to human health or the environment To protect natural resources and to promote material reuse please...

Page 6: ...r pinched particularly at plugs convenience receptacles and the point where they exit from the apparatus 11 Only use attachments accessories specified by the manufacturer 12 Use only with cart stand tripod bracket or table specified by the manufacturer or sold with the apparatus 13 Unplug this apparatus when a card is used Use caution when moving the cart apparatus combination to avoid injury from...

Page 7: ...e the product in a manner that has not been recommended the production functions performance may not be guaranteed Install the product by referring to Installation connection in the user manual 20 Installing or using the product in water can cause serious damage to the product Apparatus shall not be exposed to dripping or splashing and no objects filled with liquids such as vases shall be placed o...

Page 8: ...LATION 11 11 Before installation 11 Disassembling 12 Installation CONNECTION 15 15 Connecting to Monitor 16 Connecting to Power CAMERA OPERATION 18 18 Menu Configuration 18 Camera setup TROUBLESHOOTING 24 24 Troubleshooting SPECIFICATIONS 25 25 Specifications 27 Dimension ...

Page 9: ...DED Please check if your camera and accessories are all included in the product package As for each sales country accessories are not the same HCF 8010V ANALOG CAMERA Quick Guide Camera QuickManual Warrantycard Template TappingScrew Anchor Screw ...

Page 10: ...unt the camera 3 Power Input Connector Dual 24V AC 12V DC 4 Video Output Jack Outputs a video in the set video format 5 Video Format Setting Switch Allows to set to a video format TVI AHD CVBS of your choice 6 Screw Hole Used to assemble disassemble the camera and plate 6 2 1 5 4 3 ...

Page 11: ... cable to be caught in improper place or the electric line cover to be damaged Otherwise it may cause a breakdown or fire y y Before installing your camera you have to adjust the front direction y y When installing your camera don t allow any person to approach the installation site DISASSEMBLING 1 Remove the screws on the side using a phillips screwdriver 2 Turn the camera body clockwise to remov...

Page 12: ...Installation 12_Installation INSTALLATION 1 Attach the installation template to the selected area and punch 4 holes as shown in the figure ...

Page 13: ... camera and use the tapping screws to fix the mounting plate Make sure that the FRONT marking on the bottom mounting plate is turned towards the direction to monitor Mounting plate Tapping Screw 3 Refer to Disassembling to attach the camera to the mounting plate ...

Page 14: ... accessories available 1 Install the mounting plate to the bracket SBP 300HMW7 SBP 122HMW as shown below and then attach the camera to the mounting plate Bracket SBP 300HMW7 SBP 122HMW Mounting plate Screw 2 See Disassembling to attach the camera to the mounting plate Bracket SBP 300HMW7 SBP 122HMW Mounting plate Camera ...

Page 15: ...ARM NETWORK BACKUP POWER DVR Monitor y y As the connecting method varies with the instruments refer to the manual supplied with the instrument y y Only connect the cable when the power is turned off M M This product supports 3 video output formats of AHD CVBS and TVI The default is AHD Select the video output appropriate for your DVR ...

Page 16: ...030 0 018 VoltageDrop V m 0 028 0 018 0 011 0 006 y y As shown in the table above voltage decreases as the wire gets longer Therefore use of an excessively long adaptor output line for connection to the camera may affect the performance of the camera Standard voltage for camera operation DC 12 V 10 AC 24 V 10 There may be some deviation in voltage drop depending on the type of wire and the manufac...

Page 17: ...nce RecommendedCable Specification 500 m 5C2V M M It is recommended that pure copper coax cable is used and not copper coated steel as this will cause issues with the communication over the coaxial cable To ensure picture quality only single channel video output connector can be used while camera connected to other video equipments ...

Page 18: ...RN BACKLIGHT USERBLC D WDR RETURN SPECIAL LANGUAGE IMAGEADJ DAY NIGHT RETURN EXIT SAVE END NOTSAVE RESET CAMERA SETUP VIDEO FORMAT 1 From the Setup menu select the VIDEO FORMAT 2 Select the VIDEO mode y y The video output can be selected from AHD CVBS TVI camera operation MAIN SETUP 1 VIDEO FORMAT FORMAT 2 WHITE BAL ATW 3 EXPOSURE 4 BACKLIGHT OFF 5 SPECIAL 6 EXIT SAVE ...

Page 19: ... orAWCmode Afterthatbutton toMANUALmode fine tune theWhiteBalanceandthe FunctionSetupswitch y y AWC SET Tofindtheoptimalluminancelevelforthecurrentenvironment pointthecamera towardsasheetofwhitepaperandpresstheSetbutton Iftheenvironment changes readjustit M M White Balance may not work properly under the following conditions In this case select the AWC mode Select this When the color temperature o...

Page 20: ...s and white areas but still operate normally If you do not use the AGC mode on the exposure menu it cannot be set above 1 60sec Depending on the setting range of the minimal maximal shutter the screen exposure can become saturated y y AGC OFF LOW MIDDLE HIGH The higher the gain level the brighter the screen but the greater the noise y y SSNR This function reduces the background noise in a low lumi...

Page 21: ... LEVEL Adjusts the brightness level of a monitoring area AREA Adjust the area to be enhanced DEFAULT Resets the USER BLC setting RETURN Return to the MAIN SETUP menu y y D WDR Ifanobjecthasalargevariancebetweenbrightanddarkareas itwillkeepbrightareasbright andmakeselecteddarkareasbright sothattheoverallbrightnesscanbemaintained LEVEL The setting range is 1 32 D WDR OFF D WDR ON MAIN SETUP 1 VIDEO ...

Page 22: ...s and the more color blind it gets MIRROR y y MIRROR Flip an image horizontally y y V FLIP Flip an image vertically y y ROTATE Rotatesthevideocapturedbythecameraaccordingtothesetangle SHARPNESS Select a mode to adjust the thickness of an image s sharpness Increase or decrease the level of each mode to adjust the level of sharpness y y OFF Released state y y ON The setting range is 1 32 RETURN Retu...

Page 23: ...ht switching delay time from 3s 5s 7s 10s 15s 20s 30s 40s 60s M M If you set the AGC mode to off on the exposure menu you cannot switch the day night mode to auto When a bright light source is in the screen or there are frequent brightness changes if you use the auto night day mode and set the switching time to short 3 5 sec a hunting can be caused In this situation it is recommended to use the de...

Page 24: ... with dirt Clean your lens with soft clean cloth y y Set the monitor or DVR to the proper condition y y If the camera is exposed to very strong light change the camera position The image on the screen is dark y y Adjust the contrast feature of the monitor or DVR y y If you have an intermediate device set the 75Ω Hi z properly The camera is not working properly and the surface of the camera is hot ...

Page 25: ...rture Ratio F2 1 Angular Field of View H 180 V 180 Min Object Distance 0 2 m Operational On Screen Display English Day Night Auto ICR Color B W Backlight Compensation Off User BLC Wide Dynamic Range D WDR Digital Noise Reduction SSNR 3DNR 2DNR Gain Control OFF LOW MIDDLE HIGH White Balance ATW Indoor Outdoor Manual AWC 1 800 K 10 500 K Electronic Shutter Speed 1 25s 1 50 000s Reverse Mirror V Flip...

Page 26: ...gress Protection IP66 Vandal Resistance IK10 Electrical Input Voltage DC 12 V and AC 24 V Power Consumption Max 2 W Mechanical Color Material White Metal Dimension Ø x H Ø 120 x 63 4 mm Ø 47 24 x24 96 Weight 500 g The specification for this product may change without prior notice for product improvement ...

Page 27: ...English_27 SPECIFICATIONS DIMENSION Unit mm inch ...

Page 28: ... www hanwha security com Hanwha Techwin America 500 Frank W Burr Blvd Suite 43 Teaneck NJ 07666 Toll Free 1 877 213 1222 Direct 1 201 325 6920 Fax 1 201 373 0124 www hanwhasecurity com Hanwha Techwin Europe Heriot House Heriot Road Chertsey Surrey KT16 9DT United Kingdom Tel 44 1932 57 8100 Fax 44 1932 57 8101 www hanwha security eu ...

Reviews: