background image


14 

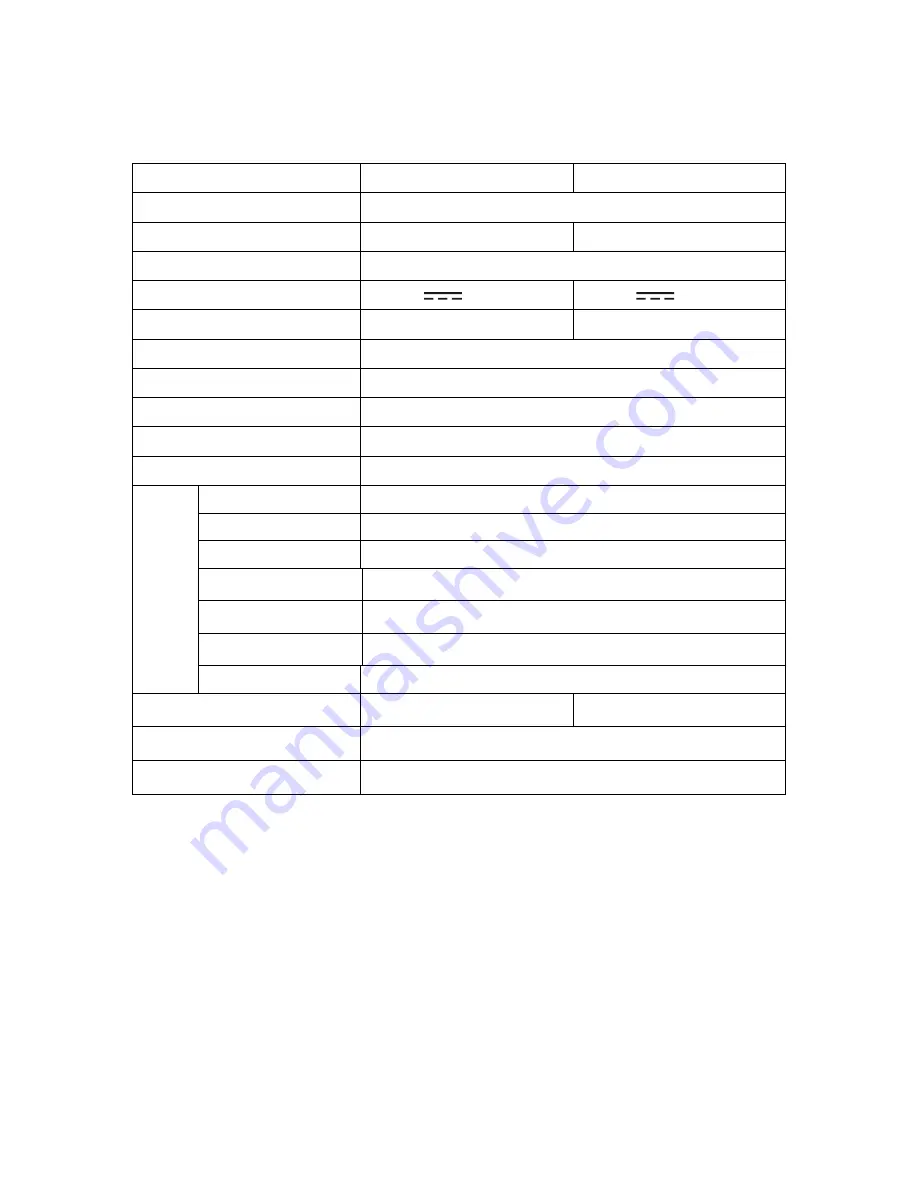
10      SPECIFICATIONS 
 

Screen Size 

15 Inch 

19 Inch 

Display Type 

TFT LCD TV 

Screen Ratio 

4:3 

16:10 

Color 

24 bit     

Power   

DC12V,

3.33A 

DC12V,

5A 

Power consumption 

40W 

60W 

TV System 

PAL / SECAM 

Video Input Format 

PAL / NTSC / SECAM 

Antenna Input 

Standard antenna socket 75Ω 

Audio Output 

L / R 3W + 3W 

VGA Input   

Standard VESA Mode


Input 

PC 

0.7 VP- P 75 Ω DB15 

VGA Audio L/R 

500mVrms (max.3.0 Vp – p) 20 KΩ RCA 

VIDIO /Audio L/R 

1.0 Vp – p, 75 Ω; 500 m Vrms (max.3.0 VP – P) 20 kΩ RCA 

S-Video   

Y: 1.0Vp-p±3db C:0. 3Vp-p±3db 

YPBPR 

1.0 Vp –p 75 Ω; RCA    MAX 1080P 

HDMI INPUT 

480I/480P/576I/576P/720P/1080I/1080P 

AUDIO L/R 

500 m Vrms 

Weight   

4.3kg 

7.2kg 

Dimensions 

15”: 384(L)*144(D)*374(H)mm 


19: 500(L)*188(D)*416(H)mm 


The  manual  is  only  for  your  reference;  any  changes  to  the  design  and 

specification will not be advised. 


Summary of Contents for WLD19HD

Page 1: ......

Page 2: ...4 5 HDMI INPUT DRAWING 5 4 6 YPBPR INTPUT DRAWING 5 4 7 COAXIAL DRAWING 6 4 8 EARPHONE DRAWING 6 5 CONFIGURATION OF THE LCD 7 5 1 PICTURE SETTING 7 5 2 SOUND SETTING 8 5 3 TV CHANNEL SEARCH 8 5 4 OPT...

Page 3: ...r source The monitor must be plugged with a tension source of 100 240V and 50 60 Hz Connection cables Power cord and cables must be properly routed and protected to prevent people from stepping on the...

Page 4: ...3 3 FRONT BACK CONNEXIONS OF LCD Front View Back View 1588 1988 Note The Service port interface is only for updating TV software Rear View SERVICE PORT SERVICE PORT...

Page 5: ...lled The antenna system as shown can be sourced from TV equipment shops which will provide service for correct installation and connection After installation insert the 75 ohm antenna plug into the an...

Page 6: ...5 4 5 HDMI INPUT DRAWING 4 6 YPbPr INTPUT DRAWING 4 7 EARPHONE OUTPUT DRAWING 4 8 COAXIAL OUTPUT DRAWING...

Page 7: ...tness Color Sharpness Tint b Press or key to access and adjust Picture Mode Contrast Brightness Color Sharpness Tint 5 1 2Press SYS MENU key then press or key until the screen displays as below a Pres...

Page 8: ...b Press or Key to access and adjust Sound Mode Treble Bass Balance Auto Volume Surround Sound 5 3 CHANNEL SEARCH Press SYS MENU key then press or key until the screen displays as below a Press and th...

Page 9: ...ault b Press or Key to access and adjust Language Audio Languages Subtitle Lanuage Country and Restore Factory Default 5 5 TIME SETTING Press SYS MENU key then press or key until the screen displays a...

Page 10: ...key until the screen displays as below a Press and then enter lock Setting Menu Press or key and enter Lock System Set Password Block Program Parental Guidance b Press or Key to access and adjust Lock...

Page 11: ...10 6 REMOTE CONTROL INSTRUCTIONS...

Page 12: ...the cursor from UP to DOWN DOWN These buttons used for orientation direct In menu status press these buttons you can move the cursor from DOWN to UP etc LEFT These buttons used for orientation direct...

Page 13: ...r 7 1 Battery Usage Caution To prevent battery leakage which may result in bodily injury or damage to the remote 1 Install all batteries correctly and as marked on the remote control 2 Do not mix batt...

Page 14: ...cal devices or appliances Double or multiple display image May be the result of an electrical wave disturb from other TV Computer and Game machine or Radio Snow on the screen The cables of the antenna...

Page 15: ...W VGA Input Standard VESA Mode Input PC 0 7 VP P 75 DB15 VGAAudio L R 500mVrms max 3 0 Vp p 20 K RCA VIDIO Audio L R 1 0 Vp p 75 500 m Vrms max 3 0 VP P 20 k RCA S Video Y 1 0Vp p 3db C 0 3Vp p 3db YP...

Page 16: ...15...

Reviews: