2
5)
Using a 1/8” drill bit, pre-drill the holes for each of
the screws to hold the mounting feet in place.
6)
Add a small bead of manufacturer approved sealant
(not provided) to each hole.
7)
Drive the screws through the sealant into each hole
until tight. Do not overtighten as it will cause the
screw to strip.
See NOTE.
8)
After the mounting feet are secured, add a small
amount of approved sealant around the edge of
each mounting foot and over each screw.
9)
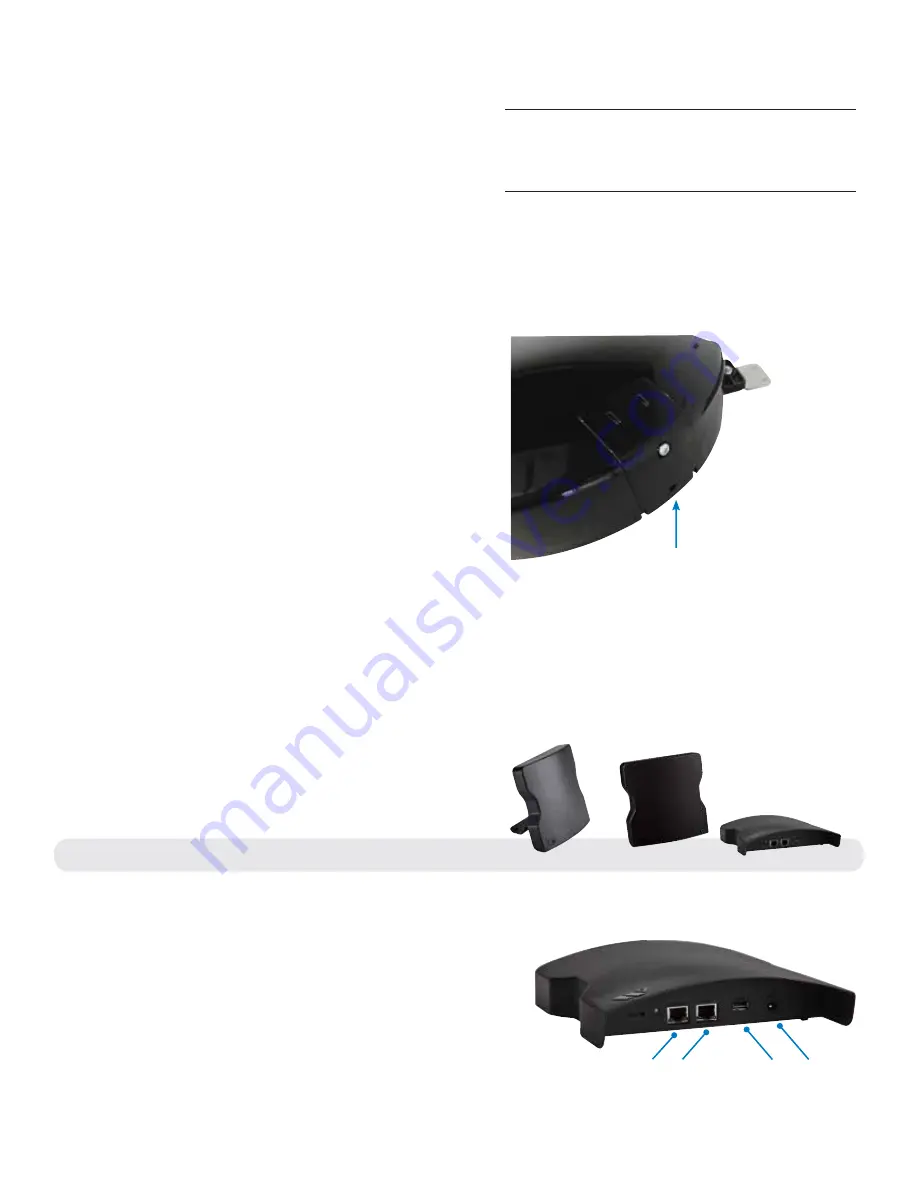
Place cable entry cover on the ODU and secure
using the provided screw.
See Figure 3
.
10)
Decide where the indoor unit (IDU) will be mounted
inside the vehicle to determine the best location for
the Ethernet cable to enter the vehicle. Drill a 3/4”
hole through the roof and push the Ethernet cable
into the vehicle. Make sure the cable is accessible
from the area where the IDU will be located.
11)
Add a bead of sealant around the hole for the cable.
Place the provided cable entry plate over the hole
and cable. Secure cable entry plate in place using
the supplied screws. Seal the plate and screws
with approved sealant.
12)
Secure the cable to the roof every 12–16 inches
to eliminate excessive cable movement. Seal the
cable to the roof between the unit and cable entry
plate. Cable clamps (not provided) may need to
be used depending on the distance the cable runs
across the roof.
NOTE:
Before using the supplied mounting screws,
check with the vehicle manufacturer for any special
screw requirements.
INTERIOR INSTALLATION
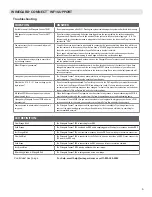
The IDU is designed to allow
for multiple mounting options.
1)
Connect the Ethernet cable from the ODU to the
POE port on the bottom of the IDU.
See Figure 4.
2)
Plug the power adapter into the IDU. The system
may take as long as five minutes before being
ready for a WiFi connection.
Figure 4
Figure 3
Cable entry cover
secured to ODU
POE
Port
Ethernet
Port
Power
Port
USB
Port
Stand mounted
Wall mounted
Laying flat


