background image

If the POS system does not find a BEETLE card or diskette in drive A:, it
automatically continues loading from drive C:.

Startup behavior

If drive A: contains a BEETLE card or diskette that does not
contain an operating system, the POS system cannot start
up. If this happens, replace the card or diskette with a
bootable one or simply remove it.

The operating system responds with additional messages on the cashier
display or monitor, as shown here, for example:

If the operating system has started up without error, the software for the
POS application can also be started automatically.

As soon as the POS system is ready for operation, a message to this
effect appears. For more information, refer to the description of your
application program.

EMP-NO:

—>

ON / OFF

Starting up the system

Startup behavior

GB - 61

Summary of Contents for BEETLE /XL

Page 1: ...BEETLE BEETLE XL Modular POS System User Guide ...

Page 2: ......

Page 3: ...BEETLE XL User Guide Edition June 2000 ...

Page 4: ...GmbH Co KG Copyright Wincor Nixdorf GmbH Co KG 2000 The reproduction transmission or use of this document or its contents is not permitted without express authority Offenders will be liable for damages All rights including rights created by patent grant or registration of a utility model or design are reserved Delivery subject to availability technical modifications possible ...

Page 5: ...ng and checking that everything is there 11 Setting up the device 11 Cabling the BEETLE XL 12 Securing the data cables 13 Monting the cable cover 14 Connecting to the mains power supply 15 Disconnecting cables 16 Basic settings 16 Adjusting the loudspeaker 17 Connecting peripherals 18 Keyboard KYBD 19 Cash drawer CASHDRW 19 Scanners and scales COM1 COM4 20 Customer display COM2 or COM4 21 Cashier ...

Page 6: ...ette 36 Removing a diskette 36 The CPU 37 General 37 Interfaces 38 Loudspeaker 38 Nonvolatile RAM NV RAM 38 Dyamic RAM 39 Connecting hard disks 39 Free AT slots 40 Additional slot on the CPU 40 Possible expansions 40 Mini disk MD 40 PCMCIA 40 Streamer drive 41 Magneto optical drive MO 41 Power pack 42 Accumulator batteries 43 Changing the accumulator batteries 44 Security against power failure 47 ...

Page 7: ...ransaction Manager 58 High Frequency Table 58 Hash File Access Method 58 Starting up the system 59 Startup behavior 59 Output of MS DOS system error messages 62 BIOS Setup 63 Appendix 73 Technical data for the BEETLE XL 73 ASYNC controller 75 VGA controller 75 LAN controller 76 VGA LAN controller 76 What to do if 77 The configuration label 78 Power on self test POST 79 MS DOS critical errors 80 PO...

Page 8: ...ce when the equipment is operated in a commercial environment This equipment generates uses and can radiate radio frequency energy and if not installed and used in accordance with the instruction manual may cause harmful interference to radio communications Operation of this equipment in a residential area is likely to cause harmful interference in which case the user will be required to correct t...

Page 9: ...with a safety tested power cable and may be connected only to a grounded contact power socket When setting up the device ensure that the power socket on the device and the grounded contact utility power socket are easily accessible To disconnect the device from the supply voltage completely switch off the device and disconnect the power plug Ensure that no foreign objects e g office clips find the...

Page 10: ...disposed of in accordance with local regulations for special waste In emergencies e g damaged housing or power cable penetration by liquids or foreign bodies the device must be switched off immediately the power plug disconnected and the Customer Service of Wincor Nixdorf WN must be notified Do not switch on the device while the cover is open The device may only be repaired by authorized qualified...

Page 11: ...lar POS system externally This provides you wtih an extraordinary amount of flexibility when you put together your POS system You can also configure and run the BEETLE XL using only the external cashier display a monitor is not a necessity The flexibility of the storage concept of the BEETLE XL makes it perfect for the modular system You can use the BEETLE card the floppy drive and of course the h...

Page 12: ... the BEETLE XL The second chapter contains an overview of the components of your BEETLE POS system You will also find a detailed description of how to go about fre quent activities such as how to use the BEETLE card and flop py disks The third chapter provides a brief overview of the software of the BEETLE XL system The fourth chapter explains how to get the system up and running This chapter assu...

Page 13: ...ipheral devices that can be connected are shipped with their own manuals These devices are therefore not described in any detail here Please refer to the relevant manuals Cleaning the BEETLE XL Clean your BEETLE XL at regular intervals using the computer cleaning set for plastic surfaces that is available from Wincor Nixdorf You will find the order number in the Wincor Nixdorf catalog or you can s...

Page 14: ... protect our environment by only switching on your equipment when it is actually needed If possible even avoid the stand by mode as this wastes energy too Also switch your equipment off when you take a longer break or finish your work At this time there are still some parts that are not reusable Wincor Nixdorf guarantees the environmentally safe disposal of these parts in a Recycling Center which ...

Page 15: ...which occur despite a normal use of the product Damages because of improper or insufficient maintenance improper use of the product or unauthorized modifications of the product inadequate location or surroundings will not be covered by the warranty All parts of the product which are subject to wear and tear are not included in the warranty engagement Recycling GB 8 ...

Page 16: ... use different kinds of scanners such as distance scanners hand held scanners or stationary scanners use scales and scanner scales observe the relevant official standards connect various printers use POS keyboards with or without swipecard readers use cash drawers various types connect a monitor and various keyboards install a LAN card and integrate the BEETLE XL into a network connect SNIkey upgr...

Page 17: ...and your modular POS system from connecting SNIkey to integrating it into a network BEETLE Printers SNIkey Cash drawers POS keyboards Scanners Monitors Scales Keyboards Cashier and customer displays BEETLE XL peripherals BEETLE XL in a network The individual POS system GB 10 ...

Page 18: ...orm your Wincor Nixdorf sales outlet immediately We advise you to keep the original packaging in case you transport the device in future this protects it against impact and shock Setting up the device Set up the BEETLE XL POS system where it will not be exposed to extreme environmental conditions Protect the device from vibrations dust moisture heat and strong magnetic fields To ensure that the BE...

Page 19: ...100 mm A closed area made of nonflammable material e g concrete or metal must be located under the vertically mounted BEETLE XL Cabling the BEETLE XL Cabling the BEETLE XL To install the devices proceed as follows in this order Make sure that the power switch on the front of the housing is set to off i e visibly protruding To do this you may have to open the slide cover first see the illustration ...

Page 20: ...uring the data cables Secure interface connectors with knurled screws using your fingers Secure interface connectors with standard screws using a screwdriver After you have done this cover the cables by mounting the cable cover see next page Under no circumstances connect data or power cables when the system is switched on The individual POS system Cabling the BEETLE XL GB 13 ...

Page 21: ...covers where necessary depending on how you want to connect the cables You do not need a tool for this these plastic parts can be removed by hand To mount the cable cover lower it into the guides indicated by arrows in the illustration Be careful not to let the cable cover get jammed when you do this Cabling the BEETLE XL The individual POS system GB 14 ...

Page 22: ...bles belonging to the BEETLE and the periphe rals into the grounded contact utility power sockets You can now use the power switch on the front of the BEETLE to switch it on You may have to unlock the slide cover and slide it to the left before you can do this The power supply unit can be connected to all conventional power supply networks It adapts automatically to the voltage supplied A fan keep...

Page 23: ...e grounded contact utility power sockets Unplug all cables from the devices Use your thumb to pull the pla stic cover away from the socket of the Mini DIN connector This releases the lock and the metal of the Mini DIN connector beco mes visible Remove the cable from the sok ket Basic settings Ex works the BEETLE XL is configured to your order Your configuration must be adapted subsequently to supp...

Page 24: ...ou can set the volume to suit your requirements by means of the volume control on the back of the POS system housing Controller KYBD CASHDR COM4 COM3 COM2 LAN LPT1 DC24 COM7 COM8 COM1 VGA LAN ASYN The individual POS system Adjusting the loudspeaker GB 17 ...

Page 25: ...he illustration below shows the rear panel of the BEETLE XL with the locations of the connecting sockets and connecting plugs To connect a monitor you need a video card However you can also run the BEETLE using only an external cashier display connected to the COM3 port To connect your system to a network you require another expansion card Rear panel of the BEETLE XL KYBD CASHDR COM4 COM3 COM2 LAN...

Page 26: ...ing cables with connector locking mechanisms take hold of the connector housing when disconnecting them Extension cables are available for keyboards Cash drawer CASHDRW The BEETLE XL has a second 6 pin mini DIN jack for connecting a cash drawer Make sure that the connector is plugged firmly into the socket to prevent malfunctioning Power is supplied to the cash drawer via this socket When using ca...

Page 27: ... must be connected to COM1 COM1 is a 9 pin D sub connector whereas COM2 to COM4 are 9 pin D sub sockets Make sure that the scanner connector is plugged securely into the socket to prevent possible malfunctioning Power is supplied via this socket If you connect scales to the BEETLE XL that do not come from Wincor Nixdorf WN you have to obtain a WN license for the driver software Connecting peripher...

Page 28: ...r display is plugged firmly into the socket to prevent possible malfunctioning Power is supplied via this socket Cashier display COM3 Connect the cashier display to the COM3 serial interface This is a 9 pin D sub socket Make sure that the connector for the customer display is plugged firmly into the socket to prevent possible malfunctioning Power is supplied via this socket The individual POS syst...

Page 29: ... via the rubber socket on the back of the BEETLE XL Connecting standard PC peripherals COM1 You can connect standard peripherals to the BEETLE XL via the COM1 serial interface Make sure that all additional devices have been tested for RFI suppression pursuant to the legal requirements of your country Connecting peripherals The individual POS system GB 22 ...

Page 30: ...er LPT1 24V 4A You can connect a printer to the standard parallel interface LPT1 In addition suitable POS printers can be supplied with power via a low voltage socket 24V max 4A A connecting cable with a HOSIDEN connector is required for this Do not connect a HOSIDEN plug when the system is turned on Connect only cable to the 24V connector which are marked with DP 1 or DP 2 The individual POS syst...

Page 31: ...Connecting peripherals The individual POS system GB 24 ...

Page 32: ...components Overview The illustration below shows what the BEETLE XL looks like from the outside BEETLE Lock LED Slide BEETLE card Floppy disk drive Optical disk or streamer On Off switch Ventilator Cable cover GB 25 ...

Page 33: ...The following illustration shows what the BEETLE XL looks like inside The BEETLE XL components CPU board Power pack Accumulator BEETLE card Front Panel The BEETLE XL components GB 26 ...

Page 34: ...e and manipulation The following diagram gives you an overview of the options available The BEETLE XL components Storage concept The gray shading indicates the standard configurations with which the BEETLE XL is shipped All other configurations are optional HDD1 PCMCIA media 1 0 Type1 Top ottom lexible rea Streamer MD MD MD MD ATA ATA PCC MO MO MO HDD2 HDD2 HDD2 HDD2 FD FD HDD2 Reserve Storage con...

Page 35: ...orf branch The BEETLE XL components Storage concept Technical details Interface PCMCIA media 1 0 Type I BEETLE card PCMCIA FD floppy disk drive 3 5 floppy disk drive Streamer MO magneto optical disk MD mini disk ATA hard disk PCMCIA 2 1 Type III PCC PCMCIA I O card 2 0 Type II HDD hard disk drive enhanced IDE The BEETLE XL components Storage concept GB 28 ...

Page 36: ...lative insensitivity to moisture and heat rapid data access no moving parts BEETLE cards can be used for a variety of purposes such as loading programs backing up data e g daily sales figures access control as an electronic key There is an internationally valid standard for BEETLE cards PCMCIA JEIDA This means you can use cards of the same type made by different manufacturers The BEETLE XL allows ...

Page 37: ...ef descriptions of the different types of cards follow SRAM cards This card type can be read and written to the system any number of times You can write protect the SRAM card to prevent the stored data from being inadvertently overwritten An integrated battery ensures that data is retained The length of time data is retained depends on the life of the battery which in turn depends on the storage c...

Page 38: ...ronically Consequently they are ideal for data subject to frequent modification The cards can only be written in special memory card drives like in the BEETLE XL FLASH EPROM cards do not require batteries for data retention Inserting the BEETLE card Hold the BEETLE card with the arrow side up and the arrow pointing in the direction of the slot Then insert the card connector end first into the slot...

Page 39: ...t to the slot You can now remove the card Write protection for BEETLE cards To write protect the BEETLE card slide the lock shown in the illustration to the WP write protection position This applies only to SRAM and FLASH EPROM cards WP BATTERY HOLDER LOCK The BEETLE card The BEETLE XL components GB 32 ...

Page 40: ... card It is only possible to change the battery without losing the data stored in the case of memory cards made by certain manufacturers For more information contact your WN branch Unlatch the battery lock Remove the battery holder and battery from the BEETLE card WP BATTERY HOLDER LOCK The BEETLE XL components The BEETLE card GB 33 ...

Page 41: ...out Hold the sides of the battery and avoid touching its plus and minus terminals at the same time To insert the new battery carry out the above steps in reverse order Please dispose of used batteries in an environment friendly manner 3V 3V 3V The BEETLE card The BEETLE XL components GB 34 ...

Page 42: ...can be used for a variety of purposes such as loading programs backing up data e g daily sales figures access control such as an electronic key The floppy drive You can write protect a diskette to protect your data from being inadvertently overwritten Data can be written to the diskette Data cannot be written to the diskette The BEETLE XL components The floppy drive GB 35 ...

Page 43: ...ress the gray ejection button next to the drive slot You can then remove the diskette Never remove the diskette when the drive is being accessed i e when the LED indicator for the drive is illuminated This can damage the drive and diskette You can use the lockable slide cover to prevent those not authorized to do so from accessing the floppy drive Lock BEETLE card Floppy disk drive Slide BEETLE Th...

Page 44: ...o the typical PC modules and interfaces components such as a nonvolatile memory NV RAM and optionally a VGA controller for connecting a monitor The board s connecting plate has the sockets for the external peripherals The illustration below shows the connector assignments for the CPU KYBD CASHDR COM4 COM3 COM2 LAN LPT1 DC24 COM7 COM8 COM1 VGA LAN ASYN The BEETLE XL components The CPU GB 37 ...

Page 45: ...or connecting a keyboard and a cash drawer We advise you to connect to the BEETLE XL only devices that are approved by WN If you are in any doubt contact your WN branch Loudspeaker A loudspeaker is connected to the CPU You can adjust its volume by means of the control on the rear panel of the modular POS system see page GB 17 Nonvolatile RAM NV RAM This memory chip can be used to store important d...

Page 46: ... Connecting hard disks Up to two 80486 CPU or four Pentium CPU hard disks can be connected to the CPU These store the operating system and POS specific software They can also be used for the long term storage of the electronic journal 3 5 hard disks are used for this These disks have a 16 bit IDE Integrated Drive Electronic AT bus system interface and an integrated controller Hard disks with a cap...

Page 47: ...LAN or ASYNC can be inserted Possible expansions Possible expansions Mini disk MD A mini disk can be compared to a diskette except that its capacity is up to 100 times larger It is therefore particularly suitable for transporting large quantities of data For more information contact your WN branch PCMCIA If you insert a PCMCIA controller into one of the slots on the rear panel depending on the typ...

Page 48: ... number of advantages over other storage technologies Extreme temperatures and strong magnetic fields do not affect the MO There are no problems such as headcrash with the read head Unlike the streamer drive it makes it possible to access specific data The standardization of the data format for both 5 25 and 3 5 inch media ensures trouble free data interchange At a constant 25 Celsius the data can...

Page 49: ...moved or replaced by authorized technical personnel The power cord receptacle rubber connector and the power output socket rubber socket for the monitor are located on the back of the BEETLE XL The power switch is on the front You can use the lockable slide cover to prevent those unauthorized to do so from switching the system on Power pack On Off switch Lock Slide BEETLE Power pack The BEETLE XL ...

Page 50: ...of the length of time for which battery power is supplied to the BEETLE XL in the event of a power failure when the accumulator batteries are fully charged A peripheral device connected to the power output socket of the POS system is not supplied with power in the event of a power failure Accumulator batteries The BEETLE XL components Duration of power supply Power output Operation 2 minutes Full ...

Page 51: ...ator batteries approved by WN You must always replace both accumulator batteries To change the accumulator batteries proceed as follows Make sure the device is switched off and the power plug is disconnected To access the accumulator batteries you have to remove the box housing Unscrew the four screws at the sides of the BEETLE XL and lift the upper part of the housing off as shown in the illustra...

Page 52: ...ble between the power supply and the accumulator batteries see the illustration below This breaks the connection between them Now remove the four screws of the metal cover indicated in the illustration Use a magnetic screwdriver to do this so that the screws do not fall into the housing CPU board Power supply Accumulator Front Panel Front panel Accumulator batteries The BEETLE XL components GB 45 ...

Page 53: ...ace the old and the new batteries in same position next to each other Disconnect the cables of the old accumulator batteries in the order shown in the illustration 1 2 3 4 Connect the cables to the new batterie in reverse order 4 3 2 1 Front panel 2 short screws 2 long screws red black black 1 2 3 4 disconnect connect The BEETLE XL components Accumulator batteries GB 46 ...

Page 54: ...period of time The power required for continued operation is supplied by the accumulator batteries Because the system is kept running by the accumulator batteries the application program can be terminated normally without data loss The power failure is reported to the application program via the Retail Device Interface see the chapter entitled Software The application then ensures that the program...

Page 55: ...t every five years The lithium battery must be changed by authorized trained personnel only If it is not done properly there is a risk of explosion Location of the battery 80486DX2 CPU The battery is located in a socket on the CPU To access the battery proceed as described in the section entitled Changing the accumulator batteries until you have removed the housing The BEETLE XL components Changin...

Page 56: ...ium battery must be disposed of in accordance with local provisions for the disposal of special waste When inserting the new battery make sure its plus and minus terminals are at the correct ends of the socket The correct positioning is indicated clearly on the socket After you have changed the battery you must reset the Setup parameters see the chapter entitled BIOS Setup Changing the lithium bat...

Page 57: ...rs Two of these are provided for future enhancements The green LED indicator tells you whether the POS system is switched on the yellow LED indicator tells you that the hard disk is being accessed LED indicators Strom grün Festplatte gelb Power green Hard disk yellow The BEETLE XL components LED indicators GB 50 ...

Page 58: ...or connecting various peripherals When connecting an ASYNC controller note that the total power consumption of all power supplied serial interfaces must not exceed 900 mA VGA controller The VGA controller allows a monitor to be connected LAN controller VGA LAN controller The LAN controller allows you to integrate the BEETLE XL into a network the combined VGA LAN controller allows you to connect a ...

Page 59: ... lift the housing off Be careful not to let the housing get caught as you do this Use a wrench to remove the screws from the panel where you are going to insert the card To find out where to insert the card refer to the illustration Then attach the card using the screws you removed from the panel BEET LE Plug in card Plug in cards Configurations GB 52 ...

Page 60: ...N branch PCMCIA controller Using an appropriate PCMCIA controller you can use various storage media such as FLASH and I O magnetic cards magnetic cards of Type 1 EXT Type II EXT and Type III and ATA removable disks If you want to know more about PCMCIA controllers contact your WN branch SNIkey controller The SNIkey is a new input output device used with BEETLE POS systems Once you have installed a...

Page 61: ...wer cable is disconnected To access the slots you have to remove the four screws on the POS system s housing and then lift the housing off To insert a card you have to remove the metal cover from a free slot by removing the screw BEET LE Metal cover AT plug in cards Configurations GB 54 ...

Page 62: ...ded for half length ISA cards In a Pentium class CPU the upper slot is reserved for a PCI card the second slot is provided for a PCI card or a full length ISA card and the third and fourth slot from above can be used for half length ISA cards Ensure that the card is firmly inserted Secure the card by means of the screw you removed from the panel Finally replace the housing screw it in using the fo...

Page 63: ...AT plug in cards Configurations GB 56 ...

Page 64: ... under the MS DOS operating system English version which has been enhanced especially for the POS applications This makes it possible for example to display all system messages on the cashier display These messages are adapted to suit the format of the cashier display Retail Device Interface The Retail Device Interface RDI is a standardized C programming interface for the BEETLE family It provides...

Page 65: ...pplications and the operating system The RTM permits shared data to be accessed for the purpose of looking up prices for example and transaction files to be maintained High Frequency Table Price Look Ups PLU are executed by means of the High Frequency Table HFT The HFT provides function libraries with standardized interfaces for this purpose Hash File Access Method Like the HFT the Hash File Acces...

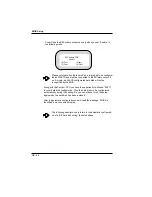
Page 66: ...r After installing the BEETLE XL switch on the POS system by means of the power switch on the front of the housing The system then performs an automatic self test to check its basic functions You will see the following message on the four line cashier display or the monitor for example xx xx is the place holder for the version number It is then decided which medium the operating system and POS app...

Page 67: ...edium The network is always assigned drive C The hard disk can be assigned drive C or D The system can only be started from it when it is configured as drive C The modular BEETLE XL POS system can be started from two drives However please note the following The system can be started from drives A and C only The storage medium must be bootable The following priorities apply The POS system always at...

Page 68: ...te with a bootable one or simply remove it The operating system responds with additional messages on the cashier display or monitor as shown here for example If the operating system has started up without error the software for the POS application can also be started automatically As soon as the POS system is ready for operation a message to this effect appears For more information refer to the de...

Page 69: ...the error occurred 0 Reserved sector MS DOS area 1 File allocation table FAT 2 Directory 3 Data area ooooo Read or write operation dddddddd Block device driver Drive e g C Character device driver Name e g COM1 mm mm Message text e g Write protect error If such an error message appears acknowledge it by pressing the C key on the keyboard The operating system then repeats the previous message M el o...

Page 70: ...ing Setup If you are using a standard PC keyboard press Ctrl Alt and ESC simultaneously during system startup Setup is called if the keyswitch on the POS keyboard is set to position 4 during startup If the configuration is errored you can decide whether the system should ignore the error or call Setup The default output medium for the BEETLE POS system is the 4 line 20 column cashier display conne...

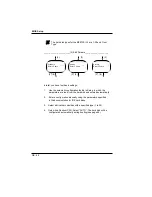
Page 71: ...appears initially as follows for example The first menu then appears You control the menus by pressing the numeric keys specified in parentheses The 2 key allows you to set the date and time in another menu 7 reboots the system Copyright C WN 1998 2000 Setup Rel 0 xy 22 01 98 ReBoot with 7 Help with 5 Enter Setup 2 Time 12 34 56 Date Jan 31 2000 8 Prev 6 Incr 2 Next 4 Decr BIOS Setup GB 64 ...

Page 72: ...ts 7 Reboots the system Following the menu for setting the time and date the menu for the drive settings appears Enter the settings for drives A and B here BEETLE card or diskette You can connect up to four hard disks to a CPU with a processor of the Pentium class You can see the following allocations PENTIUM 80486 PRI MASTR HD C PRI SLAVE HD B SEC MASTR not existing SEC SLAVE not existing The ter...

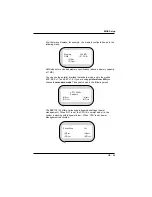
Page 73: ...m CPU you have the opportunity to choose AUTO for your hard disk configuration Thus the hard disk will be configurated automatically during the booting So you do not have to run the setup again when the hard disk has been replaced After the automatic configuration you will read the message FDISK n identified on a connected display The following description only refers to the automatic configurati ...

Page 74: ...cr 2 Next 4 Decr HD D User Type 3 List Params 8 Prev 6 Incr 2 Next 4 Decr Cyl 615 Head 4 Sec 17 20 MB Any Key to return HD D Auto Config YES 9 NO other Cylinders 0 3 Edit Params 8 Prev 2 Next Cyl 977 Head 10 Sec 22 81 MB Any Key to return Heads 0 3 Edit Params 8 Prev 2 Next Save Params YES 9 NO other Sectors 0 3 Edit Params 8 Prev 2 Next Capacity 0MB 3 Edit Params 8 Prev 2 Next Cyl 1023 A B Cyl 10...

Page 75: ...e parameters are read from the hard disk and entered automatically 2 Enter a configuration manually using the parameters specified in the documentation for IDE hard disks 3 Select a drive that coincides with a specified type 1 to 39 4 Only with a Pentium CPU Select AUTO The hard disk will be configurated automatically during booting see page 66 Cylinders ____ Enter 4 Chars Heads __ Enter 2 Chars S...

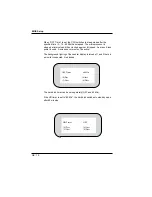
Page 76: ...v1 9 If you are using printers from WN you choose the standard mode Take your choice in the following mask The BEETLE XL offers various operating mode settings power management When NO is set the CPU is in normal mode i e the system is working with full power draw When YES is set power management is activated Memory 640 KB XMS 3072 KB 8 Prev 2 Next PowerMan Yes 8 Prev 6 Incr 2 Next 4 Decr LPT1 Mod...

Page 77: ...er is used A screen saver must not be active The background lighting of the cashier display is turned off and if there is a monitor connected it is blanked The hard disk timer can be set separately OFF and 60 Min If the HD timer is set to 60 Min the hard disk switches to standby mode after 60 minutes OFF Timer 60 Min 8 Prev 6 Incr 2 Next 4 Decr HD Timer OFF 8 Prev 6 Incr 2 Next 4 Decr BIOS Setup G...

Page 78: ...ode All interrupts are processed in sleep mode they are not lost In the next mask you can enter the card used for the display mono for the cashier display or VGA for the monitor In the absence of a VGA card the display entry must be set to mono or operator so that the outputs appear on the cashier display By pressing the numeric key 7 you can terminate Setup by rebooting the system COM Supply OFF ...

Page 79: ...e rest can only be used by other operating systems e g Windows NT OS 2 LBA MS DOS can be started from a partition up to 7 8 gigabytes GB in size Non DOS Use this setting when you want to install an operating system different from MS DOS e g SINIX Z If your BEETLE XL works with a Pentium CPU with the plug and play and PCI features then you will finally see this mask Select Yes when a new plug and p...

Page 80: ...h 280 mm Depth without cable cover 395 mm Total height 145 mm Weight 12 kg Climatic category IEC 721 3 3 class 3K3 Operating temperature 5 40 C Input voltage 100 120 V 200 240 V Power consumption 6 3 A Frequency of system voltage 50 60 Hz Noise 53 dB A GB 73 ...

Page 81: ...ble Loudspeaker Adjustable volume Hard disk connection IDE interface 3 5 disk Floppy disk connection Standard interface Submodule One VGA controller one LAN controller optional or one VGA LAN controller or one ASYNC Nonvolatile RAM 32 128 512 kB data retention approx 5 years BEETLE card Standard interface PCMCIA max 64 MB connection Cash drawer interface Mini DIN socket 6 pin interface Serial Stan...

Page 82: ...e FIFO I O base address area 02E8H 02EFH Interrupt IRQ12 Connection 9 pin D SUB socket CL GD5420 chip 256 kB video RAM Resolution max 640 480 16 Colors max 256 Refresh rate 72 Hz VGA BIOS ROM 32 KB 8 bit Monitor connection 15 pin HD SUB socket Appendix GB 75 ...

Page 83: ...are the same as for the VGA and the LAN controller separately DP83905 AT LANTIC chip RAM 8 KB default CC00h CDFFh only in shared memory mode I O address area 32 bytes default 240h 25Fh Interrupt IRQ5 BOOT PROM 16 KB default C8000h CBFFFh Connection 8 pin telephone socket RJ45 10BaseT max cable length 100 m Appendix GB 76 ...

Page 84: ...et If the system s Setup menu check the position of the key is automatically called in the central lock on the keyboard If no image is visible on a adjust the brightness and contrast connected VGA monitor controls and check that the monitor is switched on If the system cannot check to see whether the card has access the BEETLE card been correctly inserted and locked into place and whether the batt...

Page 85: ...80 DOS CPU 386SX 486SLC 486DX 2 SINIX COM3 4 IRQ disabled IRQ 10 11 IRQ 10 both RAM CMOS 2MB 4MB 32KB CMOS KB CMOS HD Size MB Cylinder Heads Sectors 3 5 270 170 944 1011 14 15 40 22 127 677 722 9 10 41 23 2 5 VGA ASYNC IRQ 12 disabled I O 2E8 BIC IRQ I O DMA Ch SCC Int Sby 2 4 wire NEN 15 220 R W 0 1 M1 yes 2 yes changed LAN submodule 8K RAM ATC 16K RAM K RAM BOOT ROM TCP IP 8K K IRQ I O RAM base ...

Page 86: ...ier display if there is no monitor or cashier display connected The error messages are output on the cashier display in the following format TEST POS TEST TYPE ERRORNUMBER Error text The error messages output during the test are always in English The following is an example of an error message output on the cashier display TEST POS MC 02 BATTERY EMPTY ANY KEY TO RETRY During the POST static errors...

Page 87: ...e a write protected disk 1 Unknown unit 2 Drive not ready 3 Unknown command 4 CRC data error 5 Invalid call structure 6 SEEK error on disks 7 Unknown data medium 8 Sector not found 9 End of paper printer A Write error B Read error C General error POST Appendix GB 80 ...

Page 88: ...SIZE 4 DATA ERROR 5 CHANGE MC ERROR 6 NV RAM 5 ADDRESS ERROR 1 DATA ERROR 5555 2 DATA ERROR ABAB 3 DATA ERROR 0000 4 Printer 6 UNKNOWN PRINTER 1 controller RESET ERROR 2 UNKNOWN STATUS 3 CPU ERROR 4 CPU RAM ERROR 5 TIMEOUT 6 LPT ERROR 7 ASIC ID ERROR 8 ASIC REGISTER ERROR 9 ASIC TIME ERROR 10 ASIC RAM ERROR 11 Z RAM ERROR 12 ROM CHECKSUM ERROR 13 Cash drawer 7 CASHDRAW CLOSED not appl CASHDRAW OPE...

Page 89: ... HARDWARE DATA ERROR 16 PRINTER TIMEOUT 17 PRINTER POWERUP ERR 18 CMOS CHECKSUM ERROR 19 PRINTER ERROR 20 EM PRINT TIMEOUT 21 PRINTER ERRORLINE 22 NO OPERATOR DISPLAY 23 NO INT CUST DISPLAY 24 NO EXT CUST DISPLAY 25 WRONG CMD ORDER 26 INST BUFFEROVERRUN 27 NO MFC1 28 NO MFC2 29 TH WRONG FORMAT 30 DATE WRONG FORMAT 31 NO HARDWARE DATA 32 MEM NOT FORMATTED 33 UNKNOWN_COMMAND 34 DATE NOT ALLOWED 35 W...

Page 90: ...e CPU Fixed disk configuration error Defined configuration not supported Correct hard disk configuration HD controller fail Controller failure Replace hard disk controller Fixed disk failure 0 1 Defective hard disk 0 C 1 D Reattempt start If this is not possible replace hard disk Hard disk read failure strike 7 to retry boot Defective hard disk Reattempt start If this is not possible replace hard ...

Page 91: ...ing hex value Failure in memory chips connected to circuit Check switch configuration Memory double word logic failure at hex value read hex value expecting hex value Memory chip circuit failure Replace memory chip Memory odd even logic failure at hex value read hex value expecting hex value Failure in memory chips connected to circuit Check connection to circuit Memory parity failure at hex value...

Page 92: ...ce board Shutdown failure Failure in keyboard controller or log circuit which connects it Check keyboard controller Time of day not set Please run SETUP program Clock not set Start SETUP Timer chip counter 2 failed Chip failure Check timer chip Unexpected interrupt in protected mode Non maskable interrupt NMI port cannot be deactivated Check CPU in particular log circuit of interrupt Unexpected ty...

Page 93: ... error occurred during POST press numeric key 7 to attempt system restart Base Memory size 64K Input for the size of the main memory for functions Extended Memory size 00000K Input for the size of the extended memory for functions If one of the above errors occurs please contact your service engineer or customer service department POST Error lists GB 86 ...

Page 94: ...ata processing system The CPU monitors all operations and provides data and programs It comprises the control unit for input and output the computer and the main memory divided into ROM and working memory RAM Interface Designates the transition point between different hardware units and software units or between hardware and software units of computers or their peripherals JEIDA Abbreviation for J...

Page 95: ...for memory cards Plug and Play PnP PnP means the automatic recognition of hardware components by the system Thus the installation integration and configuration of new components is made substantially easier Server This is a computer connected to a local network the functions of which are made available to all of the connected network users e g a print server for printing out the data of all networ...

Page 96: ...nhanced Parallel Port EPROM Erasable Programmable Read Only Memory GS Geprüfte Sicherheit tested safety HDD Hard Disk Drive HFT High Frequency Table HSF Hash File Access Method IDE Integrated Drive Electronic ISO International Standardization Organization JEIDA Japan Electronic Industry Development Association LAN Local Area Network LBA Logical Block Addressing LED Light Emitting Diode LPT Line Pr...

Page 97: ...ccess Memory RDI Retail Device Interface RMH Retail Message Handler ROM Read Only Memory RPM Retail Presentation Manager RTM Retail Transaction Manager SCSI Small Computer Systems Interface SIMM Single In Line Memory Module SRAM Static Random Access Memory UL Underwriters Laboratories VGA Video Graphics Array XMS Extended Memory Specification Abbreviations GB 90 ...

Reviews: