


32
WILO SE 04/2017
Engl
is
h
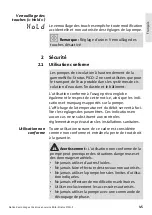
Installing the pump
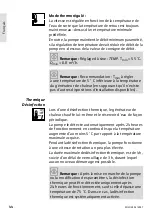
Observe the following points when installing the pump:
• Note the direction arrow on the pump housing (1).
• Install without tension, with glandless pump motor
horizontal (3).
• Place gaskets in the screwed connections.
• Screw on threaded pipe unions.
• Tightly screw the pump and the pipes together.
• Insulate the pump housing (1) with the thermal insu-
lation shell (5).
• Install non-return valves.
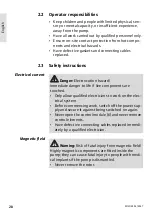
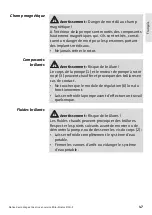
4.2
Making the electrical connection
The electrical connection may only be made by a quali-
fied electrician.
Preparation
• The current type and voltage must agree with the
specifications on the rating plate (4).
• Maximum back-up fuse: 10 A, slow-blow.
• Note switching frequency:
- Switch-on/off procedures via mains voltage
≤
100/24 h.
-
≤
20/h for a switching frequency of 1 minute
between switching on/off via mains voltage.
• The electrical connection must be made via a fixed
connecting cable equipped with a connector device or
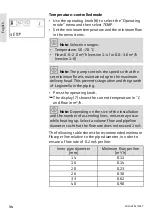
Note:
Install pump in the return to ensure perfect
functioning of the temperature-controlled mode.
1
1
3
3
Caution:
Damage to the pump!
Insufficient heat dissipation and condensation water
may damage the control module and the glandless
pump motor.
• Do not thermally insulate the glandless pump
motor (3).
• Ensure all condensate drain openings (13) are kept
free.
Summary of Contents for Stratos PICO-Z
Page 2: ...Fig 1 disinfect m h C 4 8 9 3 1 5 6 10 11 12 2 7 Fig 2 Fig 3a Fig 3b PE N L...
Page 3: ...Fig 3c Fig 3d Fig 3e Fig 3f Fig 4...
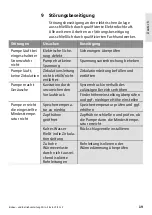
Page 20: ...20 04 2017 a a a a a a a a a a a a a a a a a a a Za Za a Ka a Z a a a a 24 a a a a a B...
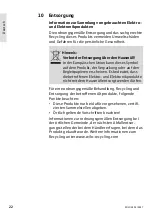
Page 22: ...22 04 2017 10 E a a a E E a a a a A a a a a a a A a H a a a a H V E Ha a a a a a a Ha...
Page 114: ...114 04 2017 a a a a a a a K a a a a a a a a Ka a a a a a a a a a 24 a a a a A a a a a a...
Page 155: ...a Z 155 1 a Z 1 1 2 3 4 5 6 7...
Page 157: ...a Z 157 10 11 12 H disinfect m h C H max H H min Hs Q...
Page 158: ...158 04 2017 24 5 4 3 2 5 1 4 4 1 6 TEMP 55 0 0 5...
Page 159: ...a Z 159 2 2 1 24 75 a Z...
Page 160: ...160 04 2017 806 5 551 553 0370 1 2 2...
Page 161: ...a Z 161 2 3 6...
Page 162: ...162 04 2017 1 3 6 2...
Page 163: ...a Z 163 3 5 9 4...
Page 164: ...164 04 2017 10 50 4 4 1 2 3 6 2 4...
Page 165: ...a Z 165 3 6 3 6 2 3 6 2 1 2 6 1 3 2 6 3 6 1...
Page 166: ...166 04 2017 1 3 1 5 4 2 4 10 A 1 13 3 3 13...
Page 167: ...a Z 167 100 24 20 3 0700 1 H05 3 1 5 W C 3a 3 9 6 W C 4...
Page 168: ...168 04 2017 5 5 1 8 MANU H 7 H 8 TEMP 7 C m m m h C m h C 50 70 0 0 2 0 1 4 0 0 3 0 1 6...
Page 169: ...a Z 169 0 2 5 2 8 ON 7 on dsft 1 14 0 11 16 0 14 20 0 23 26 0 38 33 0 62 40 0 90 disinfect...
Page 171: ...a Z 171 6 6 1 8 10 5 6 2 8 20 2 7 8...
Page 172: ...172 04 2017 9...
Page 173: ...a Z 173 24...
Page 174: ...174 04 2017 04 05 10 11 21 23 25 30 36...
Page 175: ...a Z 175 10...
Page 201: ...2 6 1RUWNLUFKHQVWUD H RUWPXQG HUPDQ 7 ZLOR ZLOR FRP ZZZ ZLOR FRP 3LRQHHULQJ IRU RX...