en
Installation and electrical connection
22
WILO USA 2021-01
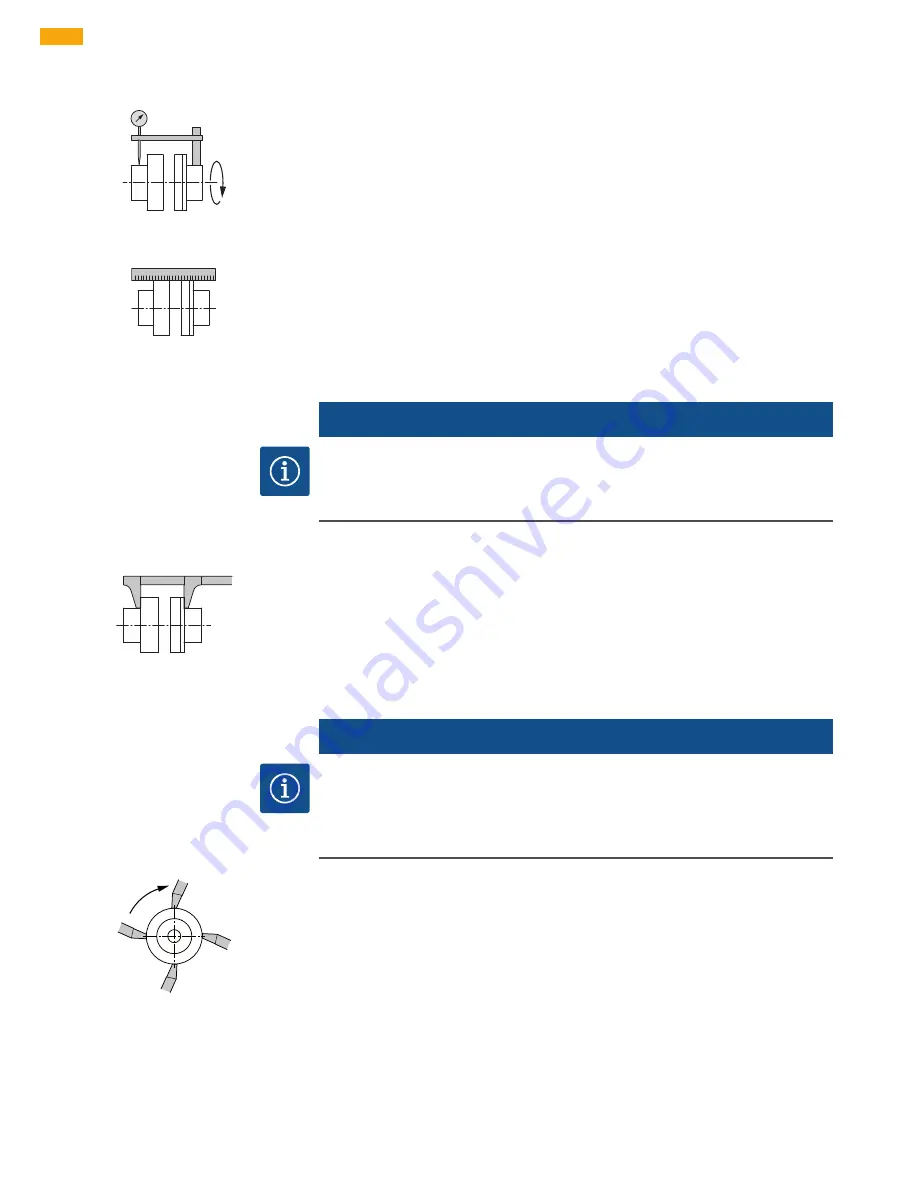
Checking the radial alignment
Fig. 13:
Checking the radial alignment with a
dial indicator
ƒ
Firmly clamp a dial gauge to one of the couplings or to the shaft. The piston of the dial
gauge must lie against the crown of the other half-coupling.
ƒ
Set the dial gauge to zero.
ƒ
Turn the coupling and write down the measuring result after every quarter turn.
ƒ
Alternatively, the radial coupling alignment can also be checked with a ruler.
Fig. 14:
Checking the radial alignment with a
ruler
NOTICE
The radial deviation of the two coupling halves must not exceed the maximum values
found in tables “Maximum RPM and Allowable Misalignment for EPDM couplings” and
“Allowable Misalignment for flexible jaw couplings”. This requirement applies to every
operating status - including operating temperature and inlet pressure.
Checking the axial alignment
Fig. 15:
Checking the axial alignment with a
calliper gauge
NOTICE
The axial deviation of the two coupling halves must not exceed the maximum values
found in tables “Maximum RPM and Allowable Misalignment for EPDM couplings” and
“Allowable Misalignment for flexible jaw couplings”. This requirement applies to every
operating status - including operating temperature and inlet pressure.
Fig. 16:
Checking the axial alignment with a
calliper gauge – circumferential check
Using a calliper gauge, circumferentially check the distance between the two coupling
halves.


