


page 15
page 16
Important
Once you connect the camera to your computer via the USB cable/ports, the camera
will then draw power from the computer. When completing the viewing, transferring,
copying or deletion of images, please make sure that you DISCONNECT THE USB
CABLE FROM BOTH THE CAMERA AND THE COMPUTER, as you will not be able to
power the camera OFF until you do so.
The directions as contained herein assume that you are using a Microsoft operating
system and not Linux or a Mac-based operating system. Even said, there may be
slight variations in your process based on the specific version of the operation
system that you are using as well as the predefined user preference for each
computer. The below listed steps are to serve as a guideline and may have to be
slightly modified based on the specific operating system and preference as on your
personal computer.
TIPS:
Recommended distance from target area is 25-30 feet for optimal imaging quality.
To improve the quality of your images, try not to mount the unit facing the rising or
the setting sun in order to avoid direct sunlight into the camera lens.
If mounting to a feeder unit or dusty environment, be sure to clean the camera lens
cover, incandescent flash cover, and the PIR sensor cover on a regular basis.
Periodically check the mounting of the camera to insure it is not loose.
Make sure that you securely latch the door closed each and every time you use the
unit, as the moisture seal will not be activated unless closed properly.
Check batteries frequently to insure no corrosive build-up, as this may cause harm
to the camera.
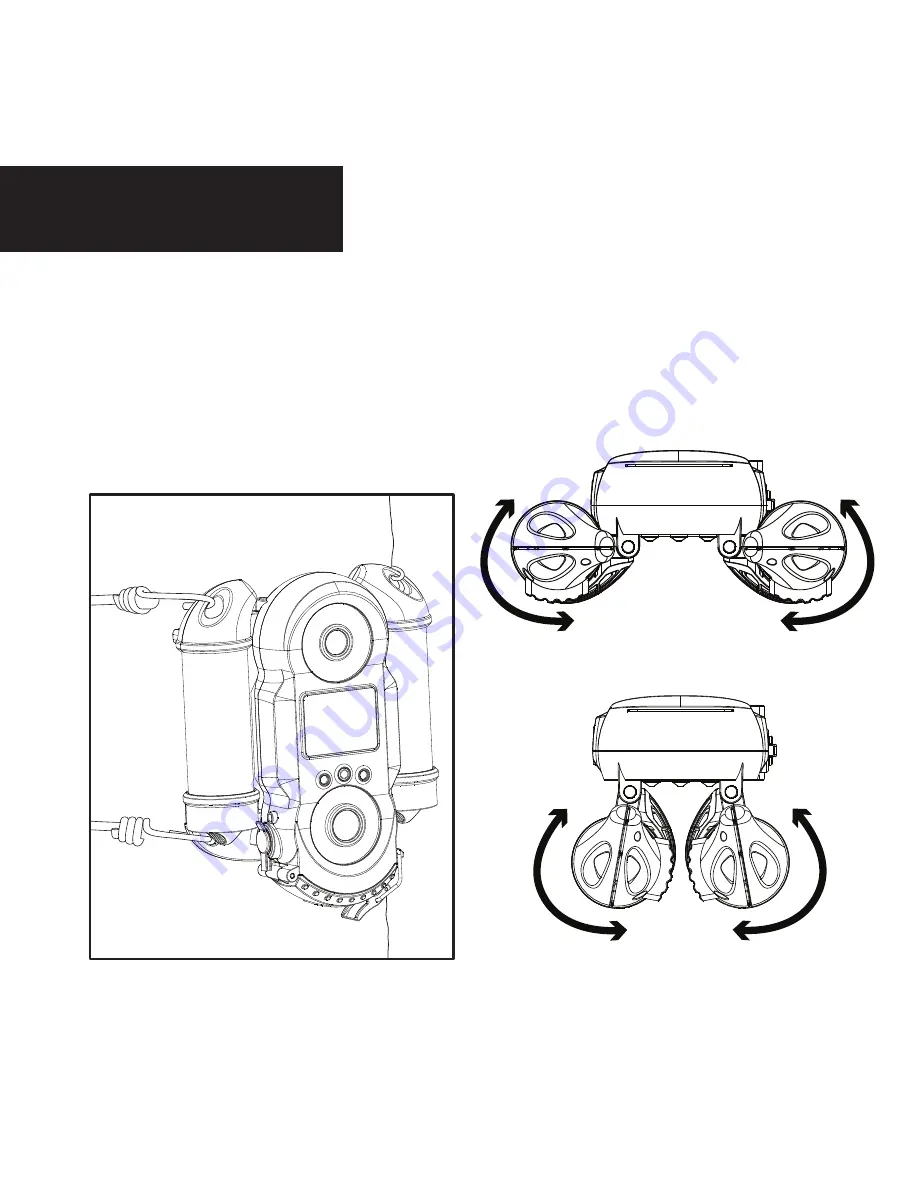
Mounting
When mounting to a tree, first latch
the 2 bungee cords through the
mounting holes on the left or right
side of the camera. Then, stretch
the cords around the tree and latch
the other ends of the bungee cords
through the mounting holes on the
opposite side of the camera.
1.
Adjustable sides to fit
almost any size tree.


