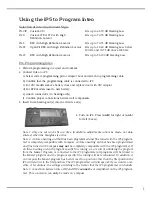
Inteo Program Options
When in the PROGRAM OPTIONS mode you may access Program Selection [
PRG
], Remote
Control matching [
RC3
], Program Gain Offset [
PGO
], High Definition Locator [
LOC
], Speech
and Noise [
SN
] and Feedback Cancelling [
FBC
].
1. The default setting for programs [
PRG
] is the Master Program. As many as two acoustic and
two telecoil programs may be selected in addition to the basic Inteo Master program for a
total of five. The Inteo CIC may have a total of three acoustic programs which can be
accessed only when using a remote control. The Inteo Master Program provides the best
overall performance in all environments. Each of the other seven available program options
has a special focus. Those programs are:
• [
T
]
telecoil
• [
TV
]
television
• [
MT
]
microphone plus telecoil
• [
MUS
] music
• [
AE
]
audibility extender
• [
ACC
]
acclimatization
• [
COMF
]
comfort
The dispenser has the flexibility of placing programs 2 through 5 in their preferred order.
The Master program is always in the first program position when programming with the iP5
programmer.
a)
Press [
M O D E
] (see B) to access [
P RO-
GRAM OPTIONS
].
b)
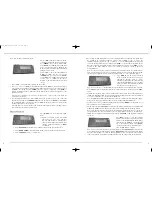
When viewing the PROGRAM
OPTIONS
screen note that [
P1
] beside
MAST
flashes
to indicate that the first program is the
Master Program. Listening programs that
h ave previously been selected will be
d i s p l ayed in the
P ROGRAM OPTIONS
window
but cannot be changed there.
c) Press [
PRG
] in the mode window (see B). [
PROGRAM SELECTION
] will be displayed.
[
P1
] beside
MAST
flashes.
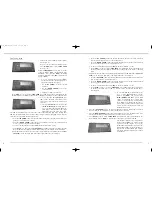
d) The second program [
P2
] position is indicated in the lower left of the [
PROGRAM SELEC-
TION
] screen by a dash [
-
]. A listening program may be added to this position by press-
ing the up or down [
ARROW KEY
] beneath to scroll through the available listening
program selections. The order of the program selections, when using the [
UP ARROW
] to
scroll, is as follows:
• Master
[
MAST
]
• Audibility Extender
[
AE
]
• Acclimatization
[
ACC
]
• Microphone plus Telecoil
[
MT
]
• Music
[
MUS
]
• Telecoil
[
T
]
• Television
[
TV
]
• No program
[
-
]
• Comfort
[
COMF
]
The order is reversed when scrolling with the [
DOWN ARROW
] key.
Use the same procedure to add or change a listening program selection in each available
program position.
• To access Automatic Output Control press [= =>] in the
FINE TUNE
mode followed
by [
MPO
].
• Press [
AOC
] (see B).
• Press [
UP ARROW
] beneath [
OFF
].
• Press [
BACK
] (see B) to return to [
MPO
]
.
An exclamation point (!) will appear in the
mode window next to [
AOC
] to indicate that a change has been made to Automatic
Output Control.
Note: When Automatic Output Control is turned off MPO values return to target and further
changes cannot be made.
4.
The default setting for Inteo Occlusion
Manager is [
O C C
]
off.
The Occlusion
Manager can be turned
o n
m a n u a l l y.
Turning Occlusion Manager on de-couples
the low fre q u e n cy channels, below 500 Hz,
f rom the higher fre q u e n cy channels and
i n c reases compression for the very low fre-
q u e n cy channels. It further allows for man-
ual gain adjustment of the isolated low fre-
q u e n cy re g i o n s. Ty p i c a l l y, gain is decre a s e d
by making negative offsets for LF1 and/
or LF2.
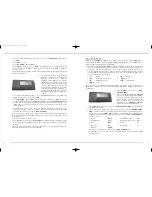
• To access Occlusion Manager press [
= =›
] in the
Fine Tune
mode (see B) followed by
[
OCC
]. An asterisk (*) appears above [
OFF
].
• Press [
UP ARROW
] beneath [
ON
]. An asterisk (*) now appears above [
ON
]. To compare
the two settings alternate between [
ON
] and [
OFF
] by pressing the [
ARROW KEYS
] and
ask the client to select the one that makes their voice sound better.
Ask the client to say
“Baby Jeanie is teeny tiny” and note the effect on the hollowness of their voice as they
repeat the phrase.
• For further fine tuning of the Occlusion Manager changes may be made to LF1
(LF1==125,250 and 350 Hz) or LF2 (LF2= 350 and 500 Hz). Gain in the desired chan-
nel can be decreased by pressing the [
DOWN ARROW
].
Note: If the occlusion is believed to be related to too much low frequency gain then decreasing
LF1 will help to alleviate the problem. Change LF1 for “loudness issues; change LF2 for “clar-
ity” adjustment.
• LF1 is not available on the Inteo élan.
• Press [
BACK
]( see B) to return to
FINE TUNE.
An exclamation point (!) will appear in the
mode window next to [
OCC
] to indicate that a change has been made to the Occlusion
Manager.
Note: If the occlusion is related to the actual physical fit of the hearing aid activating the
occlusion manager may NOT resolve the difficulty.
7
6
B
B
IN_IP5_Manual8.qxd 11/28/06 1:12 PM Page 6


