29
Caution:
Do not touch the light bulb. It contains pressurized gas and may explode due to natural body oils that
cause the light bulb to overheat.
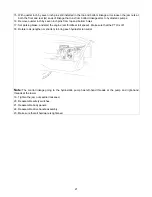
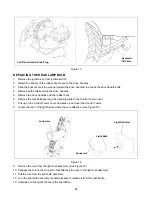
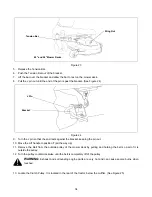
14. Insert the replacement light bulb into the light fixture.
15. Turn the light bulb assembly clockwise until it locks into place.
16. Carefully insert the connector into the light bulb assembly.
17. Replace the Control Tower cover and Drive Handle assemblies.
CHANGING THE FUSE
Always use the same rated fuse when replacing.
1.
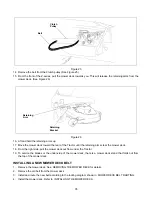
Open the engine compartment.
2.
Locate the fuse. It can be found on the wiring harness located in a protective cover between the engine and
the battery.
3.
Remove the old fuse and replace with the same rated fuse.
BATTERY MAINTENANCE
All batteries are sealed and maintenance free.
CHARGING THE BATTERY
The engine is equipped with an alternator which charges the battery when tractor is operated. Under normal
conditions, the battery only needs to be charged, during and after off-season storage.
Warning:
When removing the cables from the battery follow order of the steps to avoid a short
between the wrench and the frame.
REMOVING THE BATTERY
1.
Remove the Negative (black) cable.
2.
Remove the Positive (red) cable.
3.
Unscrew the two wing nuts from the battery rods.
4.
Remove the battery.
INSTALLING THE BATTERY
1.
Attach the Positive (red) cable.
2.
Attach the Negative (black) cable.
3.
Secure the two wing nuts to the battery rods.
JUMP STARTING
Warning:
Failure to use this starting procedure can cause sparking, and the gases in the battery to
explode.
1.
Attach one end of the red jumper cable to the Positive terminal (+) of the good battery.
2.
Attach the other end of the red jumper cable to the Positive terminal (+) of the bad battery.
3.
Attach one end of the black jumper cable to the Negative terminal of the good battery.
4.
Attach the other end of the black jumper cable to the frame of the unit with the bad battery.
Summary of Contents for 180, 180L, 200
Page 42: ...42 NOTES ...
Page 43: ...43 ...

