Whirlpool YWMH75021HV2 User Manual Download Page 4

4

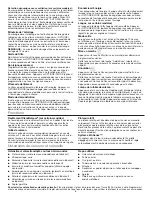
Demo Mode

Activate to practice using the control without actually turning on 

the magnetron. Touch OPTIONS/CLOCK to reach the Demo mode 

submenu, the follow the prompts to activate. The Demo icon will 

light up in the display. Repeat to deactivate.

Energy Save

To conserve energy, the Clock will automatically turn off when 

the microwave oven goes into Standby mode. Touch OPTIONS/

CLOCK to reach the Clock and Energy Save submenu and follow 

the prompts to turn on Clock.

Language (on some models)

Language of the display text may be changed. Touch OPTIONS/

CLOCK to reach the Language submenu, and follow the prompts 

to set language to English or French.

Standby Mode

When no functions are working (12-hour clock is displayed or if the 

clock has not been set), oven will switch to Standby Power mode 

and dim the LED brightness after 5  minutes. Press any keypad 

or open/close the door, and then display will return to the normal 

brightness.

Start 

Press the Start keypad to begin any cooking cycle. 
This keypad also functions as “Add 30 sec” and maybe pressed to 

add 30 seconds to your original cook time.

Cancel

Press the Cancel keypad to end any cooking cycle. 
This keypad also functions as Control Lock. Press and hold the 

Cancel keypad for 3 seconds to disable keypad. Press and hold 

for 3 seconds again to disable keypad.

Cooktop Light

Press the Cooktop Light keypad once to adjust its brightness 

setting to high. This is the light’s brightest setting. Press the 

Cooktop Light keypad again to adjust the brightness to low. Press 

the Cooktop Light keypad again to turn it off.

Features

CLEANRELEASE

®

 Cavity Coating (on some models)

The durable, nonstick coating resists soil buildup by making 

cleaning easier. See the “Microwave Oven Care” section.

Cooking Rack

Use the rectangular cooking rack only for 2-level cooking. To avoid 

damage to the microwave oven, always remove rack after 2-level 

cooking. To avoid damage to the microwave oven due to soil 

buildup, clean rack supports often.

Turntable

Turntable may be turned off for manual cooking only. This is 

helpful when cooking with plates that are bigger than the turntable 

or when cooking with plates that are side by side. Turntable 

cannot be turned off during preset or sensor (on some models) 

functions.

6th Sense™ System

A sensor in the microwave oven detects moisture released from 

food as it heats, and adjusts the cooking time accordingly.

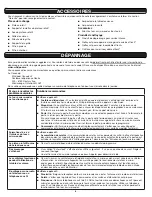
Cookware and Dinnerware

Microwave-Safe


Browning dish (Follow manufacturer recommendations.)


Ceramic glass, glass


China, earthenware (Follow manufacturer recommendations.)


Melamine (Follow manufacturer recommendations.)


Paper towels, paper plates, napkins (Use non-recycled paper.)


Plastic wraps, bags, covers, dinnerware, containers (Follow 

manufacturer recommendations.)


Pottery and clay (Follow manufacturer recommendations.)


Silicone bakeware (Follow manufacturer recommendations.)


Wax paper

Do Not Use


Metal cookware and bakeware


Straw or wicker


Gold, silver, or pewter


Non-approved meat thermometers, skewers


Twist ties


Foil liners, such as sandwich wrappers


Staples


Objects with gold or silver trim or with metallic glaze

To Test Cookware/Dinnerware:

 Place dish in microwave oven with 1 cup (250 mL) of water beside it. Program 1 minute of cook time 

at 100%. If dish becomes hot and the water stays cool, do not use the dish in the microwave oven.

Microwave Oven Use

For a list of preset programs, see the Quick Reference Guide provided with your model.

Manual Cooking/Stage Cooking

Touch COOK TIME/POWER, touch number keypads to enter time, 

touch COOK POWER (if not 100%), touch number keypads to 

enter power level (10-90), then touch the Start keypad.
If programming additional stages (up to three), touch OPTIONS/ 

CLOCK to enter programming for the next stage, then enter the 

cook time and cook power of each, then touch the Start keypad.

Sensor Cooking

A sensor in the microwave oven detects moisture released from 

food as it heats and adjusts the cooking time accordingly.
Make sure microwave oven has been plugged in for at least 

1 minute. Use microwave-safe dish with loose-fitting lid or cover 

microwave-safe dish with plastic wrap and vent. For optimal 

performance, wait at least 30 minutes after convection cooking or 

grilling (on some models) before sensor cooking.

Add More Time

At the end of any cycle, “PRESS 0 TO ADD MORE TIME” scrolls 

in the display. Enter the additional time, if desired, and start the 

microwave oven. The cook power for all non-sensor cycles will be 

the same as in the finished cycle but may be changed. If Add More 

Time is used after a sensor cycle, the cook power will be 100% 

but may be changed.

Summary of Contents for YWMH75021HV2

Page 1: ...mbol This symbol alerts you to potential hazards that can kill or hurt you and others All safety messages will follow the safety alert symbol and either the word DANGER or WARNING These words mean follow instructions instructions DANGER WARNING When using electrical appliances basic safety precautions should be followed including the following IMPORTANT SAFETY INSTRUCTIONS SAVE THESE INSTRUCTIONS ...

Page 2: ...t always present THIS COULD RESULT IN VERY HOT LIQUIDS SUDDENLY BOILING OVER WHEN THE CONTAINER IS DISTURBED OR A SPOON OR OTHER UTENSIL IS INSERTED INTO THE LIQUID To reduce the risk of injury to persons Do not overheat the liquid Stir the liquid both before and halfway through heating it Do not use straight sided containers with narrow necks After heating allow the container to stand in the micr...

Page 3: ...ouch and hold the Cancel keypad for about 3 seconds until 2 tones sound and Padlock icon appears in the display Repeat to unlock control Options Clock Twelve options settings may be adjusted 1 Clock 2 Scrolling peed 3 Sound 4 Language English or French 5 Energy Save 6 Auto Adapt Fan 7 Filter Alert 8 30 Minute Fan Timer 9 Light Timer 10 Temp Calibration on convection models 11 Demo Mode 12 Factory ...

Page 4: ...rned off during preset or sensor on some models functions 6th Sense System A sensor in the microwave oven detects moisture released from food as it heats and adjusts the cooking time accordingly Cookware and Dinnerware Microwave Safe Browning dish Follow manufacturer recommendations Ceramic glass glass China earthenware Follow manufacturer recommendations Melamine Follow manufacturer recommendatio...

Page 5: ...filters are on the underside of microwave oven Clean monthly Slide the filter away from the tab area and drop out the filter To reinstall place end of the filter into the opening opposite the tab area swing up the other end and slide it toward the tab area Charcoal filter The charcoal filter is behind the vent grille at the top front of the microwave oven The charcoal filter cannot be cleaned and ...

Page 6: ...ng of the cycle Display shows messages Enter clock with flashing digits means there has been a power failure Reset the clock A letter followed by a number is an error indicator Call for assistance Fan running during cooktop usage This is normal The microwave oven s cooling fan which is separate from the vent fan automatically comes on during microwave oven operation to cool the microwave oven It m...

Page 7: ...tions etc 5 Defects or damage caused by the use of non genuine Whirlpool parts or accessories 6 Conversion of products from natural gas or L P gas 7 Damage from accident misuse abuse fire floods acts of God or use with products not approved by Whirlpool 8 Repairs to parts or systems to correct product damage or defects caused by unauthorized service alteration or modification of the appliance 9 Co...

Page 8: ...W11037864B 2017 Whirlpool All rights reserved Used under license in Canada 02 17 ...

Page 9: ...ou AVERTISSEMENT Ces mots signifient Lors de l utilisation de tout appareil ménager électrique on doit observer certaines précautions de sécurité fondamentales dont les suivantes IMPORTANTES INSTRUCTIONS DE SÉCURITÉ CONSERVEZ CES INSTRUCTIONS AVERTISSEMENT Pour réduire le risque de brûlures de choc électrique d incendie de blessures et l exposition excessive à l énergie des micro ondes Lire la tot...

Page 10: ... DÉBORDER LORSQU ON BOUGE LE RÉCIPIENT OU QUE L ON UTILISE UNE CUILLÈRE OU UN AUTRE USTENSILE POUR LE REMUER Pour réduire le risque de blessures corporelles Ne pas trop faire chauffer le liquide Remuer le liquide avant et pendant le chauffage Ne pas utiliser de récipients à parois droites avec des ouvertures étroites Une fois chaud laisser le récipient dans le four à micro ondes un moment avant de...

Page 11: ...éder au menu secondaire de l horloge puis suivre les instructions à l écran pour régler l horloge Le format de l horloge 12 heures avec AM et PM 12 heures sans AM et PM ou 24 heures peut aussi être réglé dans le menu secondaire de l horloge Minuterie Alors que le four à micro ondes est en mode de veille appuyer sur la commande de la minuterie entrer la durée puis appuyer sur la commande de la minu...

Page 12: ... l affichage retrouve sa luminosité normale Mise en marche Appuyer sur la touche Start mise en marche pour démarrer un programme de cuisson Cette touche sert aussi de touche Add 30 sec ajouter 30 s Appuyer dessus pour ajouter 30 secondes au temps de cuisson original Annulation Appuyer sur la touche Cancel annulation pour mettre fin à un programme de cuisson Cette touche sert aussi de touche Contro...

Page 13: ...duits de nettoyage Pour éviter d endommager le four à micro ondes du fait de la formation d arcs dus à l accumulation de saletés conserver la cavité l orifice d introduction des micro ondes les supports des grilles de cuisson et la zone de contact entre la porte et le cadre propres Nettoyer avec un savon doux de l eau et un chiffon doux ou une éponge ou tel qu indiqué ci dessous Revêtement intérie...

Page 14: ...o ondes les supports de la grille de cuisson et la zone de contact entre le cadre et la porte peut entraîner la formation d arcs Voir Nettoyage général dans la section Entretien du four à micro ondes Le plateau rotatif tourne dans les deux sens Ceci est normal et dépend de la rotation du moteur au début du programme Des messages s affichent L inscription Enter clock s affiche et des chiffres clign...

Page 15: ...ation de pièces ou accessoires Whirlpool non authentiques 6 Conversion de votre produit du gaz naturel ou du gaz de pétrole liquéfié 7 Dommages causés par accident mésusage abus incendie inondations catastrophe naturelle ou l utilisation de produits non approuvés par Whirlpool 8 Réparations aux pièces ou systèmes dans le but de rectifier un dommage ou des défauts résultant d une réparation altérat...

Page 16: ...W11037864B 2017 Whirlpool Tous droits réservés Utilisée sous licence au Canada 02 17 ...

Reviews: