background image

14. Benutzereinstellungen

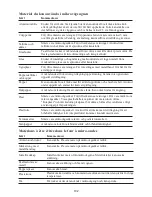
In diesem Modus haben Sie die Möglichkeit, die unterschiedlichen Benutzereinstellungen 
anzupassen.
1) Öffnen Sie die Tür und halten Sie die Taste „2“ 5 Sekunden lang gedrückt. Es ertönt ein 

Signalton und der Modus wird aktiviert.

2) Im Display erscheint die Anzeige „OP: - -“.
3) Drücken Sie eine beliebige Zifferntaste, um die entsprechende Einstellung aufzurufen.

Beispiel: Signalton auf mittlere Lautstärke stellen. Drücken Sie „2“, im Display erscheint 
„OP:22“. Drücken Sie zum Ändern der Einstellung erneut die Taste „2“. Im Display erscheint 
nacheinander  „OP:20“, „OP:21“, „OP:22“, „OP:23“, „OP:20“ ......

4) Drücken Sie die Taste               , um die aktuelle Einstellung zu speichern. Nach der Speicherung 

erscheint im Display erneut die Anzeige „OP: - -“.

5) Drücken Sie während der Einstellung die Taste             , um die Tür zu öffnen. Schließen Sie die 

Tür, um in den betriebsbereiten Modus zu wechseln.

6) Wenn Sie im letzten Schritt nicht die Taste              drücken, werden die Änderungen nicht 

gespeichert und die alte Einstellung wird beibehalten.

15. Wartungsmodus

1) Öffnen Sie die Tür und halten Sie die Taste „3“ 5 Sekunden lang gedrückt, um den 

Wartungsmodus zu aktivieren.

2) Im Display erscheint die Anzeige „SErU“.
3) Um die Häufigkeit, mit der die Tür geöffnet und geschlossen wurde, zu überprüfen, drücken Sie 

die Taste „3“. Im Display wird die Häufigkeit angezeigt.

4) Drücken Sie die Taste               und halten Sie dann die Taste „4“ 4 Sekunden lang gedrückt. Die 

Anzeige wird abgebrochen. Im Display erscheint „4-CL“.

5) Drücken Sie die Taste              , um die Tür zu öffnen. Schließen Sie die Tür, um in den 

betriebsbereiten Modus zurückzukehren.

16. Abfragefunktion

Drücken Sie während des Kochvorgangs die Taste              , um die aktuelle Leistungsstufe 
anzuzeigen. Das Display zeigt die Leistung 3 Sekunden lang an und kehrt dann zum vorhergehen-
den Modus zurück. Diese Funktion ist im mehrstufigen Kochmodus verfügbar.

17. Werkseinstellungen

Drücken Sie im betriebsbereiten Modus die Tasten                und „o“, um das Gerät auf die 
Werkseinstellungen zurückzusetzen. 

95

Summary of Contents for PRO 25 IX

Page 1: ...ijzing Istruzioni per l uso Brugsanvisning Bruksanvisning Käyttöohje Manual de utilização Instrucciones para el uso Instrukcje użytkowania Használati utasítás ИнструкциЯ за употреба Návod k použití Návod na použitie Instruc iuni de utilizare Инструкции по эксплуатации ...

Page 2: ......
Page 3: ...ENGLISH Instructions for use Page 4 ESPAÑOL Mode d emploi Page 2 Page Istruzioni per l uso DEUTSCH Page Gebrauchsanweisung Page SVENSKA FRANÇAIS ITALIANA Instruktion för användning 3 2 ...

Page 4: ...TRUCTIONS CAREFULLY Read these instructions carefully before using your microwave oven and keep it carefully If you follow the instructions your oven will provide you with many years of good service MODEL PRO 25 IX 4 ...

Page 5: ... door seals are damaged the oven must not be operated until it has been repaired by a competent person If the apparatus is not maintained in a good state of cleanliness its surface could be degraded and affect the lifespan of the apparatus and lead to a dangerous situation ADDENDUM 5 Specifications Model Rated Voltage Rated Input Power Microwave Rated Output Power Microwave Oven Capacity External ...

Page 6: ...n accordance with the installation instructions provided 14 Eggs in the shell and whole hard boiled eggs should not be heated in microwave ovens since they may explode even after microwave heating has ended 15 Use this appliance only for its intended uses as described in manual Do not use corrosive chemicals or vapors in this appliance This oven is especially designed to heat It is not designed fo...

Page 7: ...r extension cord should be at least as great as the electrical rating of the appliance 2 The extension cord must be a grounding type 3 wire cord 3 The long cord should be arranged so that it will not drape over the counter top or tabletop where it can be pulled on by children or tripped over unintentionally This appliance must be grounded In the event of an electrical short circuit grounding reduc...

Page 8: ...ay break Heat resistant oven glassware only Make sure there is no metallic trim Do not use cracked or chipped dishes Follow manufacturer s instructions Do not close with metal tie Make slits to allow steam to escape Use for short term cooking warming only Do not leave oven unattended while cooking Use to cover food for reheating and absorbing fat Use with supervision for a short term cooking only ...

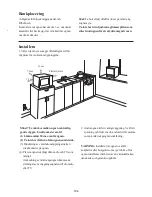
Page 9: ...od into microwave safe dish May cause arcing Transfer food into microwave safe dish May cause arcing and could cause a fire in the oven A Control panel B Observation window C Door assembly D Safety interlock system E Ceramic board SETTING UP YOUR OVEN Names of Oven Parts and Accessories Remove the oven and all materials from the carton and oven cavity Your oven comes with the following accessories...

Page 10: ... the frequency is the same as the voltage and the frequency on the rating label WARNING Do not install oven over a range cooktop or other heat producing appliance If installed near or over a heat source the oven could be damaged and the warranty would be void Remove all packing material and accessories Examine the oven for any damage such as dents or broken door Do not install if oven is damaged C...

Page 11: ...ntrol panel and plastic parts as this may cause damage to these parts Use a dry cloth not a soaked cloth to clean these parts 3 Cleaning the oven interior After use be sure to clean up spilled liquids spattered oil and food debris as quickly as possible If the oven is used when dirty efficiency drops and the dirt gets stuck on the oven surface and may cause bad odours Clean the interior with a clo...

Page 12: ...Control Panel and Features OPERATION 1 Power Buttons 2 Time cook Button 4 Stp Cancel Button Start Button 3 X2 Button 6 Number Button 12 1 2 3 4 5 6 5 ...

Page 13: ...ep 5 quick beeps Repeating Beeper Off Low Medium High Keybeep Off Keybeep On 15 seconds 30 seconds 60 seconds 120 seconds On the Fly Disable On the Fly Enable Door reset Disable Door Reset Enable 60 Minute Maximum Cook Time 10 Minute Maximum Cook Time Manual Programming Disable Manual Programming Enable Single Digit Mode 10 programs Doule Digit Mode 100 programs Five power levels are available Lev...

Page 14: ...less otherwise noted in the product Specification Button Display Time Power 1 2 3 4 5 6 7 8 9 0 0 10 0 20 0 30 0 45 1 00 1 30 2 00 3 00 4 00 5 00 100 100 100 100 100 100 100 100 100 100 Cook Factors 80 80 80 80 80 80 80 80 80 80 Appendix B Default Cook Times 14 ...

Page 15: ...d closing the door while the oven is in Idle Mode will put the oven into Ready Mode 2 During Ready Mode 0 00 displays 3 From the Ready Mode the oven can go to almost all of the other modes 1 While the door of the oven is open the oven shall be in Door Open Mode This shall also allow for entry into Programming Mode Whenever the door is open the oven shal enter this mode 2 During this mode LED is bl...

Page 16: ...ll display the related power If the same button pressed twice the power will change to PL10 If no power chosen PL0 is default 5 During setting process press to enter Manual Cook Mode Press to enter Ready Mode 1 This mode allows cooking of the food items While in Manual Cook Entry Mode pressing the pad will cause to the oven to begin Manual Cook Mode 2 During this mode remaning cooking time display...

Page 17: ...stage cooking the total remaning cooking time displays not a particular stage cooking time 3 If the program chosen exceeds the maximum time allowed by User Option 7 then the oven shall beep three times rapidly and display 00 00 to indicate that the program is unacceptable 4 When cooking program finish the oven will enter End of Cook Cycle Mode If you press button under this mode the oven will ente...

Page 18: ... time is no use And then LED turn back to show ProG The time set before will be no change 8 Close the door the oven will turn back to Ready Mode If press button during setting process the oven turn to Door Open Mode The program that not saved will be lost If there is program saved as memory procedure press the related number button the saved program will start If no saved program the buzzer will a...

Page 19: ...on of various Power Levels 1 Three stages can be set at most under cooking mode or memory mode Aftet setting the power and time for the first stage press to set the second stage And the same step to set the third stage 2 When setting the second or the third stage press S 2 or S 3 displays 3 Press button to start cooking Example To set three stages as memory mode The first stageis PL7 and time is 1...

Page 20: ... Ready Mode 6 If button not pressed at the last step the program cannot be saved but stay at previous way 15 Service Mode 1 Open the oven door and press 3 for 5 seconds to enter service mode 2 LED displays SErU 3 To check the times of closing or opening the door just press number button 3 LED will display the times 4 Press and then press number button 4 in 4 seconds the message will be cancelled 4...

Page 21: ...llected and treated If at any time in future you need to dispose of this product please do NOT dispose of this product with household waste Please send this product to WEEE collecting points where available It is forbidden to run the unit without any food inside It is very dangerous 21 Trouble shooting ...

Page 22: ...z attentivement ces instructions avant d utiliser votre four à micro ondes et gardez le précieusement SAUVEGARDEZ PRECIEUSEMENT CES INSTRUCTIONS 22 Merci de suivre et respecter ces instructions afin d optimiser les performances ainsi que la durée de vie du produit ...

Page 23: ...itifs de verrouillage b Ne déposez aucun objet entre la partie avant du four et la porte et ne laissez pas de saletés ou de restes de produits de nettoyage sur les surfaces de verrouillage c AVERTISSEMENT Lorsque la porte ou le dispositif de verrouillage de la porte sont endommagés le four ne peut être utilisé avant d avoir été réparé par une personne qualifiée ADDENDA Un nettoyage insuffisant de ...

Page 24: ... de produits tels que du pain des biscuits etc dans le four 12 Retirez les liens et les attaches métalliques des récipients en papier ou en plastique avant de les placer dans le four 13 Installez et placez ce four conformément aux instructions d installation fournies 14 Ne réchauffez pas d œufs avec leur coquille ou d œufs durs dans le four à micro ondes car ils peuvent exploser même lorsque le fo...

Page 25: ... d habitude 3 Le cadre de la porte et le joint de la porte ainsi que les pièces avoisinantes doivent être soigneusement nettoyés à l aide d un chiffon humide lorsqu ils sont sales L appareil doit être mis à la terre En cas de court circuit la mise à la terre réduit le risque de choc électrique en déviant le courant électrique Cet appareil est équipé d un câble avec une ligne de terre et une fiche ...

Page 26: ...s en verre Uniquement du verre résistant à la chaleur et adapté au four à micro ondes Assurez vous qu il n y ait pas de pièces métalliques N utilisez pas de vaisselle fêlée ou ébréchée Sachets de cuisson Respectez les consignes du fabricant Ne fermez pas le sachet avec un lien métallique Faites des entailles dans le sachet pour que la vapeur puisse s échapper Assiettes et gobelets papier Uniquemen...

Page 27: ...ur Mousse de plastique La mousse de plastique exposée à une température élevée peut fondre ou contaminer le liquide qu elle contient Bois Le bois se dessèche dans un four à micro ondes et peut se fendre ou se briser INSTALLER VOTRE FOUR Noms des parties du four et accessoires Enlevez le four et tous les matériels du carton et de la cavité du four Votre four vient avec les accessoires suivants A Pa...

Page 28: ...acents Un côté doit être ouvert 1 Laissez un dégagement minimum de 12 inches 30 cm sur le four 2 N enlevez pas les jambes de l arrière du four 3 Bloquez la consommation et ou les ouvertures de sortie qui peuvent endommager le four 4 Placez le four aussi loin que possible des radios et de la télévision L opération du four à micro ondes peut entraîner des interférences à votre radio ou réception tél...

Page 29: ...et aux parties plastiques comme ça peut endommager ces parties Utilisez un chiffon sec pas un chiffon trempé pour nettoyer ces parties 3 Nettoyer l intérieur du four Après utilisation soyez sûr de nettoyer les liquides renversés l huile éclaboussée et les débris de nourriture aussi rapidement que possible Si le four est utilisé quand il est salE les gouttes Nettoyez l intérieur avec un chiffon tre...

Page 30: ...Panneau de contrôle et caractéristiques OPERATION 1 Boutons d alimentation 2 Bouton de Temps de Cuisson 4 Bouton Arrêt Annulation 5 Bouton de Démarrage Bouton X2 6 Bouton de Numéro 30 1 2 3 4 5 6 3 ...

Page 31: ...ouche du beep éteint Touche du beep allumé 15 secondes 30 secondes 60 secondes 120 secondes Ne pas permettre instantané Réinitialisation de la porte pas permise Réinitialisation de la porte permise Temps de cuisson max de 60 minutes Temps de cuisson max de 10 minutes Ne pas permettre Permettre Mode de chiffre unique 10 programmes Mode de chiffre double 100 programmes Cinq puissances sont disponibl...

Page 32: ...ement ils soient notés dans la spécification du produit Bouton Affichage Temps Puissance 1 2 3 4 5 6 7 8 9 0 0 10 0 20 0 30 0 45 1 00 1 30 2 00 3 00 4 00 5 00 100 100 100 100 100 100 100 100 100 100 Facteurs de cuisson 80 80 80 80 80 80 80 80 80 80 Appendice B temps de cuisson par défaut 32 ...

Page 33: ...it à commencer en manuel ou à prédéfinir le cycle de cuisson 2 Ouvrir et fermer la porte pendant que le four est en mode V EILLE idle mettra le four en mode prêt 3 Pendant le mode prêt 0 00 s affiche 4 Du mode prêt le four peut changer parmi les autres modes 4 Mode Porte Ouverte 1 Pendant que la porte du four est ouverte le four devrait être en mode ouverture de porte Ca devrait aussi autoriser d ...

Page 34: ...mode 2 Quand le four est en mode prêt appuyez sur la touche sur le clavier mettra le four en mode d entrée de cuisson manuel 3 Pendant ce mode 00 00 s affiche 4 Si vous appuyez sur les boutons ou pour sélectionner un niveau de puissance la LED affichera la puissance liée Réappuyez sur le même bouton la puissance changera en PL10 S il n y a pas de puissance choisie PL0 est par défaut 5 Pendant le r...

Page 35: ...le temps de cuisson restant S il est en cuisson multi stage le temps de cuisson restant total n affiche pas un temps de cuisson de stage particulier 3 Si le programme choisi excède le temps maximum autorisé par l option d utilisateur 7 alors le four devrait rapidement beeper trois fois et montrer 00 00 pour indiquer que le programme est inacceptable 4 Quand le programme de cuisson se termine le fo...

Page 36: ...nible et ensuite la LED revient pour montrer ProG La mise du temps avant ne sera pas changée 8 Fermez la porte le four reviendra en mode prêt Si vous appuyez sur le bouton pendant le réglage du processus le four tourne en mode porte ouverte Le programme non sauvé sera perdu S il y a un programme sauvé comme une procédure de mémoire appuyez sur le bouton de numéro lié le programme sauvé démarrera S...

Page 37: ... le mode de cuisson ou mémoire Après le réglage de la puissance et du temps pour la première étape appuyez sur pour mettre la seconde étape Et la même étape pour mettre la troisième étape 2 Pendant le réglage de la seconde ou troisième étape appuyez sur S 2 ou S 3 s affiche 3 Appuyez sur le bouton pour commencer à cuisiner Exemple Pour mettre trois étapes comme mode mémoire La première étape est P...

Page 38: ...écédent 15 Mode de Service 1 Ouvrez la porte du four et appuyez sur 3 pendant 5 secondes pour entrer en mode de service 2 La LED affiche SErU 3 Pour vérifier les temps de fermeture et d ouverture de la porte appuyez juste sur le bouton 3 la LED montrera les temps 4 Appuyez sur et ensuite sur le bouton 4 en 4 secondes le message sera annulé 4 CL s affichera 5 Appuyez sur pour entrer en mode d ouver...

Page 39: ...porteouverte C estnormal Ilestinterditdefairetournerlefoursansnourritureàl intérieur C estdangeureux Lefournepeutpasêtre démarré Lefourneproduitpasde chaleur Fermezbienlaporte 4 Laporten estpasbienfermée Débranchez Rebranchezaprès10 secondes 1 Lecâbled alimentationn est pasfermementbranché Remplacezlefusibleouréinitialisezle court circuit réparéparunpersonnel professionneldenotrecompagnie 2 Fusibl...

Page 40: ... attentamente le istruzioni prima di utilizzare il forno a microonde e conservare con cura il presente manuale Se si seguono le istruzioni il forno funzionerà per molti anni in maniera efficiente CONSERVARE LE ISTRUZIONI ATTENTAMENTE PRO 25 IX 40 ...

Page 41: ... parte anteriore del forno e lo sportello poichè ciò permetterebbe ai residui di sporco di accumularsi sui giunti di chiusura c AVVERTENZA Se lo sportello o i giunti di chiusura sono danneggiati non utilizzare il forno fino a che non sia stato riparato da un tecnico qualificato APPENDICE Se l apparecchio non viene conservato in un adeguato stato di pulizia le sue superfici potrebbero deteriorarsi ...

Page 42: ...rno seguendo le istruzioni di installazione fornite 14 Le uova intere anche se già cotte non devono essere riscaldate o cotte nel microonde poichè potrebbero esplodere anche a cottura microonde ultimata 15 Utilizzare questo apparecchio solo per gli scopi descritti in questo manuale Non utilizzare prodotti o vapori corrosivi Questo forno è costruito per un uso domestico Non è concepito per uso indu...

Page 43: ...tenzione utilizzando un panno inumidito Questo elettrodomestico deve essere collegato a terra Nel caso di cortoͲcircuiti elettrici la messa a terra riduce il rischio di scosse elettriche scaricando l energia elettrica L elettrodomestico è dotato di un cavo provvisto di un conduttore e di una spina per il collegamento a terra La spina deve essere inserita in una presa correttamente installata e dot...

Page 44: ...za dalle pareti del forno Piatto crisp Seguire le istruzioni del produttore Il fondo del piatto crisp deve essere sollevato dal piatto rotante di almeno 5 mm Un uso scorretto può portare alla rottura del piatto rotante Stoviglie Solo se adatta all uso con forno a microonde Seguire le istruzioni del produttore Non utilizzare stoviglie rotte o scheggiate Barattoli di vetro Rimuovere sempre il coperc...

Page 45: ... Carta oleata Utilizzare come copertura contro gli schizzi e per trattenere l umidità Materiali da evitare con forno a microonde Utensili Note Vassoio di alluminio Potrebbe causare archi elettrici Trasferire il cibo in un contenitore adatto all us con forno a microonde Contenitore per cibo in carta con parti metalliche Potrebbe causare archi elettrici Trasferire il cibo in un contenitore adatto al...

Page 46: ...annello di controllo B Finestra di osservazione C Assemblaggio Porta D Sistema di interblocco di sicurezza Note 1 Non premere la ceramica con la forza 2 Prendere e mettere la tavola in ceramica delicatamente durante l operazione 3 Dopo che l unità è in uso non toccare la ceramica con le mani a causa della elevata C B D A Manuale d Istruzione 1 temperatura 46 ...

Page 47: ... il forno e le pareti adiacenti Un lato deve essere aperto 1 Lasciare uno spazio minimo di 12 pollici 30 cm sopra il forno 2 Non rimuovere i gambini dal fondo del forno 3 Blocchi di aspirazione e o aperture di uscita possono danneggiare il forno 4 Posizionare il forno il più lontano possibile da radio e TV Il funzionamento del forno a microonde può causare interferenze con la ricezione radio o TV ...

Page 48: ...o di controllo e le parti in plastica in quanto ciò potrebbe causare danni a queste parti Usare un panno asciutto non un panno imbevuto per pulire queste parti 3 Pulire l interno del forno Dopo l uso assicurarsi di pulire i liquidi rovesciati olio schizzato e residui di cibo più rapidamente possibile Se il forno viene utilizzato quando gocce di sporchi e la sporcizia si blocca sulla superficie del...

Page 49: ...Pannello di controllo e Funzioni 1 Pulsanti di alimentazione 2 Tasto di tempo di cottura 4 Stop pulsante Annulla 5 Pulsante di avvio 3 Pulsante X2 6 Tasto dei numeri 49 1 2 3 4 5 6 Manuale d uso ...

Page 50: ...no off Basso Medio Alto Suono tasti Off Suono tasti On 15 secondi 30 secondi 60 secondi 120 secondi On the Fly Disattivato On the Fly Attivato Resetta Porta Disattivato Resetta Porta Attivato Tempo max di cottura 60 Tempo max di cottura 10 Programmazione manuale disattivata Programmazione manuale attivata Modalità cifre singole 10 programmi Modalità cifre doppie 100 programmi Sono disponibili cinq...

Page 51: ...rsamente specificato nelle Specifiche del Produttore Tasto Display Time Potenza 1 2 3 4 5 6 7 8 9 0 0 10 0 20 0 30 0 45 1 00 1 30 2 00 3 00 4 00 5 00 100 100 100 100 100 100 100 100 100 100 Fattori di cottura 80 80 80 80 80 80 80 80 80 80 Appendice B Tempi di cottura prestabiliti 51 ...

Page 52: ...ale o preimpostata 2 Aprire e chiudere lo sportello mentre il forno è in modalità Stand by si mettere il forno in modalità Ready 3 In modalità Pronta 0 00 schermi 4 Dalla modalità Ready il forno può passare tra tutte le altre modalità 4 Modalità Porta Aperta 1 Mentre la porta del forno è aperta il forno deve essere in modalità di porta aperta Ciò deve anche consentire l ingresso nella modalità di ...

Page 53: ...n tempo di cottura e il livello di potenza 2 Quando il forno è in modalità Ready premere il pulsante e il forno avvierà la funzione cottura manuale 3 Con questa modalità apparirà 00 00 4 Se si premono i pulsanti o per selezionare il livello di potenza il LED mosterà la potenza collegata Premere due volte lo stesso tasto la potenza cambierà a PL10 Se non si seleziona nessuna potenza allora PL0 è la...

Page 54: ...2 Il LED visualizza il tempo di cottura rimanente Se è la cottura a più stadi il tempo totale di cottura rimanente non viene visualizzato un particolare tempo di cottura 3 Se il programma scelto supera il tempo massimo consentito dalla Opzione Utente 7 il forno emetterà un segnale acustico per tre volte rapidamente e mostrerà 0 00 per indicare che il programma è inaccettabile 4 Durante la cottura ...

Page 55: ... mostra nuovamente Prog Il tempo impostato precedentemente non subirà cambiamenti 8 Chiudere la porta il forno tornerà alla modalità Ready Se si preme durante il processo di impostazione il forno va alla modalità Porta Aperta Il programma che non sono stati salvati verranno persi Se non vi è programma salvato come procedura di memoria premere il pulsante numerico relativo il programma salvato avrà...

Page 56: ...e gli alimenti a combinazione di vari livelli di potenza 1 Possono essere impostate tre fasi al massimo in modalità di cottura o memoria Dopo aver impostato la potenza e il tempo per la prima fase premere per impostare il secondo stadio E lo stesso passo per impostare la terza fase 2 Quando si imposta il secondo o il terzo passaggio premere S 2 o S 3 schermi 3 Premere il pulsante per avviare la co...

Page 57: ...alità Ready 6 Se il pulsante non è premuto all ultimo passaggio il programma non può essere salvato e resta nella modalità precedente 15 Modalità Servizio 1 Aprire la porta del forno e premere 3 per 5 secondi per entrare in modalità di servizio 2 Il LED visualizza Seru 3 Per controllare gli orari di chiusura o di apertura della porta basta premere il tasto numerico 3 LED visualizzerà i tempi 4 Pre...

Page 58: ... Questoènormale E vietatoutilizzarel unitàsenzaciboall interno Questoèpericoloso Ilfornononsiaccende Ilfornononriscalda Chiuderebenelaporta 4 Portanonchiusabene Scollegare Poicollegaredinuovodopo10 secondi 1 Cavodialimentazionenon collegatosaldamente Sostituireilfusibileoripristinareinterruttore automatico riparatodapersonale professionaledellanostraazienda 2 Fusionedelfusibileo l interruttorenonf...

Page 59: ...cciones con atención antes de usar su horno de microondas y consérvelas en un lugar seguro para consultas futuras Si sigue las instrucciones su horno de microondas le propor cionará muchos años de buen servicio GUARDE ESTAS INSTRUCCIONES EN UN LUGAR SEGURO PRO 25 IX 59 ...

Page 60: ...l horno y la puerta ni permita que se acumule suciedad o residuos de limpiador en las superficies de cierre c ADVERTENCIA Si la puerta o el burlete de la puerta están dañados no se deberá hacer funcionar el horno hasta que haya sido reparado por una persona competente APÉNDICE Si el horno no se mantiene en buen estado de limpieza su superficie podría degradarse y afectar la vida útil de la unidad ...

Page 61: ...os en el horno 13 Instale y ubique este horno solamente de acuerdo con las instrucciones de instalación proporcionadas 14 Los huevos en su cáscara y huevos hervidos enteros no deberán calentarse en hornos de microondas ya que pueden explotar aún después que se haya terminado de calentar en el microondas 15 Utilice este aparato solamente para los usos que se describen en este manual No utilice en e...

Page 62: ...currir un cortocircuito la conexión a tierra reduce el riesgo de descarga eléctrica proporcionando un cable de escape para la corriente eléctrica Esta unidad está equipada con un cable que tiene una conexión a tierra con un enchufe a tierra Este enchufe debe estar conectado a que esté adecuadamente instalado y con conexión a tierra Consulte a un técnico o electricista calificado si no comprende to...

Page 63: ...ones del fabricante No utilice platos rotos o desportillados Recipientes de Vidrio Siempre retire la tapa Utilice solamente para calentar la comida hasta que esté apenas tibia La mayoría de los recipientes de vidrio no son resistentes al calor y se podrían romper Cristalería Solamente artículos de cristal resistentes al uso en horno de microondas Asegúrese que no tengan ningún adorno metálico No u...

Page 64: ... de microondas Utensilios de Metal o con Bordes de Metal El metal protege los alimentos de la energía de microondas Los bordes de metal pueden arquearse Sujetadores de Metal Pueden arquearse y pueden ocasionar fuego en el horno Bolsas de Papel Pueden ocasionar fuego en el horno Espuma de Poliuretano La espuma de poliuretano se puede derretir o contaminar el líquido que tiene dentro cuando se expon...

Page 65: ...cesorios Manual de instrucciones 1 A Panel de control B Ventana de observación C Ensamblado de puerta D Sistema de bloqueo de seguridad Observación 1 No presione el tablero de cerámica a la fuerza 2 Tome y ponga el tablero de cerámica de forma delicada durante el funcionamiento 3 Una vez que la unidad esté en uso no toque el tablero de cerámica con la mano debido a la alta temperatura C B D A 65 ...

Page 66: ...entre el horno y cualquier pared adyacente Un lado debe estar despejado 1 Deje un claro mínimo de 12 pulgadas 30cm sobre el horno 2 No retire las patas de la parte de abajo del horno 3 Si bloquea las aberturas de ventilación del aparato podría dañarlo 4 Coloque el horno lo más lejos que pueda de radios y televisores El uso del horno microondas puede provocar interferencias en su radio televisión o...

Page 67: ...tergente o espray de líquido alcalino al panel de control y a las piezas plásticas pues podría dañarlas Use un paño seco no mojado para limpiar estas piezas 3 Limpie el interior del horno Antes de usarlo asegúrese de limpiar líquidos derramados salpicaduras de aceite y restos de comida tan pronto como sea posible Si el horno se usa cuando está sucio la suciedad se pegará en la superficie y podría ...

Page 68: ...unciones y características del panel de control FUNCIONAMIENTO 1 Botones de potencia 2 Botón de tiempo de cocción 4 Botón detener cancelar Botón de inicio 3 Botón X2 6 Botones numéricos 68 1 2 3 4 5 6 5 ...

Page 69: ...ones apagado Sonido de botones encendido 15 segundos 30 segundos 60 segundos 120 segundos Deshabilitar opción Sobre la marcha Habilitar opción Sobre la marcha Deshabilitar reinicio de puerta Habilitar reinicio de puerta 60 minutos máximos de cocción 10 minutos máximos de cocción Deshabilitar programación manual Habilitar programación manual Modalidad de un dígito 10 programas Modalidad de dos dígi...

Page 70: ...arezca algo distinto en las especificaciones del producto Botón Pantalla Tiempo Potencia 1 2 3 4 5 6 7 8 9 0 0 10 0 20 0 30 0 45 1 00 1 30 2 00 3 00 4 00 5 00 100 100 100 100 100 100 100 100 100 100 Factores de cocción 80 80 80 80 80 80 80 80 80 80 Apéndice B Tiempos de cocción predeterminados 70 ...

Page 71: ...odalidad de Puerta Abierta 1 Mientras el horno está con la puerta abierta estará en la modalidad de puerta abierta puerta se abra el horno entrará a esta modalidad 2 Durante esta modalidad el LED estará en blanco y el ventilador y la luz de horno funcionarán 3 Cuando la puerta esté cerrada si la opción de usuario OP 60 es seleccionada y el la modalidad de pausa En todos los otros casos el horno re...

Page 72: ...Presione el mismo botón dos veces y la potencia cambiará a PL10 Si no selecciona ninguna la opción PL0 será la predeterminada funcionamiento 7 Modalidad de Cocción Manual 1 Esta modalidad permite cocinar los alimentos de forma manual Cuando esté en la modalidad de entrada de cocción manual presione para iniciar la modalidad de cocción manual ventilador y la lámpara del horno estarán encendidos de ...

Page 73: ...as etapas el tiempo total restante aparecerá y no el tiempo de alguna etapa en particular 3 Si el programa excede el tiempo máximo permitido por la Opción de usuario 7 entonces el horno emitirá un bip tres veces rápido y la pantalla mostrará 00 00 para indicar que el programa no es aceptable 4 Cuando el programa de cocción haya finalizado el horno regresará a la modalidad de término de ciclo de co...

Page 74: ...strar ProG El tiempo ajustado antes no será cambiado 8 Cierre la puerta y el horno regresará a la modalidad de funcionamiento Si presiona el botón durante el proceso de ajuste el horno cambiará a la modalidad de puerta abierta El programa que no fue almacenado se perderá Si existe un programa almacenado como proced i miento de memoria presione el botón numérico relacionado y el programa será inici...

Page 75: ...star tres etapas como máximo bajo la modalidad de cocción o la modalidad de memoria Después de haber ajustado la potencia y el tiempo para la primera etapa presione para ajustar la segunda etapa Repita el mismo paso para ajustar la tercera etapa 2 Cuando ajuste la segunda o la tercera etapa presione y la pantalla exhibirá S 2 o S 3 3 Presione el botón para iniciar el periodo de cocción Ejemplo Par...

Page 76: ...no será guardado pero los pasos anteriores quedarán en la memoria 15 Modalidad de Servicio 1 Abra la puerta del horno y presione 3 durante 5 segundos para acceder a esta modalidad 2 La pantalla LED mostrará SErU 3 Para verificar los tiempos de cerrado o apertura de la puerta sólo presione el botón numérico 3 La pantalla LED mostrará los tiempos 4 Presione y luego presione el botón numérico 4 en 4 ...

Page 77: ...lugarfrío comolapuertadelhorno Estoesnormal Estáprohibidohacerfuncionarestaunidadsincomidaensuinterior Estoespeligroso Elhornonopuedeiniciarse Elhornonocalienta Cierrebienlapuertadelhorno 4 Lapuertanocerróbien Desconecteelcable Reconéctelodespués de10segundos 1 Elcabledealimentaciónno estábienconectado Remplaceelfusibleohagaqueun profesionalrepareelcortacircuitos 2 Falladelosfusiblesodel sistemade...

Page 78: ...eitung vor dem Gebrauch der Mikrowelle sorgfältig durch und bewahren Sie die Anleitung gut auf Sofern Sie die Bedienungsanleitung befolgen wird Ihnen die Mikrowelle über viele Jahre hinweg gute Dienste leisten BEWAHREN SIE DIESE BEDIENUNGSANLEITUNG GUT AUF PRO 25 IX 78 ...

Page 79: ...ne Schmutz oder Reinigungsmittelreste befinden c Platzieren Sie keine Gegenstände vor der Tür d WARNUNG Wenn die Tür Scharniere oder Dichtungen beschädigt sind darf die Mikrowelle nicht in Betrieb genommen werden bis der Schaden nicht von einem qualifizierten Fachmann behoben worden ist Wenn das Gerät nicht in einwandfreiem Zustand ist könnte das zu einer gefährlichen Situation führen 79 7 PRO 25 ...

Page 80: ...enden Chemikalien Diese Art von Ofen ist entworfen worden um Lebensmittel zu wärmen zu kochen oder zu trocknen Die Mikrowelle ist nicht für industriellen oder Laborgebrauch gedacht 15 Wenn das Netzkabel beschädigt ist muss es vor Betriebnahme der Mikrowelle vom Servicepersonal ausgetauscht werden 16 Das Gerät ist nur für die Innenverwendung gedacht 17 Verwenden Sie die Mikrowelle nicht in der Nähe...

Page 81: ... Tuch gereinigt werden wenn sie schmutzig sind Dieses Gerät muss richtig platziert sein um im Falle eines elektrischen Schlags sofort den Stecker aus der Steckdose ziehen zu können Dieses Gerät ist ausgestattet mit einem Erdungskabel und einem Erdungsstecker Der Stecker muss sachgemäß in eine ebenso sachgemäß installierte Steckdose gesteckt werden Konsultieren Sie einen Fachmann wenn Sie Zweifel b...

Page 82: ... der Beleuchtung Es gibt auch nicht metallische Materialien die nicht für die Mikrowelle geeignet sind Wenn Sie Zweifel haben können Sie das Material mit dem folgenden Test testen Material Test 1 geben Sie das fragwürdige Material Zubehör in ein Mikrowellen geeignetes Geschirr und fügen Sie 250 ml kaltes Wasser dazu 2 Kochen Sie mit maximaler Leistung 1Minute lang 3 Befühlen Sie das Zubehör vorsic...

Page 83: ...r darf keine Metallumrandung haben Verwenden Sie kein Geschirr mit Sprüngen oder Rissen Nehmen Sie immer den Deckel ab Erhitzen Sie Speisen nur soweit bis sie gerade warm sind Die meisten Gläser sind nicht hitzebeständig und könnten zerspringen Nur falls mikrowellengeeignet Befolgen Sie die Anleitungen des Herstellers Suchen Sie nach der Markierung Microwave Safe Mikrowellengeeignet Einige Plastik...

Page 84: ...enungsanleitung 1 A Tastenfeld B Sichtfenster C Tür D Verriegelungssystem Hinweis 1 Drücken Sie nicht mit Gewalt auf die Keramikplatte 2 Handhaben Sie die Keramikplatte während des Betriebs mit Vorsicht 3 Berühren Sie die Keramikplatte nicht nach dem Gebrauch da die Platte sehr heißwird C B D A Im Lieferumfang Ihrer Mikrowelle ist folgendes Zubehör enthalten 84 ...

Page 85: ...Seite muss frei bleiben 1 Lassen Sie oben am Gerät mindestens 12 Zoll 30 cm Platz 2 Entfernen Sie nicht die Standfüße an der Unterseite des Geräts 3 Das Gerät könnte beschädigt werden wenn die Belüftungsöffnungen blockiert sind 4 Stellen Sie die Mikrowelle so weit wie möglich von Radios und Fernsehern entfernt auf Der Betrieb der Mikrowelle kann den Empfang von Radios und Fernsehern beeinträchtige...

Page 86: ...sche Flüssigsprays da die genannten Teile dadurch beschädigt werden könnten Reinigen Sie diese Teile mit einem trockenen Lappen nicht angefeuchtet 3 Reinigung des Innenraums der Mikrowelle Beseitigen Sie nach dem Gebrauch übergelaufene Flüssigkeiten Ölspritzer und Speiserück stände so schnell wie möglich Falls die Mikrowelle im schmutzigen Zustand verwendet wird könnten Tropfen und Schmutz an den ...

Page 87: ...Tasten und Funktionen GEBRAUCH 1 Leistungstasten 2 Programmiertes Kochen 4 Stopp Abbrechen 5 Start Taste X2 Taste 6 Zifferntasten 3 87 1 2 3 4 5 6 ...

Page 88: ...olt Signalton Aus Niedrig Mittel Hoch Tastenton Aus Tastenton Ein 15 Sekunden 30 Sekunden 60 Sekunden 120 Sekunden Funktion deaktiviert Funktion aktiviert Tür zurückstellen deaktiviert Tür zurückstellen aktiviert Max Kochzeit 60 Minuten Max Kochzeit 10 Minuten Manuelle Programmierung deaktiviert Manuelle Programmierung aktiviert Ein Ziffer Modus 10 Programme Zwei Ziffern Modus 100 Programme Die Mi...

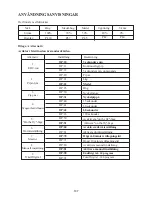
Page 89: ...es sei denn die technischen Daten enthalten andere Informationen Taste Anzeige Dauer Leistung 1 2 3 4 5 6 7 8 9 0 0 10 0 20 0 30 0 45 1 00 1 30 2 00 3 00 4 00 5 00 100 100 100 100 100 100 100 100 100 100 Kochfaktor 80 80 80 80 80 80 80 80 80 80 Anhang B Standardkochzeiten 89 ...

Page 90: ...auswählen und starten 2 Öffnen und schließen Sie im Standby Modus die Tür um den betriebsbereiten Modus zu aktivieren 3 Im betriebsbereiten Modus erscheint im Display die Anzeige 0 00 4 Vom betriebsbereiten Modus aus können Sie in alle anderen Modi umschalten 4 Tür geöffnet 1 Dieser Modus wird aktiviert wenn Sie die Tür öffnen Von diesem Modus aus können Sie in den Programmieren Modus wechseln Jed...

Page 91: ...rücken Sie im betriebsbereiten Modus die Taste um den manuellen Eingabemodus zu aktivieren 3 In diesem Modus erscheint die Anzeige 00 00 4 Wenn Sie mit den Tasten oder die Leistung einstellen wird im Display die entsprechende Leistung angezeigt Drücken Sie die gleiche Taste zweimal wechselt die Leistung zur Einstellung PL10 Falls keine Leistung eingestellt wird ist die Standardeinstellung PL0 5 Dr...

Page 92: ...en handelt es sich um die gesamte verbleibende Zeit und nicht um die Zeit einer einzelnen Kochstufe 3 Falls das ausgewählte Programm die unter Benutzereinstellung 7 ausgewählte max Kochzeit überschreitet ertönt dreimal ein kurzer Signalton und im Display erscheint die Anzeige 00 00 die darauf hinweist dass das Programm nicht verfügbar ist 4 Nach Ablauf des Kochprogramms geht das Gerät in den Ferti...

Page 93: ...st dass die Kochzeit ungültig ist Danach erscheint im Display wieder die Anzeige ProG Die vorher eingestellt Zeit wurde nicht geändert 8 Schließen Sie die Tür Das Gerät wechselt in den betriebsbereiten Modus Wenn Sie während der Einstellung die Taste drücken aktiviert das Gerät den Modus Tür geöffnet Nicht gespeicherte Programme gehen verloren Falls Sie ein Programm gemäß der Vorgehensweise gespei...

Page 94: ... die Kochzeit für das erste Programm eingestellt haben drücken Sie die Taste um die Einstellungen für das zweite Programm vorzunehmen Gleiches gilt für das dritte Programm 2 Wenn Sie für das zweite und dritte Programm die Taste drücken erscheint im Display entsprechend S 2 oder S 3 3 Drücken Sie die Taste um den Kochvorgang zu starten Beispiel Im Speichermodus zwei Programme kombinieren Für das er...

Page 95: ...n Schritt nicht die Taste drücken werden die Änderungen nicht gespeichert und die alte Einstellung wird beibehalten 15 Wartungsmodus 1 Öffnen Sie die Tür und halten Sie die Taste 3 5 Sekunden lang gedrückt um den Wartungsmodus zu aktivieren 2 Im Display erscheint die Anzeige SErU 3 Um die Häufigkeit mit der die Tür geöffnet und geschlossen wurde zu überprüfen drücken Sie die Taste 3 Im Display wir...

Page 96: ...ätdarfnichtohneSpeisengestartetwerden DieserZustandistsehrgefährlich Mikrowellestartetnicht Mikrowelleerhitztnicht SchließenSiedieTürordnungsgemäß 4 Türnichtrichtiggeschlossen TrennenSiedasNetzkabelundschließenes nach10Sekundenerneutan 1 Netzkabelnichtrichtig angeschlossen ErsetzenSiedieSicherungoderstellenSie denLeistungsschutzschalterzurück muss voneinerFachkraftunsererFirmarepariert werden 2 Si...

Page 97: ...BRUKSANVISNING MODELL Läs dessa anvisningar noga innan du använder din mikrovågsugn och förvara dem väl Om du följer dessa anvisningar kan din ugn ge dig många års användning SPARA DESSAANVISNINGAR VÄL PRO 25 IX 97 ...

Page 98: ...inte kvar smuts eller rester av rengöringsmedel på tätningens ytor c VARNING Om luckan eller luckans tätningar skadas får inte mikrovågsugnen användas förrän den har reparerats av kompetent person d Om apparaten inte hålls väl rengjord kan ytan försämras och påverka apparatens livslängd och leda till en farlig situation 98 Ca 14 kg 7 PRO 25 IX 230V 50Hz 1550W 1000W 25L 511 364 311mm 511 364 311mm ...

Page 99: ...get och håll dörren stängd för att kväva eventuella lågor 10 Tillaga inte maten för länge 11 Använd inte ugnen som förvaringsplats Förvara inte något såsom bröd småbröd osv inne i ugnen 12 Ta av vridförslutningar och metallhandtag från pappers eller plastbehållare påsar innan de placeras i ugnen 13 Installera och placera endast mikrovågsugnen i enlighet med de medföljande installationsinstruktione...

Page 100: ...s av personer inklusive barn med reducerad fysisk eller mental förmåga eller med bristande erfarenhet och kunskap om de inte har fått handledning eller instruktioner gällande användning av produkten av en person som ansvarar för deras säkerhet 25 Barn ska handledas så att man är säker på att de inte leker med produkten 26 Mikrovågsugnen får inte placeras i ett skåp om den inte har testats i ett sk...

Page 101: ...nda förlängningskabel får endast en förlängningskabel med 3 ledningar användas 1 En kort elkabel medföljer för att minska risken för personskador om man skulle fastna i eller falla över en längre kabel 2 Om en lång kabel eller förlängningskabel används 1 Den nominella el märkningen på kabeln eller förlängningskabeln skall vara minst lika hög som el märkningen på produkten 2 Förlängningskabeln måst...

Page 102: ...ta glas Kontrollera att ingen metall finns Använd inte glas som är spruckna eller kantstötta Ta alltid av locket Använd endast för att värma mat tills den är precis varm De flesta glasburkarna är inte värmetåliga och kan gå sönder Måste vara mikrovågssäker Följ tillverkarens anvisningar Bör vara märkt som mikrovågssäker Vissa plastbehållare mjuknar när maten inuti värms Kokpåsar och tätt åtslutna ...

Page 103: ...ljande tillbehör medföljer A Kontrollpanel B Ugnsfönster C Dörrmontering D Förregling Obs 1 Utsätt inte glastallriken för tryck 2 Var försiktig när du tar ut och sätter tillbaka glastallriken 3 Vidrör in à causennte glastallriken efter att du använt ugnen Den kan vara mycket het C B D A Bruksanvisning 1 103 ...

Page 104: ...ande väggar En sida måste vara fri 1 Lämna minst 30 cm ovanför ugnen 2 Ta inte bort fötterna från ugnens undersida 3 Blockering av ventilationsöppningarna kan orsaka skador på ugnen 4 Placera ugnen så långt ifrån radio och TV som möjligt Användning av mikrovågsugnen kan orsaka störningar av mottagningssignalen till din radio eller TV 2 Anslut ugnen till ett vanligt vägguttag Se till att spänning o...

Page 105: ...panelen och plastdelarna då detta kan skada dessa delar Använd en torr trasa inte blöt för att rengöra dessa delar 3 Rengöra ugnsutrymmet Rengör spilld vätska stänkt olja och matrester direkt efter användning av ugnen Om ugnen används när den är smutsig förlorar den effekt och smutsen fastnar på ytorna och kan orsaka dålig lukt Blöt en trasa i ljumt vatten med ett milt rengöringsmedel och rengör S...

Page 106: ...Kontrollpanel och egenskaper ANVÄNDNING 1 Effektknappar 2 Tid knappar 4 Stopp Avbryt knapp 5 Start knapp 3 Dubbleringsknapp X2 6 Sifferknappar 106 1 2 3 4 5 6 ...

Page 107: ...upprepande Pip av Låg Medel Hög Nyckelpip av Nyckelpip på 15 sekunder 30 sekunder 60 sekunder 120 sekunder Avaktivera on the fly läge Avaktivera dörråterställning Aktivera dörråterställning Högst 60 minters tillagningstid Högst 10 minters tillagningstid Avaktivera manuell inställning Aktivera manuell inställning Ensiffrigt tal 10 program Tvåsiffrigt tal 100 program Det finns fem effektnivåer Nivå ...

Page 108: ...inget annat anges i produktspecifikationen Knapp Display Tid Effekt 1 2 3 4 5 6 7 8 9 0 0 10 0 20 0 30 0 45 1 00 1 30 2 00 3 00 4 00 5 00 100 100 100 100 100 100 100 100 100 100 Tillagning 80 80 80 80 80 80 80 80 80 80 Bilaga B Förinställda tillagningstider 108 ...

Page 109: ...t eller förinställt tillagningspro gram 2 Öppna och stäng dörren när ugnen är i viloläge för att försätta ugnen i bereds kapsläge 3 I beredskapsläget visas 0 00 4 Ugnen kan växla till alla andra lägen från beredskapsläget 4 Dörrläge 1 När ugnens dörr är öppen är ugnen i dörrläge Härifrån kan man komma till inställningsläget Ugnen går in i dörrläget när dörren är öppen 2 I det här läget är teckenfö...

Page 110: ...manuellt i detta läge 2 När ugnen är i beredskapsläge tryck på knappen för att gå in i manuellt tillagningsläge 3 I detta läge visas 0 00 4 Om du trycker på knappen eller för att välja effekt visas den motsvarande effekten på teckenfönstret Tryck på samma knapp två gånger för att byta effekt till PL10 Om ingen effekt väljs är PL0 standard 5 Tryck på för att komma till manuellt tillagningsläge när ...

Page 111: ...d Om tillagningen ska ske i flera omgångar visas den totala återstående tillagningstiden och inte tillagningstiden för en specifik omgång 3 Om det valda programmet överstiger den högsta tillåtna tiden enligt alternativ 7 avger ugnen tre snabba pip och visar 00 00 för att visa att programmet inte kan köras 4 När tillagningsprogrammet är färdigt går ugnen in i avslutningsläge Tryck på knappen för at...

Page 112: ...en Tiden som var inställd innan ändras inte 8 Stäng dörren för att återgå till beredskapsläget Om du trycker på knappen under inställningsprocessen går ugnen in i dörrläget Program som inte sparats kommer att förloras Om programmet sparats i minnet trycker du på motsvarande sifferknap för att starta det sparade programmet Om inget program har sparats avger ugnen en signal när du trycker på sifferk...

Page 113: ...om mest i tillagnings och minnesläge När du ställt in önskad effekt och tid för den första omgången tryck på för att ställa in den andra omgången Därefter samma för att ställa in den tredje omgången 2 När du ställer in den andra eller tredje omgången tryck på S 2 eller S 3 visas 3 Tryck på knappen för att starta tillagningen Exempel För att ställa in tre omgångar som minnesläge Den första omgången...

Page 114: ...ycks ned vid det sista steget kan programmet inte sparas utan förblir som tidigare 15 Serviceläge 1 Öppna dörren och tryck på 3 i fem sekunder för att komma till serviceläget 2 Teckenfönstret visar SErU 3 För att kontrollera tiden för öppning och stängning av dörren trycker du bara på sifferknappen 3 Teckenfönstret visar motsvarande tid 4 Tryck på och sedan sifferknappen 4 i fyra sekunder för att ...

Page 115: ...Ugnenfårabsolutintekörasutanattdetfinnsmatiden Dettaärfarligt Ugnenstartarinte Ugnenvärmerinte Stängdörrenordentligt 4 Dörrenärintestängd ordentligt Draur Vänta10sekunderochsätti 1 Sladdenärinteansluten ordentligt Ersättsäkringenelleråterställströmbrytaren utförsavserviceteknikerfrånvårtföretag 2 Kortslutningisäkringeller strömbrytaren Testauttagetmedandraelektriska apparater 3 Problemmeduttaget E...

Reviews: