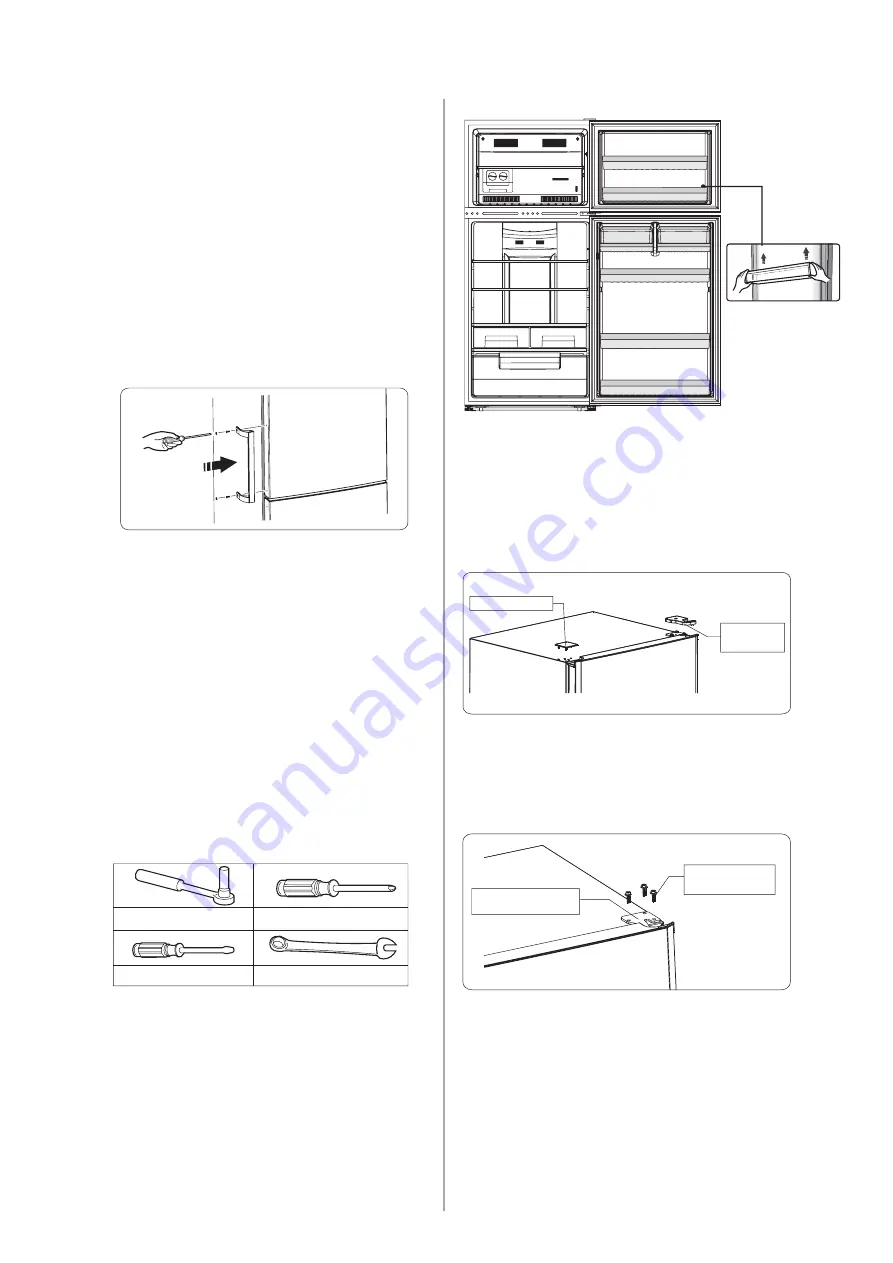
Installing the door handles
For the convenience of transportation, the
door handles are separately provided in a
plastic bag, you can install the door handles
as follows.
1. Lever screw covers on the left side of the
door, and then put them back to the plastic
bag.
2. Match the handle on the left side of the
door, keeping axes of screw holes in the
handle and the door in a line, as the picture
shows.
3. Fix the handle with the special screws
provided in the plastic bag. And then install
the handle covers.
Reversing the door
The side at which the door opens can be
changed, from the right side (as supplied) to
the left side, if the installation site requires.
Warning! When reversing the door, the
appliance must not be connected to the
mains. Ensure that the plug is removed
from the mains socket..
Tools you will need
8mm socket wrench
Cross-shaped screwdriver
8mm wrench
Thin-blade screwdriver
Note: Before you start lay the refrigerator
its
back
in order
to it on soft foam
packaging
or
similar
material
to
avoid
damaging
the
backboard
of
the refrigerator
.
To
reverse
the
door
,
the following
steps
are
generally recommended
.
1. Stand
the
refrigerator
upright
.
Open
the upper
door
to
take
out
all
door
racks
(to avoid
racks damaged)
and
then
close
the door
.
on
Door racks
2. Use a putty knife or thin-blade
screwdriver to prize the screw hole cover
which is at the top left corner of the
refrigerator, and Unscrew the upper hinge
cover which is at the top right corner of
the refrigerator.
screw hole cover
upper hinge
cover (right)
3.Unscrew the special flange self-tapping
screws which are used for fixing the right
upper hinge part by a 8mm socket driver or
a spanner(please support the upper door
with your hand when doing it ).
right upper hinge part
special flange
selftapping screws
4. Remove the upper door and place it
on a smooth surface with its panel
upwards. Lever
part
①
and
part
④
then
loose screws
②
,
as shown in the
picture. Change
handle
③
to the right
side, then install screws
②
, part
①
and
part
④
in turn. Loose screws
⑥
, detach
part
⑤
then install part
⑤
to the left side
with screws
⑥
.
,
9
Summary of Contents for Hotpoint Ariston NMTZH 821 FT
Page 1: ......
Page 8: ...2 ...
Page 10: ......
Page 17: ......
Page 21: ......
Page 23: ......
Page 25: ......
Page 27: ...11 ...
Page 28: ...12 ...
Page 29: ...13 ...
Page 30: ......
Page 31: ...Whirlpool EMEA S p A via Carlo Pisacane n 1 20016 Pero MI Italy ...
Page 47: ......
Page 48: ...Whirlpool EMEA S p A via Carlo Pisacane n 1 20016 Pero MI Italy 400011192167 400011192167 ...