background image

7

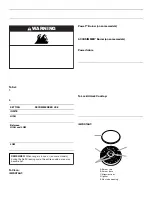
Burner cap: Always keep the burner cap in place when using a 
surface burner. A clean burner cap will help avoid poor ignition 
and uneven flames. Always clean the burner cap after a spillover 
and routinely remove and clean the caps according to the 
“General Cleaning” section.

Gas tube opening: Gas must flow freely throughout the gas tube 
opening for the burner to light properly. Keep this area free of soil 
and do not allow spills, food, cleaning agents or any other 
material to enter the gas tube opening. Protect it from spillovers 
by always using a burner cap.

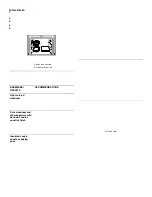
Burner ports: Check burner flames occasionally for proper size 
and shape as shown above. A good flame is blue in color, not 
yellow. Keep this area free of soil and do not allow spills, food, 
cleaning agents or any other material to enter the burner ports.

To Clean:

IMPORTANT: Before cleaning, make sure all controls are off and 
the oven and cooktop are cool. Do not use oven cleaners, bleach 
or rust removers.

1. Remove the burner cap from the burner base and clean 

according to “General Cleaning” section.

2. Clean the gas tube opening with a damp cloth.

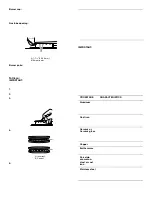
3. Clean clogged burner ports with a straight pin as shown. Do 

not enlarge or distort the port. Do not use a wooden 
toothpick. If the burner needs to be adjusted, contact a 
trained repair specialist.

4. Replace the burner cap, making sure the alignment pins are 

properly aligned with the burner cap.

5. Turn on the burner. If the burner does not light, check cap 

alignment. If the burner still does not light, do not service the 
sealed burner yourself. Contact a trained repair specialist.

Home Canning

When canning for long periods, alternate the use of surface 
burners between batches. This allows time for the most recently 
used areas to cool.

Center the canner on the grate. 

Do not place canner on 2 surface burners at the same time.

For more information, contact your local agricultural 
department. Companies that manufacture home canning 
products can also offer assistance.

Cookware

IMPORTANT: Do not leave empty cookware on a hot surface 
cooking area, element or surface burner.

Ideal cookware should have a flat bottom, straight sides and a 
well-fitting lid, and the material should be of medium-to-heavy 
thickness.

Rough finishes may scratch the cooktop or grates. Aluminum and 
copper may be used as a core or base in cookware. However, 
when used as a base they can leave permanent marks on the 
cooktop or grates.

Cookware material is a factor in how quickly and evenly heat is 
transferred, which affects cooking results. A nonstick finish has 
the same characteristics as its base material. For example, 
aluminum cookware with a nonstick finish will take on the 
properties of aluminum.

Cookware with nonstick surfaces should not be used under the 
broiler.

Use the following chart as a guide for cookware material 
characteristics.

A. 1-1

¹⁄₂

" (25-38 mm)

B. Burner ports

A. Incorrect
B. Correct

B

A

A

B

COOKWARE

CHARACTERISTICS

Aluminum

Heats quickly and evenly.

Suitable for all types of cooking.

Medium or heavy thickness is best for 
most cooking tasks.

Cast iron

Heats slowly and evenly.

Good for browning and frying.

Maintains heat for slow cooking.

Ceramic or 
Ceramic glass

Follow manufacturer’s instructions.

Heats slowly, but unevenly.

Ideal results on low to medium heat 
settings.

Copper

Heats very quickly and evenly.

Earthenware

Follow manufacturer’s instructions.

Use on low heat settings.

Porcelain 
enamel-on-
steel or cast 
iron

See stainless steel or cast iron.

Stainless steel

Heats quickly, but unevenly.

A core or base of aluminum or copper 
on stainless steel provides even 
heating.

Summary of Contents for 9763003

Page 1: ...performance parts accessories or service call 1 800 253 1301 or visit our website at www whirlpool com Table of Contents 2 9763003 To the installer Please leave this instruction book with the unit To the consumer Please read and keep this book for future reference ...

Page 2: ... Oven Temperature Control 9 OVEN USE 10 Aluminum Foil 10 Positioning Racks and Bakeware 10 Split Oven Rack 10 Bakeware 11 Meat Thermometer 11 Oven Vent 11 Baking and Roasting 12 Broiling 12 Hold Warm Feature 13 Timed Cooking on some models 14 Sequence Programming on some models 15 Warming Drawer on some models 16 RANGE CARE 17 Self Cleaning Cycle on some models 17 General Cleaning 18 Oven Light 19...

Page 3: ...ad and obey all safety messages This is the safety alert symbol This symbol alerts you to potential hazards that can kill or hurt you and others All safety messages will follow the safety alert symbol and either the word DANGER or WARNING These words mean follow instructions instructions DANGER WARNING WARNING If the information in this manual is not followed exactly a fire or explosion may result...

Page 4: ...ms of interest to children in cabinets above a range or on the backguard of a range children climbing on the range to reach items could be seriously injured Proper Installation The range when installed must be electrically grounded in accordance with local codes or in the absence of local codes with the National Electrical Code ANSI NFPA70 In Canada the range must be electrically grounded in accor...

Page 5: ... control ACCUSIMMER burner on some models E Surface burner locator A Oven vent B Surface cooking area C Anti tip bracket D Oven door hinge E Model and serial number plate behind left side of storage drawer F Storage drawer warming drawer on some models G Electronic oven control H Center grate on some models I Surface burner control J Automatic oven light switch K Oven rack L Gasket M Oven door win...

Page 6: ...he surface burners cannot be turned on by the control knobs When power is first supplied to the range or if the range loses power the surface burners will be in the Cooktop Lockout position The surface burners cannot be activated until power is restored to the range and or the Cooktop Lockout is disengaged Also cooktop burners will be in the Cooktop Lockout position during the self clean cycle To ...

Page 7: ...This allows time for the most recently used areas to cool Center the canner on the grate Do not place canner on 2 surface burners at the same time For more information contact your local agricultural department Companies that manufacture home canning products can also offer assistance Cookware IMPORTANT Do not leave empty cookware on a hot surface cooking area element or surface burner Ideal cookw...

Page 8: ...a reminder On some models START will appear on the display If the Start pad is not pressed within 5 minutes after pressing a function pad the oven display will return to the time of day mode and the programmed function will be canceled Off Cancel The Off Cancel pad stops any function except the Clock Timer and Control Lock Clock On some models this is a 12 hour clock that shows a m and p m To Set ...

Page 9: ...gth of time to cook 3 Press START or TIMER SET When the set time ends end of cycle tones will sound then if enabled reminder tones will sound every minute on some models 4 Press TIMER OFF or TIMER CANCEL anytime to cancel the Timer and reminder tones Remember do not press the Off Cancel pad because the oven will turn off To display the time of day for 5 seconds when the timer is counting down pres...

Page 10: ...s are level To move a rack pull it out to the stop position raise the front edge then lift out Use the following illustration and chart as a guide BAKEWARE To cook food evenly hot air must be able to circulate Allow 2 5 cm of space around bakeware and oven walls Use the following chart as a guide SplitOvenRack onsomemodels Split Rack with Removable Insert The split rack with removable insert is a ...

Page 11: ...ne or gristle After reading the thermometer once push it into the meat 1 3 cm more and read again If the temperature drops cook the meat or poultry longer Check all meat poultry and fish in 2 or 3 different places OvenVent A Oven vent The oven vent releases hot air and moisture from the oven and should not be blocked or covered Blocking or covering the oven vent will cause poor air circulation aff...

Page 12: ...ure to differ due to the cycling of the elements Waiting an additional 10 minutes after the preheat conditioning time ends to put food in the oven is suggested when baking foods with leavening ingredients such as yeast baking powder baking soda and eggs Broiling Broiling uses direct radiant heat to cook food Changing the temperature when Custom Broiling allows more precise control when cooking The...

Page 13: ...s BAKE 2 Set the temperature optional Press the TEMP up or down arrow pad to set a temperature other than 350 F 177 C 3 Press COOK TIME 4 Press the HOUR MIN up or down arrow pads to set cook time 5 Press WARM A 1 hour warm time will automatically be set 6 Set the warm temperature optional Press the TEMP up or down arrow pad to raise or lower the temperature in 5 F 5 C amounts to set a temperature ...

Page 14: ...tones will sound then if on reminder tones will sound every minute 8 Open and close the oven door to clear the display and or stop reminder tones Styles 2 3 Series Electronic Oven Control see Electronic Oven Controls section To Set a Timed Cook 1 Press BAKE The bake indicator light will light up 2 Set the temperature optional 3 Press the TEMP HOUR up or down arrow pad to enter a temperature other ...

Page 15: ...ads to select a stop time For example 1 35 5 Continue repeating steps 1 through 4 until the desired number of sequences have been set You can program up to 4 cooking functions within the sequence 6 Press START to begin sequence If you choose to press START your program sequence will begin Additional steps cannot be added to the sequence once START has been pressed Press OFF CANCEL at any time to c...

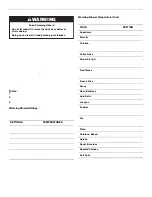
Page 16: ...f when finished Warming Drawer Settings The warming drawer is preset for a Lo temperature but can be changed by pressing the TEMP up arrow pad Use the following chart as a guide when selecting a different temperature other than Lo Warming Drawer Temperature Chart Different foods require different settings in order to maintain the ideal serving temperature Use the following chart as a guide SETTING...

Page 17: ...le Maximum clean time is 4 hours 30 minutes and the minimum is 2 hours 30 minutes The oven will automatically shut off once it is clean The door will not unlock until the oven cools Once the oven has completely cooled remove ash with a damp cloth to the inner door glass before it has cooled completely could result in the glass breaking The oven light will not work during the self cleaning cycle Th...

Page 18: ...Cleaning Method Stainless Steel Cleaner Polish Part Number 31464 not included See Assistance or Service section to order Liquid detergent or all purpose cleaner Rinse with clean water and dry with soft lint free cloth Vinegar for hard water spots METALLIC PAINT on some models Do not use abrasive cleaners cleaners with bleach rust removers ammonia or sodium hydroxide lye because paint surface may s...

Page 19: ...tion see Storage Drawer section Cleaning Method Mild detergent Drawer Liner on some models Remove all stored items from drawer and lift out drawer liner Clean with mild detergent All Purpose Appliance Cleaner Part Number 31662 not included See Assistance or Service section to order WARMING DRAWER on some models Make sure drawer is cool before cleaning Cleaning Method Mild detergent for both All Pu...

Page 20: ... push the drawer into the range until the drawer side rails engage with the gap in the drawer glides 4 Once the drawer is fully engaged on both sides slide the drawer back into the closed position NOTE When you are removing and replacing the storage drawer a slight push may be needed to move the drawer stop notch past the drawer glides WarmingDrawer onsomemodels Remove all items from inside the wa...

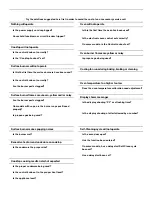
Page 21: ...xpected Is the proper cookware being used See Cookware section Is the control knob set to the proper heat level See Cooktop Controls section Is the appliance level Level the appliance See the Installation Instructions Oven will not operate Is this the first time the oven has been used Turn on any one of the surface burner knobs to release air from the gas lines Is the electronic oven control set c...

Page 22: ...nly FSP replacement parts FSP replacement parts will fit right and work right because they are made with the same precision used to build every new WHIRLPOOL appliance To locate FSP replacement parts in your area call us or your nearest Whirlpool designated service center Call the Whirlpool Customer eXperience Center toll free 1 800 253 1301 Our consultants provide assistance with Features and spe...

Page 23: ...F REMEDIES CUSTOMER S SOLE AND EXCLUSIVE REMEDY UNDER THIS LIMITED WARRANTY SHALL BE PRODUCT REPAIR AS PROVIDED HEREIN IMPLIED WARRANTIES INCLUDING WARRANTIES OF MERCHANTABILITY OR FITNESS FOR A PARTICULAR PURPOSE ARE LIMITED TO ONE YEAR OR THE SHORTEST PERIOD ALLOWED BY LAW WHIRLPOOL SHALL NOT BE LIABLE FOR INCIDENTAL OR CONSEQUENTIAL DAMAGES SOME STATES AND PROVINCES DO NOT ALLOW THE EXCLUSION O...

Page 24: ...9763003 2005 Whirlpool Corporation All rights reserved Registered Trademark TM Trademark of Whirlpool U S A 12 05 Printed in U S A ...

Reviews: