background image

Model # 8LIECH-BP-WL:  Page 8


OPERATION 


This unit is intended for use with high-quality bacteriologically safe bottled water only. Do NOT 
use other liquids. Do NOT use for other purposes. Warranty is void if unit is used with any other 
liquids, including tap water, coffee, tea, juices, beer, or wine.

This dispenser has been designed to use with standard water bottles with a 3, 5, or 5.2 gallon 
capacity. Do NOT use alternative bottles. 

Initial Set Up

Do NOT plug in until steps 1-3 are completed.

1. If unit was transported on its side, make sure unit is in the OFF
    position and is upright for at least 4 hours prior to plugging the unit in. 
2. This model uses a pump to deliver water from the bottle to the reservoirs:

i. Clean the bottle cap and neck. 
ii. Remove the entire plastic cap from the bottle. 
iii. Adjust the length of the probe by pulling the B portion of the tube  to 

its maximum extension. Insert the probe into the bottle and push it 
down. The probe will self-adjust to its appropriate length. (See 

   illustration on right). 
iv. Push down the probe head until it is seated.
v. Plug power cord into the wall outlet.

Note:

 At initial set-up, it will take less than 3 minutes to fill reservoirs 

with water. If pump stops prematurely, please open and close the door to activate reset 
using door switch.

IMPORTANT


IMPORTANT: Do NOT Return Dispenser To Store. 

If you have a question or problem, please contact 1-855-594-4755 for assistance. 

A

B

              Electrical shock Hazard
Plug into a grounded 3 prong outlet.
Do not remove ground prong.
Do not use an  adapter.
Do not use an extension cord.
Failure to follow these instructions 
can result in serious injury, fire, or 
electrical shock.

WARNING

              Excessive Weight Hazard
Use two or more people to move and 
install the water cooler and the bottles.

Failure to do so can result in back or 

other injury.

WARNING

Summary of Contents for 8LIECH-BP-WL

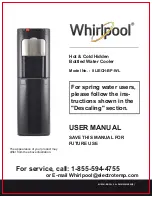
Page 1: ...12563XX00 E USER MANUAL SAVE THIS MANUAL FOR FUTURE USE The appearance of your product may differ from the above illustration For service call 1 855 594 4755 or E mail Whirlpool electrotemp com For spring water users please follow the ins tructions shown in the Descaling section ...

Page 2: ...tions Parts Features Unpacking and Assembly Installation Clean Out Of The Box No Need For Cleaning Prior To Initial Use Operation Proper Care Descaling Troubleshooting Limited Warranty 3 4 4 5 5 6 6 7 8 11 13 15 IMPORTANT Do NOT Return Dispenser To Store If you have a question or problem please contact 1 855 594 4755 for assistance ...

Page 3: ... messages This is the safety alert symbol This symbol alerts you to potential hazards that can kill or injure you and others All safety messages will follow the safety alert symbol and either the word DANGER or WARNING These words mean You can be killed or seriously injured if you don t immediately follow the instructions When operating this dispenser please observe the following Prior to use this...

Page 4: ...UCT FEATURES IMPORTANT Do NOT Return Dispenser To Store If you have a question or problem please contact 1 855 594 4755 for assistance Congratulations You have chosen a technology advanced state of the art water cooler To provide consistently cold water this water cooler forms an Ice Bank in the cold tank Formation of the initial Ice Bank can take up to 1 hour WHEN THE UNIT IS PLUGGED IN FOR THE F...

Page 5: ... Ibs Version 2 0 IMPORTANT Do NOT Return Dispenser To Store If you have a question or problem please contact 1 855 594 4755 for assistance 1 2 3 4 5 6 7 8 9 10 11 12 13 14 15 16 17 18 19 20 Control Hot Water Hot Water Release Control Cold Water Hidden Faucet or Tap Hot Water Hidden Faucet or Tap Cold Water LED Night lights Drip Tray Door Bottle Tray Water Pump Door Switch Bottle Probe Cold Power S...

Page 6: ...ee of kitchen grease and oil near a grounded wall outlet 2 Position dispenser so that the back is at least 4 inches from the wall and there are at least 4 inches of clearance on both sides 3 Level the water cooler as shown below to prevent vibration There are two leveling feet at the back of the water cooler Please adjust them one at a time until the water cooler sits levelly and does not rock Fai...

Page 7: ...on 60 ml of unscented bleach per 3 liters of water and activate the pump Allow chlorine solution to wash probe inside Shut off after 3 liters of solution is pumped through 6 Place a 2 gallon or larger bucket under the drain plug in the rear of the cooler 7 Once the unit has been drained replace the drain plug and drain cap 8 Remove the remaining water from the reservoirs by dispensing it from the ...

Page 8: ... of the probe by pulling the B portion of the tube to its maximum extension Insert the probe into the bottle and push it down The probe will self adjust to its appropriate length See illustration on right iv Push down the probe head until it is seated v Plug power cord into the wall outlet Note At initial set up it will take less than 3 minutes to fill reservoirs with water If pump stops premature...

Page 9: ... fully closed It will take less than 3 minutes to fill reservoirs with water During this time it is normal for the pump to run on and off If water fill stops before reservoirs are full please open and close the door to reset door acti vated switch Each time you dispense water from the taps the pump will turn on to refill the tanks Dispensing Cold Water Note After setup it will take up to 1 hour to...

Page 10: ... empty the dispenser will beep intermittently and the LED night lights will blink until a fresh bottle is connected You may also hear a sucking sound when the bottle is empty and needs changing This is normal and is another way to be alerted that your bottle is empty and needs to be replaced Replace the bottle as soon as you notice that it is empty If a new bottle is unavailable leave the door aja...

Page 11: ... resulting in a gradual slowdown of the flow rate leaking faucets and other problems Descaling Solutions Cooking vinegar is proven to remove calcium deposits efficiently Depending on the frequency of decalcification treatments please use the following proportions of White Vinegar For descaling once every three months use two cups 500 ml of white vinegar with 2 5 liters of hot water For descaling o...

Page 12: ...the water from the cooler into a bucket and discard the water a Locate the white plastic cap at the back of the cooler b Remove the screw c Remove the clear silicone drain plug and allow water to drain out d Re attach the drain plug and plastic cap before proceeding 9 Fill the bucket bottle with tap water and place into the machine 10 Plug the cooler back into the wall do not turn hot or cold swit...

Page 13: ...ooking oils might cause slow moving push buttons Add mineral oil unscented baby oil between the gaps of buttons to clear dirt Problem Dispenser is not operating Solution Make sure that the power cord is properly connected to a working outlet Problem Water is leaking Solution Replace water bottle The most common cause of this issue is a cracked bottle If the leak remains unplug unit and call 1 855 ...

Page 14: ...to flow on all 4 sides of the dispenser Make sure that the cold water switch is ON Problem Water dispensed is not hot Solution Note that it takes 15 20 minutes after setup to dispense hot water Make sure that the power cord is properly connected to a working outlet Make sure that the hot water switch is ON Problem LED night lights are flashing and the dispenser is making beeping noises Solution Re...

Page 15: ...ure to perform normal and routine maintenance on the dispenser as set out in the User s Manual In addition the Limited Warranty does not cover damages to the finish such as scratches dents discoloration or rust after purchase The Limited Warranty is in lieu of all other express warranties Vendor disclaims all warranties for products that are purchased from seller other than authorized retailers or...

Page 16: ... 2018 Whirlpool All rights reserved Manufactured under license by Electrotemp Technologies Inc Mississauga ON Canada Limted warranty provided by manufacturer ...

Reviews: