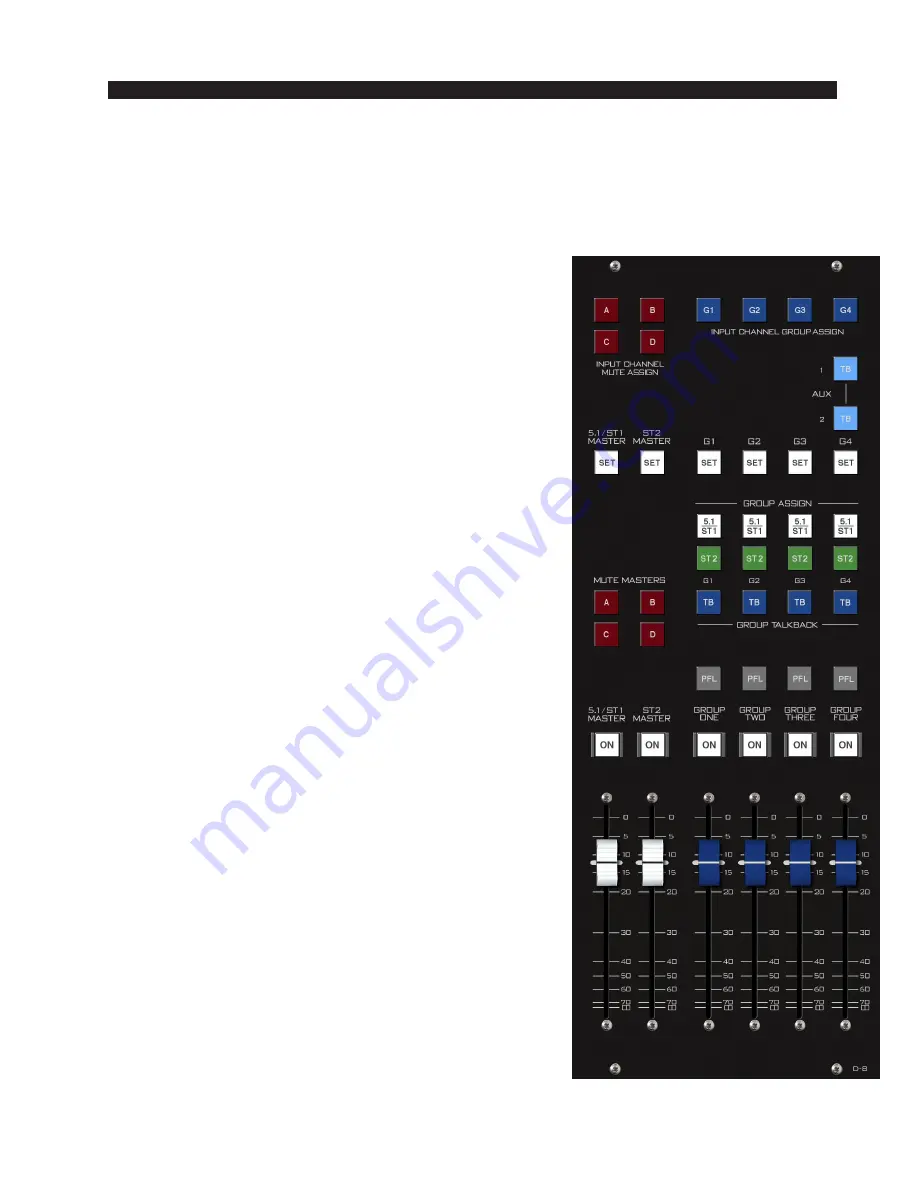
M A S T E R P A N E L
page 17
D-8 / Feb 2009
Master Panel (MST-D8)
Controls and Functions
The D-8 digital audio control surface is equipped with
one MASTER panel. The lower half of this panel provides
fader control of the two master program outputs and four
group outputs. The top section’s assign switches work in
conjunction with the Input fader’s SET buttons to assign
Input faders to the A-B-C-D MUTE assign and to the four
audio Groups G1-G2-G3-G4. Rounding out the panel are
talkback switches to the AUX Sends and the four MUTE
MASTER switches.
Input Channel Assign Buttons
At the top of the MASTER panel are two sets of buttons
that only work whenever an input fader’s SET button is
pressed. These are the A-B-C-D Mute Assigns and the
G1-G2-G3-G4 Group Assign switches.
Mapping an Input Fader to a Mute Group
To map an input fader to a MUTE GROUP, first press
the input fader’s SET switch, then select the desired
A-B-C-D INPUT CHANNEL MUTE ASSIGN switches.
Routing an Input Fader to an Audio Group
To route an input fader to an audio GROUP, first press
the input fader’s SET switch, then select the desired
G1-G2-G3-G4 INPUT CHANNEL GROUP ASSIGN
switches.
AUX Talkback
Below and to the right of the Input Channel Group
Assign switches are two talkback buttons. Pressing the
AUX 1 TB button will interrupt the AUX 1 output with the
predefined TB signal. AUX 2 TB works in a similar
manner. Please refer to the Talkback section in the Monitor
Panel chapter of this manual for details on configuring
talkback.
SET Buttons
Like the SET button on input fader strips, the MASTER
and GROUP SET buttons are used to access other controls
and apply their settings to the selected output mix. The
masters may have their MODE settings changed and may
be assigned to MUTE MASTERS A, B, C, and/or D.


