background image


Using

Using 

ƒ

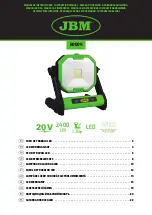
  Press the On/Off button (7) to switch on and off the big light panel 

of the work lamp with 21 LEDs. 

ƒ

  Press the On/Off button (6) to switch on and off the small light 

panel of the work lamp with 5 LEDs. 

Cleaning and Storing 

ƒ

  Clean the device only with a soft dry cloth. If the unit is very dirty, 

you may clean it with a slightly moist cloth. Do not use 
detergents or chemicals as this may damage the surfaces. 

ƒ

  Store the LED work lamp indoors in a dry place that is protected 

from dust, dirt and extreme temperatures. 

26 LED Lampe 


26 LED Flashlight

Eingangsspannung 

12 V


Rated Voltage

Akku 

Ni-MH 

3,6 V, 1800 mAh


Battery

Ladezeit 

Ca. 4 – 5 Std. 

Charging Time

Leuchtzeit  
(großes Leuchtfeld) 

Ca. 5 – 6 Std. 

Illumination Time 

(big Light Panel)

Leuchtmittel 

26 LED white 

Illuminant

Abmessungen 

L:220 mm, Ø:60 mm

Dimensions

Gewicht 

244 g 

Weight

Netzladegerät 


Charger

Eingang 

230 V~ 50 Hz 

Input

Ausgang 

12 V

, 300 mA 

Output

12 V Kfz-Adapter 


12 V Car Adaptor

Eingang 

12 V


Input

Ausgang 

12 V


Output

Technische Daten | Technical Data 

Summary of Contents for 800260

Page 1: ...Westfalia Bedienungsanleitung Nr 109219...

Page 2: ...26 LED Arbeitsleuchte Artikel Nr 80 02 60 26 LED Work Lamp Article No 80 02 60 Bedienungsanleitung Instruction Manual...

Page 3: ...and keep it for future reference Bedienungsanleitungen enthalten wichtige Hinweise f r den Umgang mit Ihrem neuen Ger t Sie erm glichen Ihnen alle Funktionen zu nutzen und sie helfen Ihnen Missverst...

Page 4: ...III bersicht Overview 9 1 8 7 10 11 6 5 4 3 2...

Page 5: ...Gummi Abdeckung Charging Socket behind Rubber Cap 5 Ladezustandsanzeige Charging Indicator 6 Ein Austaster f r kleines Leuchtfeld On Off Button for small Light Panel 7 Ein Austaster f r gro es Leuchtf...

Page 6: ...ED Arbeitsleuchte keinen hohen Temperaturen starken Vibrationen Feuchtigkeit oder Regen aus Vermeiden Sie eine starke mechanische Beanspruchung des Ger tes Tauchen Sie die LED Arbeitsleuchte nicht in...

Page 7: ...n Setzen stellen legen Sie die Leuchte nur auf normal oder schwer entflammbare Untergr nde Zerlegen Sie das Ger t nicht und unternehmen Sie keine Reparaturversuche Das Ger t enth lt keine durch Sie au...

Page 8: ...n Benutzung einmal komplett auf 1 Stecken Sie dazu das Netzladeger t 10 in eine Steckdose und verbinden Sie es dann mit der Ladebuchse 4 welche sich hinter einer Gummikappe an der Seite der Leuchte be...

Page 9: ...w rmen Benutzung Schalten Sie das gro e Leuchtfeld 1 mit den 21 LEDs ber den Ein Austaster 7 an der Seite der Leuchte ein und aus Schalten Sie das kleine Leuchtfeld 2 mit den 5 LEDs ber den Ein Austas...

Page 10: ...ation moisture or rain Do not expose the LED work lamp to strong mechanical stress Do not immerse the LED work lamp into liquids Only use the included accessory for charging Do not charge other device...

Page 11: ...urther Put the lamp only on normally flammable or flame resistant surfaces Do not disassemble the unit or attempt to repair it yourself It does not contain parts serviceable by you In the case of ques...

Page 12: ...p 2 The charging indicator 5 shines red When the battery is completely charged the charging indicator turns green Pull out the plug of the charger and remove it from the wall socket Using the 12 V Car...

Page 13: ...e surfaces Store the LED work lamp indoors in a dry place that is protected from dust dirt and extreme temperatures 26 LED Lampe 26 LED Flashlight Eingangsspannung 12 V Rated Voltage Akku Ni MH 3 6 V...

Page 14: ...A1 A2 EN 61547 2009 Hagen den 8 November 2010 Thomas Klingbeil Qualit tsbeauftragter We the Westfalia Werkzeugcompany Werkzeugstra e 1 D 58093 Hagen declare by our own responsibility that the product...

Page 15: ...ch Internet www westfalia net Kundenbetreuung Customer Services Werter Kunde bitte helfen Sie mit Abfall zu vermeiden Sollten Sie sich einmal von diesem Artikel trennen wollen so bedenken Sie bitte da...

Reviews: