27
Using the Scanner
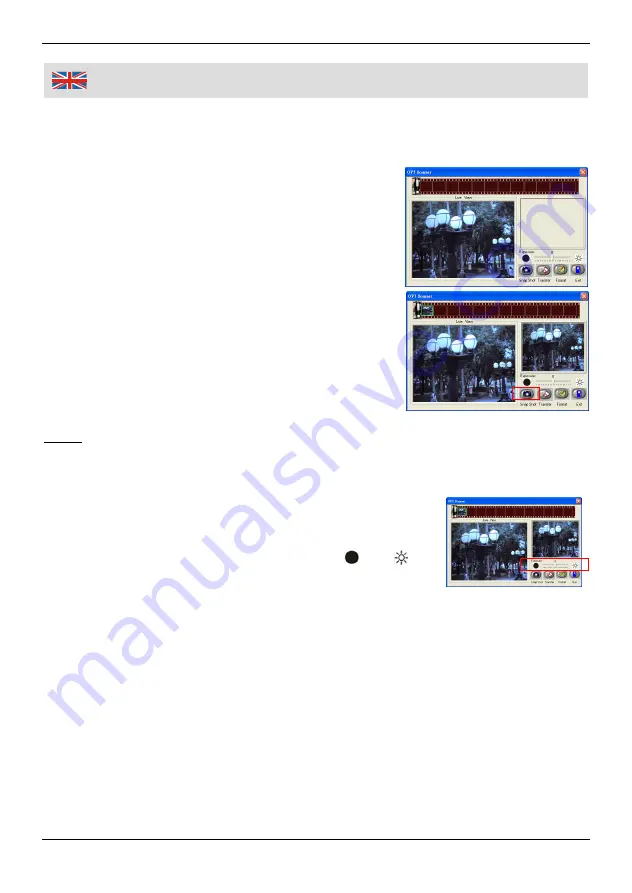
5. A preview image will be shown in the preview area. If the preview image is
not accurately framed, you can micro-adjust the location of the film by hand
moving the negative film/slide holder. Then previewed image will be adjusted
according to your movements.
6. Click “Snap Shot” on the screen or press the
COPY button (2) on the scanner. A green frame
will indicate the selected picture(s) in the
preview area; the maximum is 12 pictures in the
preview area. If there are more than 12 pictures
scanned, the 13th picture will overwrite the 1st
picture.
7. If you want to save one or more pictures, press
the shift key to continue selecting pictures or the
CTRL key to select a single picture.
8. Then press “Transfer” to save the selected
pictures to your computer.
Hints:
To ensure the best image quality, please allow about 5 seconds between
Snap Shot and Transfer for white balance enhancement.
Exposure compensation lets you change the exposure
setting manually to adjust for the lightness of your
picture. This feature helps to achieve better results
when scan the film. You can click the or to
adjust the compensation and check the result of the
compensation by viewing the image on the screen.
Do not minimize the window of converting screen after transferring the
pictures. If you want to see the scanned pictures, click Exit and you will see
the picture you scanned before.
Summary of Contents for 97 48 99
Page 3: ...III Übersicht Overview 4 5 6 1 2 3 7 ...
Page 40: ...36 Notizen Notes ...


