4
SAFETY WARNINGS – FOR THE INSTALLER
When installing the cooker hood, make sure
you adhere to the minimum and maximum
distances from the cooker hood base to the
hob surface (refer to page 8).
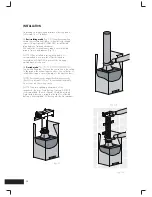
Exhaust flue installation: The following rules
must be strictly followed to obtain optimal air
extraction.
Keep exhaust flue short and straight.
Do not reduce the size or restrict exhaust flue.
Keep bends in the exhaust flue to a minimum.
When using flexible flue always install duct
with helix pulled taut to minimise pressure loss.
Failure to observe these basic instructions will
drastically reduce the performance and
increase the noise levels of the cooker hood.
Exhaust air must not be discharged into a wall
cavity, unless the cavity is designed for that
purpose. The exhaust from the cooker hood
must not be discharged into any heating flue,
which may carry combustion products from
other sources.
NOTE: Some installations may require the
telescopic exhaust cover to be cut to length.
Cut with sharp tin snips or a fine-tooth hack
saw blade, taking care not to distort or dent
the exhaust cover.
1
2
ELECTRICAL CONNECTION
Check that the mains voltage matches with the
voltage on the data plate inside the canopy
rangehood. Check that the installation complies
with standards of local building, gas and
electrical authorities. Before connecting to the
mains supply ensure that the mains voltage
corresponds to the voltage on the rating plate
inside the cooker hood.
If the supply cord is damaged, it must be
replaced by the manufacturer or its service
agent or similarly qualified person in order to
avoid a hazard.
Summary of Contents for WRCG932SB
Page 1: ...INSTALLATION AND USER MANUAL WRCG932SB WRCG933SB Canopy Rangehood WRCG943SB Canopy Rangehood ...
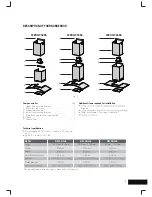
Page 7: ...RANGEHOOD DIMENSIONS WRCG943SB Fig 6 320 290 480 900 600 Min 750 Max1100 216 290 296 320 35 7 ...
Page 16: ......
Page 17: ......
Page 18: ......
Page 19: ......


